Spooky Candy Eyes with a How to Video
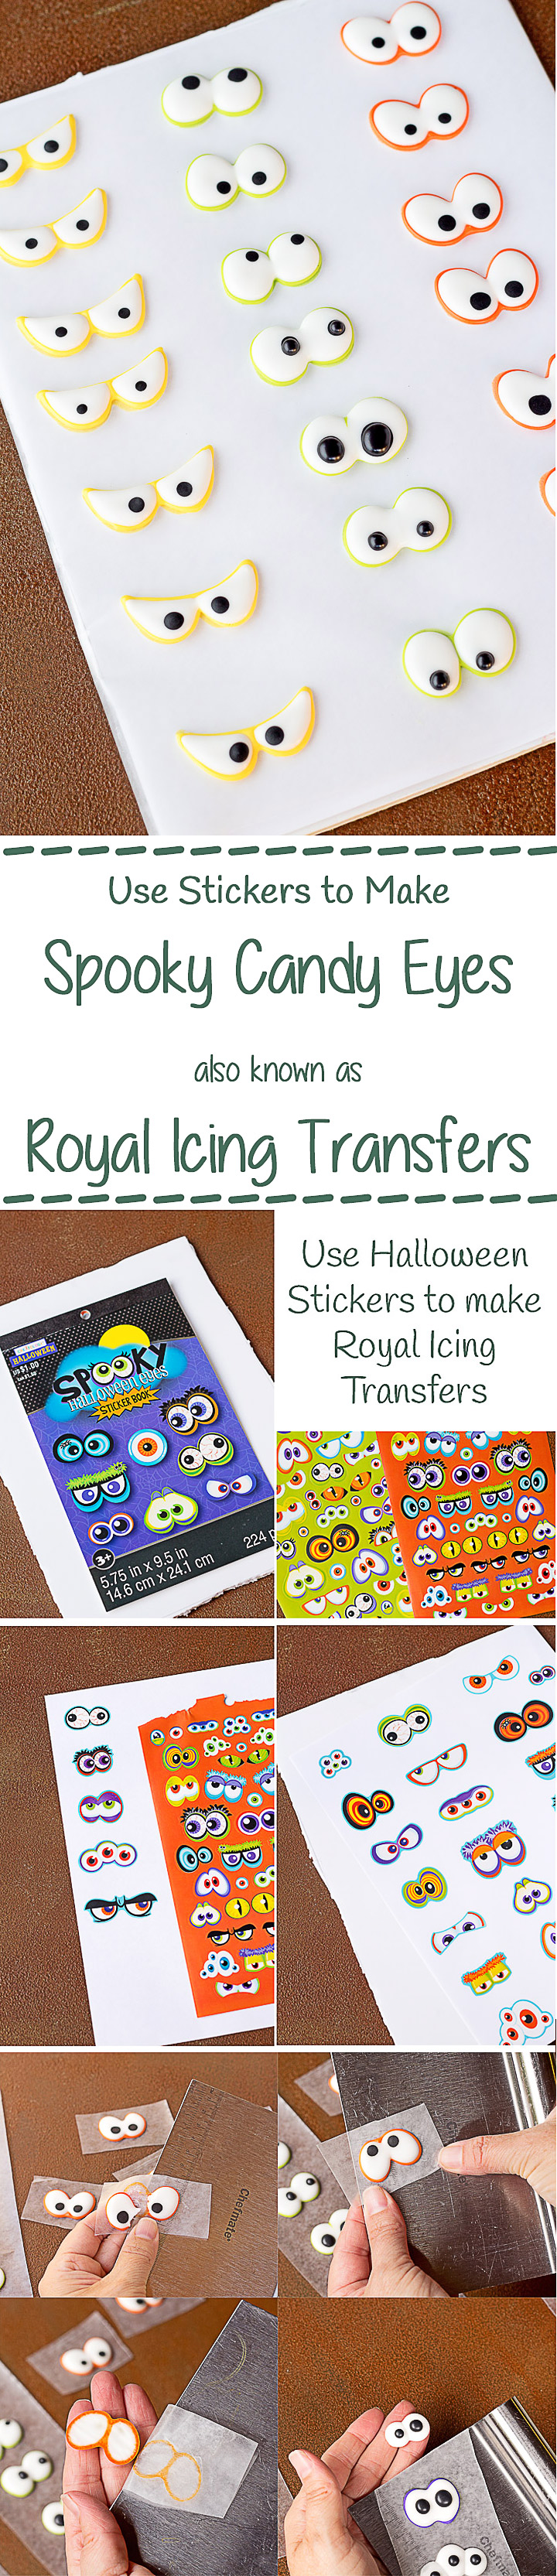
FINALLY! Royal Icing Transfers are here! I know, I know I’ve been promising to make them forever and didn’t deliver but, look at these Spooky Candy Eyes. Can you forgive me now?
I’ve struggled with ways to make new patterns and templates for you and in the process of searching for a computer program to use I found a way we all can make our own. Don’t worry, I also have made several templates for you so just know, I’m BACK BABY! I’ve got your candy decorations covered.
Are you ready to learn the easiest possible way to make your own royal icing transfer patterns? Keep “looking” and I’ll show you!

Are you ‘watching’ so you can make your own?
All you have to do is go shopping, find inexpensive stickers, and place them on a piece of paper. That’s it! So simple but there are so many different stickers books that the possibilities are endless! Halloween, Thanksgiving, and Christmas stickers are everywhere right now so the patterns and shapes are yours for the taking. Let’s start with spooky candy eyes today.
Spooky Candy Eyes Supply List:
Fun Halloween Spooky Eye Stickers
Disposable Piping Bags
#2 Decorating tips
Couplers
Royal Icing in fun colors you like but be sure to include black and white
A piece of paper-place your stickers on the paper
Wax paper
Foam board cut into 9×12 pieces-tape your paper with the eyes on the foam board to give it support.
Double-sided tape
Painters or Masking tape
Bench scraper
Spooky Candy Eyes Video:
Spooky Candy Eyes Video-Lights. Camera. ACTION!
These spooky eye stickers came from Michael’s but I’ve seen stickers like this in the grocery store, Dollar General, Target, Wal-Mart, and almost every store you enter will have inexpensive stickers you can use. This book had 224 eye stickers. I used some for the template and gave the others to my grandkids. We all played for hours so it was a win, win sticker kind of day.

- Buy your stickers and place them onto a piece of paper. I used computer paper so there weren’t any distractions under the wax paper. Be sure to leave a little room so the eyes don’t stick together.
- Buy a piece of foam board and cut it into paper shape sizes. Well, a little bigger than your 8.5″ x 11″ sheet of paper. We’re gonna use this as the base instead of using a baking sheet or another flat surface. Foam board is cheap and lightweight so it makes the perfect base for your templates. When you cut the foam board it probably won’t have smooth edges but that’s alright. It’s still the best base I’ve found and it doesn’t tie up your baking sheets while you’re waiting on the icing to dry.
- Once the stickers are on the paper, use double-sided tape to attach it to the foam board.
- Cover the board with wax paper pull it nice and tight and tape the edges to the back of the board. Make sure it’s nice and snug. If you want to see how I do it, watch the video at the end of this post.

- Next, decorate your eyes. Use a #2 decorating tip to outline the spooky candy eyes any color you want.
- Let the outline dry completely. I had to let mine dry for several hours so the colors wouldn’t bleed together and a few did anyway. That’s alright because when making royal icing transfers you always need to make extra. Sometimes they break when you remove them from the wax paper or when they’re stored so extra is always the way to go with these babies.
- Once the outline is dry, flood with the white icing or any color of icing you want to make them.
- You can add the iris and pupil while the white icing is wet or you can let the white icing dry before you add them. If you live in a place with high humidity be aware the icing might bleed so use your own judgment on how you should make them.
*TIP-You can always outline and flood the eye without adding the iris and pupil so it will reduce the risk of the colors bleeding together.
Outline the eye and let it dry completely. Flood the inside with the eye and let it dry completely. After they’re completely dry store them in an airtight container away from the sun. When your ready to use them on your cookies add the iris and pupil. This will help cut down the possibilities of the colors bleeding.
- Let the Spooky Candy Eyes dry completely in front of a fan. The fan will give them a nice shine on top. Who says spooky eyes can’t be sparkly!
- When I say let the eyes dry completely I mean let them dry as a dessert that hasn’t seen rain in 100 years kind of dry. If you store them while they’re wet they won’t stay fresh. It takes my royal icing a few days to really, really dry.

- Spooky monster eyes are a great addition to Halloween cookies. You can never have enough.

- Keep in mind you don’t need to follow the templates exactly. Making eyelashes, furry eyebrows and other small details might make them break as you try to remove them from the wax paper or when they’re stored. Keep it simple for the best results.
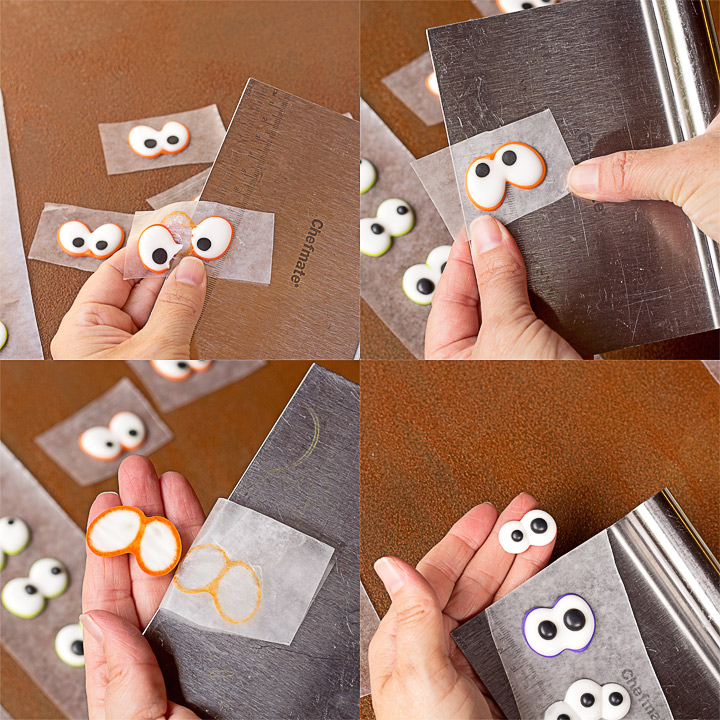
- Once the eyes are completely dry it’s time to remove them.
- See the eye in the first image? It broke because it was wet. Yep. If they’re wet they’ll break.
- An easy way to remove them is to cut the wax paper into smaller pieces and remove one eye at a time.
- Place the wax paper with the eye on a bench scraper.
- Fold the edge of the paper over the edge of the bench scraper and pull the paper from the bottom.
- As the wax paper moves the icing eye will start to pull away and you can support it with your hand until it’s completely free. You can watch the video to see it in action.
- To make sure the Spooky Eye Candy is completely dry before you store them, place them upside down in front of the fan for several hours or overnight.
- Store them in an airtight container away from the sun because the sun will cause the colors to fade.
What will you decorate with your candy eyes? Monsters, pumpkins, ghosts, cartoon characters, or animals? Whatever you use them on have fun with it and I’ll see you soon!
Bear hugs,


LOVE the idea of using the foam board Lisa! So smart and these eyes are adorable. I especially like the ones that have both a larger and smaller eye. Thanks for sharing!
That is so cool–amazing! Now I can’t wait to go shopping and see what kinds of stickers I can find!
Bench scraper – great idea to remove the eyes from the paper with a lower risk of breaking them.
Thinking beyond – you could use this technique to make any shape your little heart desires (not just eyes).
For those of us who live in CONSTANT humidity – what would be your recommendations to prevent bleeding?
Thanks. Tavette – S. Fla.
+1 to Tavette’s question about humidity. Looks like the black went straightaway into wet white? Or was that a trick of videotography? Gotta know how!!! Thanks.
Oh, never mind. I just read (again!) where you did mention the humidity issue. Don’t know how I missed that the first time. Drats. I was hoping I’d be able to do them like you did -I love the smooth look you were able to get. 🙁 Thanks anyway!
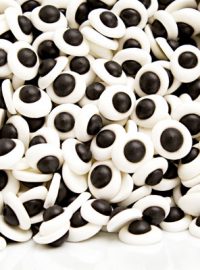
Love, love, love these. I picked up a bottle of candy eyes at ta high end baking store two days ago and now wishing that I hadn’t because these are waaaaay cuter. Love the instructional video and can’t wait to give it a try.
Love it! Thanks for sharing
This is an “eye opening” tutorial….”eye” really enjoyed “watching” the video and “seeing” the process in action
“right before my eyes”. You come up with such great “eye”deas. Thanks for sharing…you are a wonderful teacher. 🙂
Your loyal “pupil”,
Janis S.
I love the idea of using stickers! Here’s another idea instead of wax paper…plastic sheet protectors! I print out whatever shape I want to create, slip it inside a sheet protector, rub a tiny bit of butter on the sheet protector (this helps the finished design pop off without breaking), and voila! Let them dry just as you described. The paper can be used again and again, and the sheet protectors can be wiped clean for next time.
Thanks for your great ideas!
-Maggie from Maggie’s Magic Cookies
What a great tip Maggie! Thanks for sharing!!
My hero
That bench scraper !!!!!
Instead of wax paper I use the clear page protectors you can buy at office supply stores. I find wax paper tends to wrinkle when it gets wet with the icing but the page protector does not and stays perfectly flat. When the transfer is dry they slide right off. Love the idea of using stickers for a template. Thanks.
I am new to using icing templates. How do you attach the items you have made to the cookies? I saw your post with the music notes, and was looking for something just like that.
Hi! All you have to do is add the eyes or music note to the wet icing. If you’re doing something bigger like eyes, you can add a drop of royal icing to the dry icing on the cookie and then add the eyes.
It’s fun to decorate with royal icing transfers.
Why do you put lines on the cookies be for you flood
This is absolutely GENIUS!!!! Thank you for sharing. I love your blog!