How to Make Strawberry Cookies with Video
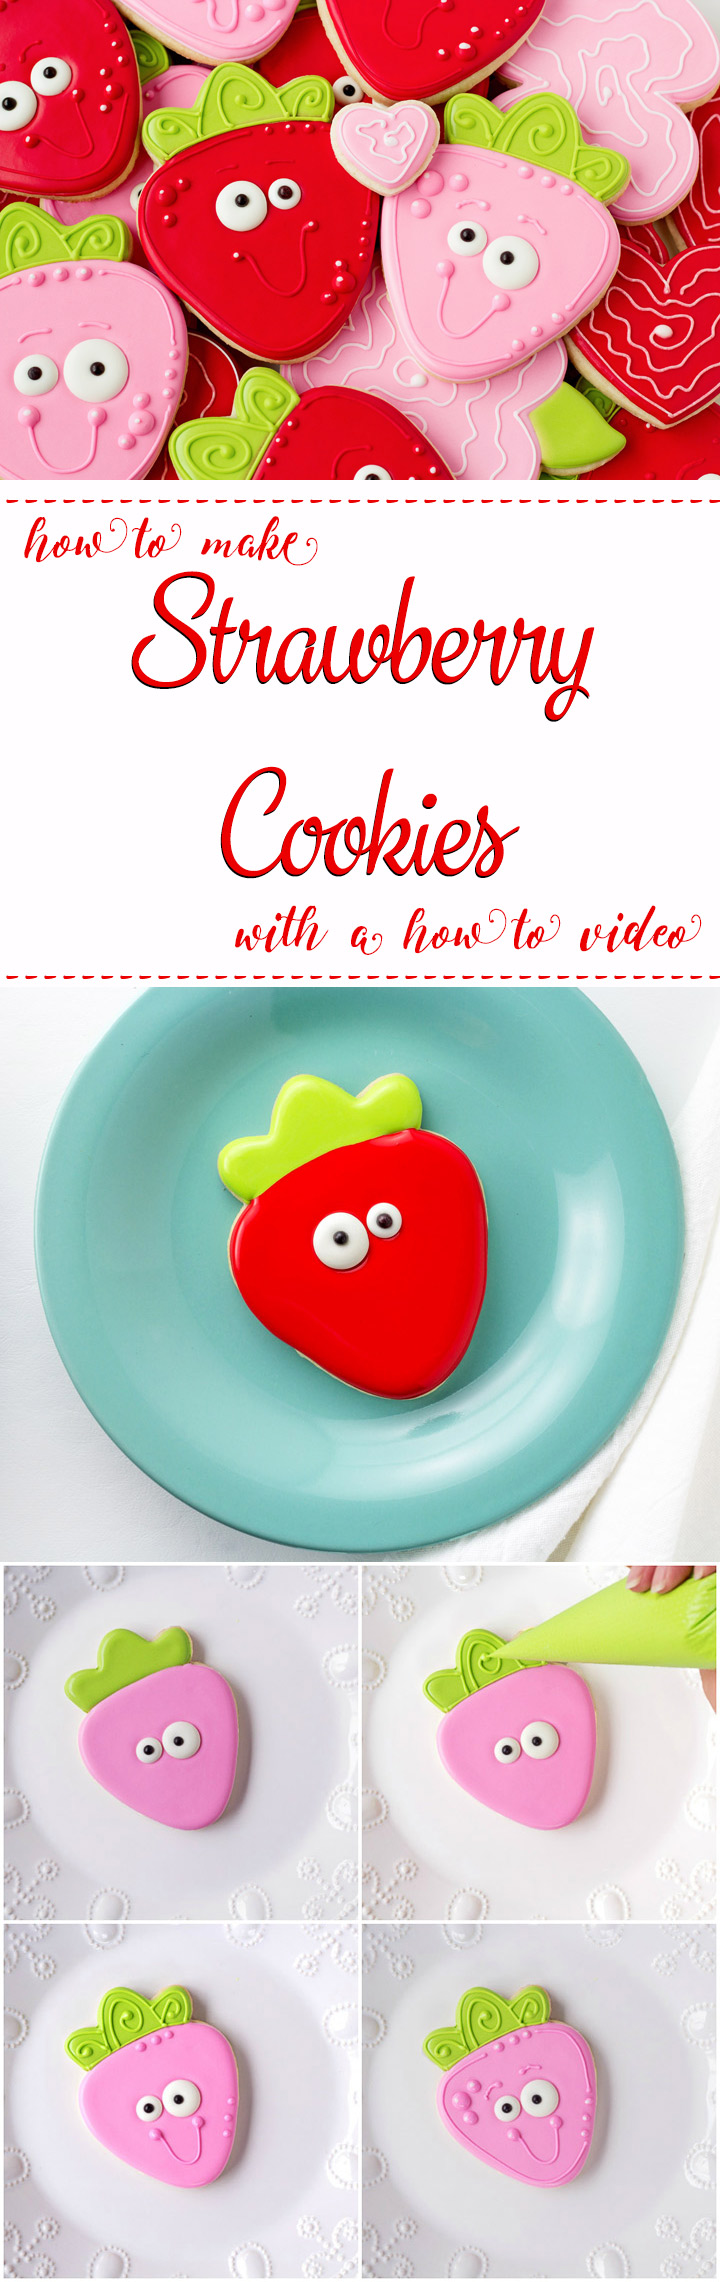
When Sweet Sugarbelle told me she was going to work with a company and make cookie cutter designs, I was over the moon! I knew the cutters would be like magic because you’d be able to make many different cookie designs with little effort. Take these simple strawberry cookies for example. How many different designs do you see with this basic strawberry shape? Callye provided a template that will show us how to make a strawberry and a rose and I see many, many more cookie designs. I see a cute little carrot and rock ship blasting off just to name two. What do you see?

As you can see I didn’t follow Callye’s template on these strawberry cookies. I wanted to add some candy eyes and give them a big smile because candy eyes will give your cookies a little personality.
Supplies for Strawberry Cookies:
(may contain affiliate links)
Recipes:
Cutter:
- Sweet Sugarbelle’s Strawberry Cookie Cutter or any Strawberry Cutter will work
Royal Icing Colors:
- Red- AmeriColor Tulip Red with a drop of Chocolate Brown
- AmeriColor Electric Green
- White
- Pink-Artisan Accents Gel Color Pinkalicious-I got this from The Cookie Countess and it’s the best pink I’ve used in like, forever!
Tools:
- Decorating Bags with a coupler with a #2 or #3 tip. Or you can use Tipless Decorating Bags or Decorating Bottles with #2 or #3 tips.
- Candy Eyes
- Turkey Lacer or toothpick
Strawberry Cookies Video:
Here’s a little video for ya. Enjoy!
Outline:

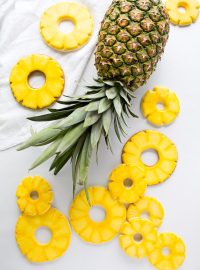
- Begin by outlining the strawberry body with the red royal icing.
- Next, outline and flood the strawberry leaves with the green royal icing and let them dry completely.
Flood:

- Flood the strawberry body with the red royal icing.
Add the eyes:

- Add the candy eyes while the icing is still wet and let it dry for about 10 minutes. This will allow the surface of the cookie to form a crust which will make the details stand out instead of falling flat into the icing.
Add some details:

- Once the icing has had a few minutes to dry, add an outline and a few swirly lines on the leaves with the green icing.
- Next, add three dots to the top of the strawberry body and three more on the side in the same color of icing you used to flood.
- Add a smile with cheeks using the same color.
- Pipe an outline around the edge of the strawberry cookies. Don’t touch the line to the dots because it looks better if you leave a little space between them.
- Add the eyebrows and three strawberry seeds. You can stop there or you can add a little white to the dots for highlights.
Aren’t they cute?

I want to point out a few things about these cute little guys before I go. It was really humid the day I decorated them and the red and green icing didn’t play well together. The red bled into the green and I tried to hide it by outlining the green leaves. Normally I would not have shared a picture. I would have remade the red strawberries and shared a better picture with you. Sometimes no matter what I do my icing will bleed. It’s bad but it’s not the end of the world. Adding an outline helped hide it and I’m okay with that. If this would have been something I was giving ways as a gift, I would have used a leaf tip as Callye did here so no one would ever know what lies beneath the surface.
Also, I’ve been struggling with the color pink lately. I’ve bought AmeriColor and Wilton and as soon as I open the bottle I get hit with an awful smell. And the icing tastes very bitter. Hillary at The Cookie Countess asked me if I wanted to try her Artisan Accents Gel Colors and I fell in love with the Pinkalicious! No bad smell and no bad taste. It’s now my “go-to pink” color. I’ve also tried the red color and it didn’t have a bad taste either and it makes a really pretty red. I’ll share more as I play with the colors so stay tuned.
Bear hugs,


I see a head with a crown and a very fat fish 🙂
The strawberries are adorable!
So adorable Lisa!!! Can I ask why you add a touch of brown to the red? Also, I am very curious if you think the PME tips are worth the extra money, I asked Marlyn at Montreal Confections and she loves the 1.5 and thinks they are definitely worth it. I was using a #1 Wilton to make spider webs on a cookie and my icing was curling like crazy and it drove me crazy! I tried thinning it a bit but it was still doing it. I have heard that the PME’s will not curl like that, I would love your feedback. Thanks so much! Dora
I see an iron, a fish, King or Queen or Princess or Prince, radish, baby octopus, jellyfish, and an ice cream treat on a stick with drips to each side. Crazy, I know. 🙂
Hi Lisa, These strawberry cookies look so happy! I love the colors and enjoyed the video. I see a rocket ship cookie in your future. Have a great day!