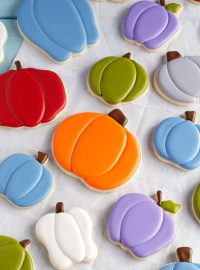
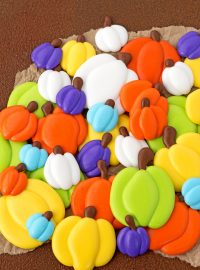
Decorated Pumpkin Cookies
I am a huge fan of decorated pumpkin cookies. There is something about the orange pumpkins and the brown stems that put an instant smile on my face. I also get excited to see how many different ways people can decorate them. Seriously, one cute pumpkin cutter can be transformed into a million different decorated pumpkin cookies.

Well today, I want to talk to you about a few of my favorite ways to make a simple cute pumpkin cookie a little fancier without much effort at all.
Let’s Decorate Some Pumpkin Cookies!
Supplies for Decorated Pumpkin Cookies:
(may contain affiliate links)
Pumpkin Cutter from Whisked Away Cutters
Stencil from The Cookie Countess- Hillary discontinued her stencil but you can find it here or here and here and here.
Stencil Genie by Creative Cookier
Disco Dust- *Update* Now I use DIY Sparkling Dust
Orange Icing
Green Icing
Brown Icing
Leaf tip #70
Airbrush Machine with Brown and Orange Airbrush Color
I would like to talk to you about where I got some of the supplies for this project as we go along. Let’s begin with the cute pumpkin cookie cutter from Tracy over at Whisked Away cutters. I love the shape of this little guy! Isn’t it cute? Tracy has a lot of unique cookie cutters that will make your heart happy and your cookies adorable. You should check out her shop to see a little cookie-cutter eye candy.
Decorated Pumpkin Cookies:

Begin by piping the stem with the brown icing and airbrush the bottom and left side with brown airbrush color. Let it dry.
Outline and flood the pumpkin body with the orange icing. Let the cookie dry completely.
Let’s Airbrush!

Stencils are a great way to add detail and style to your cookies. They are easy to use and easy to clean. I get my stencils from Hillary over at The Cookie Countess. You should stop by and look at all of the amazing stencils she has in her shop. There are so many different designs that will blow your mind! As a matter of fact, I have a table full of cookies that are begging to be stenciled right now. I am so excited to share some of them with you soon.
Stencil Genie by Creative Cookier
Now, look at that frame that holds the stencil. That frame is pure genius! It was made by Ginny over at Creative Cookier. Let me tell you why I love this frame so much. First of all, it has a few little magnets that hold the top and bottom frames together. That is brilliant because it comes apart easily so you can add your stencil. Just take the top off, lay your stencil on the bottom pieces, place the top of the stencil and airbrush away. Your stencil won’t move unless you move it. BRILLIANT!
Second, the top frame piece and the bottom frame piece are two different sizes for different sizes of cookies. If you like thin cookies, no problem! If you like thick cookies, no problem! Just flip it to the size the fits your cookie best.
Stenciling just got easier and more fun will the creativity of Hillary and Ginny!

Back to the cute little pumpkins. Place your stencil on the dry iced cookie and airbrush it with the orange airbrush color.
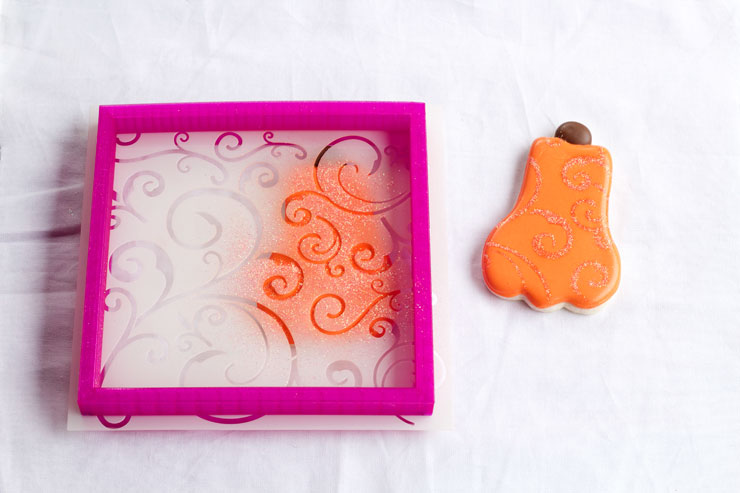
While the airbrush color is wet, sprinkle a little disco dust on pattern and carefully remove the stencil by lifting straight up.

Let the airbrush color dry for a few minutes and then, use a dry brush to gently remove the excess disco dust from the cookie.
Let’s Add Some Leaves:

Next, make a few swirls with the green icing on each pumpkin.

Add a leaf using tip #70. You can add the to the side or in the middle. I was feeling the middle but think adding one to the side would look a bit better. Let the cookie dry completely.
Decorated Pumpkin Cookies:

I love my new toys! A cute cutter, pretty stencils, and a Stencil Genie helped me make some pretty cookies with little effort and time. I can’t wait to play some more!
Bear hugs,


These are lovely!
Awesome!! I have a stencil genie on it’s way. JillFCS asked me if I had one..that’s all I needed to order it!! She loves hers!! –Katy
Love the cookie, they are beautiful. What consistency is the icing for the leaf? Mine always spread and you can’t see the center stem.
Along with my airbrush, stenciling is my new love! And talk about love… I LOVE your pretty pumpkins!
Somehow, your pumpkin cookies always look WAY better than mine! I enjoy seeing yours though! You inspire me!
These cookies are so elegant. They’d be beautiful on my dessert table for my pumpkin carving party! Oh, if I only had time to get them done.
Hi Lisa – these are BEAUTIFUL. I am having trouble finding the stencil on her website, do you know what it is called? Thanks!!
Hi Ashley,
I found out that Hillary discontinued the stencil but I added a few links in the Supply List where you can find it. Sorry for the trouble! 🙂
What a nice surprise to be catching up on cookie news and see this…I love the finished cookies! I am so glad you enjoyed using the Stencil Genie! Thank you for including the genie link in your notes!!
Love your pumpkins! Absolutely beautiful! Went to the website and the stencil genie is $25! Seriously? Give me a break.
I am glad you like the pumpkins! Nothing says Autumn like pumpkins!
The stencil genie is almost $25 Amy and I think it’s worth it. I know that it may sound like a lot, but I am willing to pay for good tools that help improve my decorating.
Alrighty, you sold me then. I come to your site quite a bit so I trust you 😉
LOL Don’t take my word alone! Oh the pressure! Google it and she what others think as well. Knowledge is power Amy! LOL
You are so cute!!! 😉
I want to be you when I grow up! Everything you do is amazing, and me, I’m about to embark on my first decorated cookie journey. I have a feeling it will be a Pinterest failure, but here I go!
It won’t be a Pinterest failure Robin! Let me know where you pin it and I will add it to my Pinterest Board!