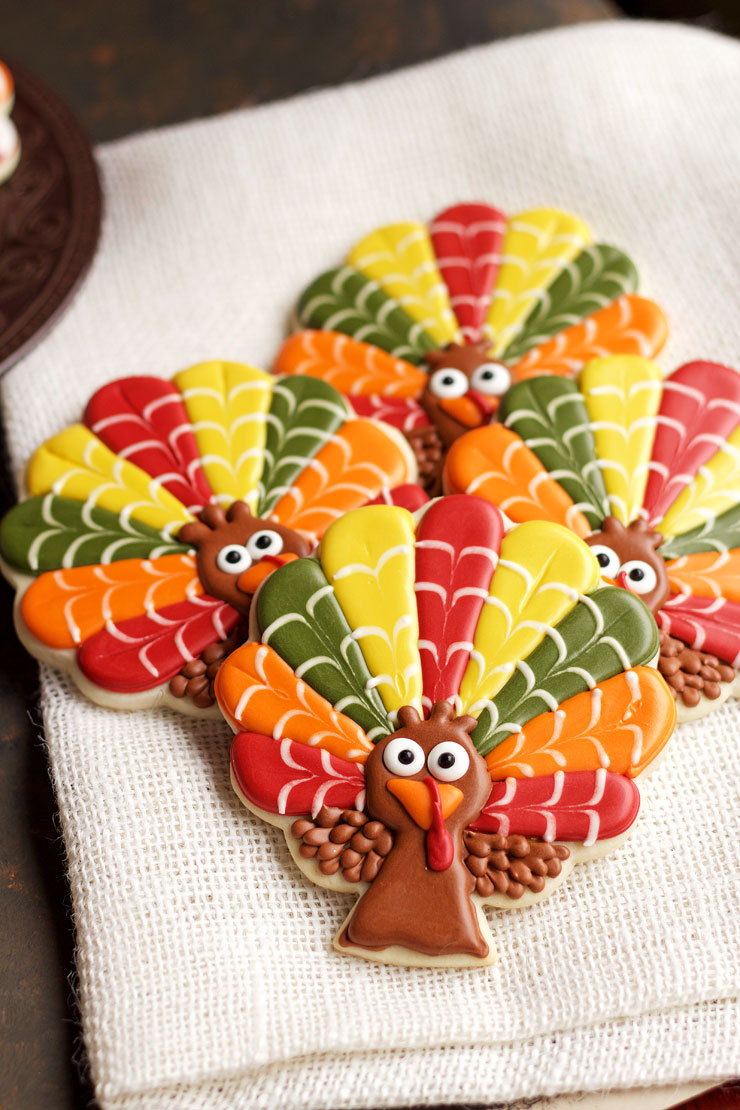
Decorated Turkey Cookies

Ten days. Ten turkeys. Ten different cookie cutters. This was my challenge for myself this Thanksgiving. I wanted to take ten different cookie cutters and come up with ten different decorated turkey cookies. Today I am going to share turkey #5. I want you to know that I laughed the entire time I made these cookies.
I even sent pictures to a friend and we laughed together. You will see why in a minute.
Supplies for Decorated Turkey Cookies:
Brown Icing
Yellow Icing
Green Icing
Red Icing
Orange Icing
White Icing
Candy Eyes
Tooth pick or a boo boo stick
Food Safe Marker
Tree Cookie Cutter
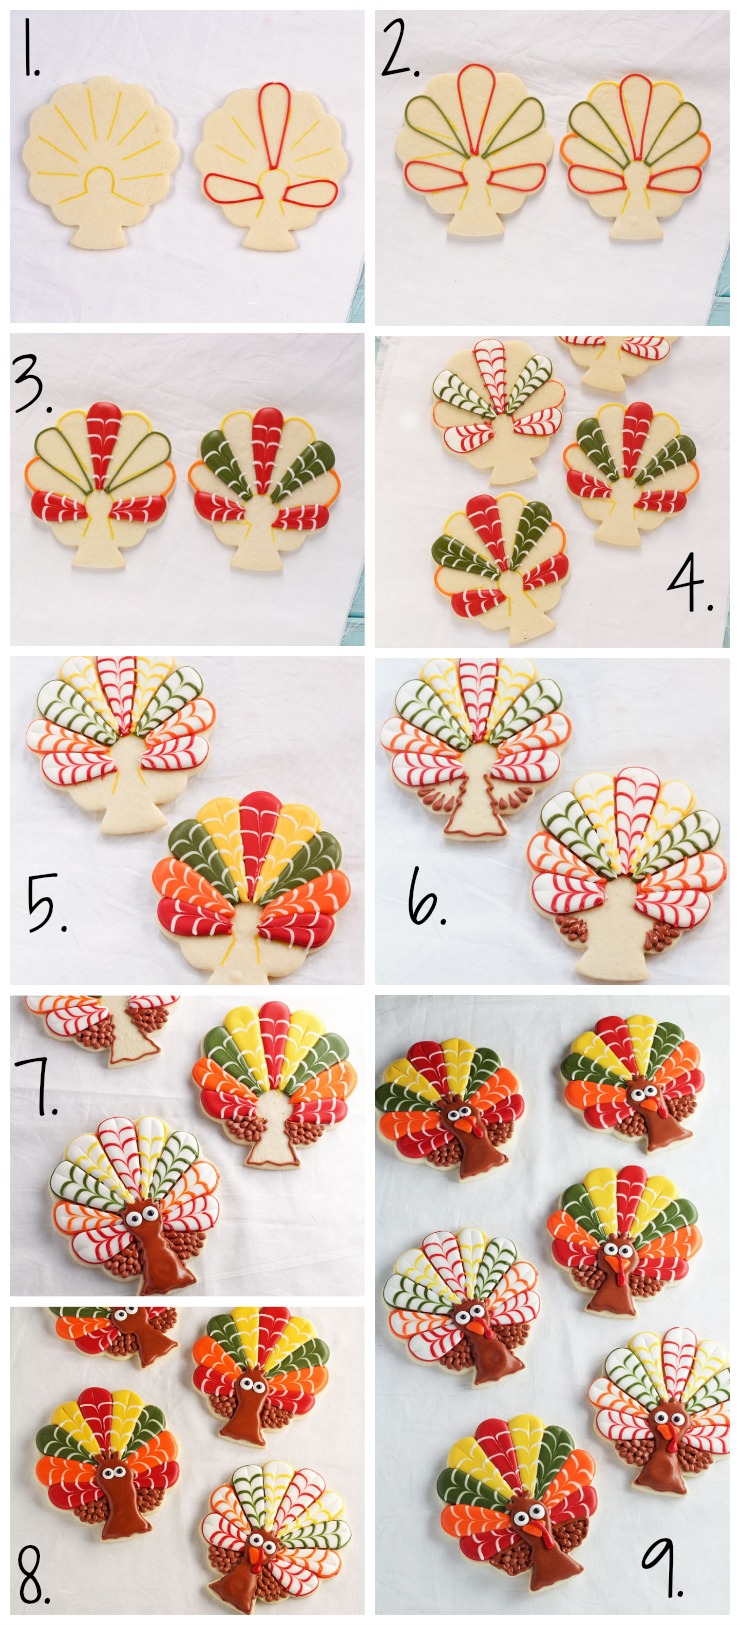
- Draw the pattern on the cookie with a food safe marker and outline the tree feathers red as shown in the picture.
- Outline the green feathers and let them dry for about 10 minutes. Then, outline the yellow and orange feathers.
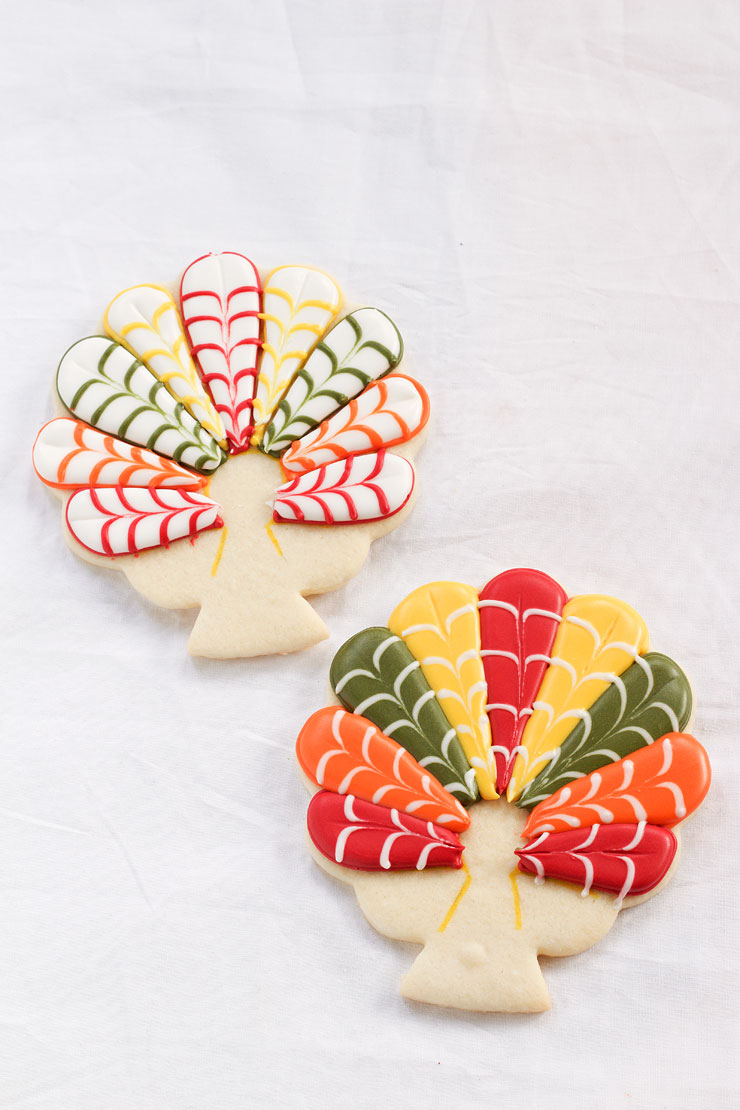
- Flood the red feathers one at a time. While the icing is wet, make some white lines across the feather. Use a toothpick and start at the top of the feather. Drag it through the red icing to pull the white icing down towards the bottom of the feather. Repeat for the remaining red and green feathers. Let them dry completely.
- If up want the turkeys to have white feathers instead of colored feather, just reverse the colors. I like mixing it up and using both.
- Repeat with the yellow and orange icing.
- To make the wings of the turkeys, pipe a brown dot at the edge of the wing. Build the dot up some and then pull it toward the body of the turkey as you release pressure on the piping bag. Make a row and let it dry for about 10 minutes before you add the next row.
- Continue until the wings are full.
- Pipe the head and the body of the turkey brown. You will have to pipe some brown icing on the base of the feathers to make it nice and round. Just build the icing up and drag a toothpick through it to pop any air bubbles. You may need to add more icing after you drag it with the toothpick. Add the candy eyes while the icing on the face it wet. Let it dry.
- Pipe the beak with the orange icing and let it dry. Add the snood.
 Want to know why I was laughing the entire time I made these turkey cookies? Look at the one with the colorful feather. Do you see his tummy? LOL It is an air bubble in the dough but it look like a belly button. It just happened to be in the perfect spot to give me a good laugh. Sometimes air bubbles are good as long as they are on the cookie and under the icing.
 So there is turkey number 5 in my turkey Thanksgiving Cookie Challenge. I am really having fun making with these decorated turkey cookies and can’t wait to make the next 5 turkeys.
More Turkey Cookies:
Turkey #1
Turkey #2
Turkey #3
Turkey #4
Turkey #6
Turkey #7
Turkey #8
Turkey #9
Bear hugs,


I think these are my faves so far…I love that you’ve challenged yourself this way…we all reap the benefits of your challenge!! LOL! Hugs!
Lisa,
These are so pretty! Love these! Thanks for all your great ideas!!!
So adorable and colorful. How can you not love them!
I like these cookies best out of all the ‘turkeys’ you have done so far. Really, really, pretty.
Love these!
These are my favorites so far, too…..they are really pretty, Lisa!
Blessings, Donna B.
I love the turkeys – but I especially like the side feather technique!
I am loving your challenge so creative and they look awesome!
I adore this one! I learned something new to me with this. I would have flooded the body first, thinking that would make the feathers easier. But then it would have been flat. I think that your turkey body is more 3-d and above the feathers because you flooded it last. I’m going to try that! Thanks!
Love them … air bubbles and all!
P.S. I could see a peacock using this cutter 😉
Look at all those beautiful feathers, and a belly button to boot, haha!
lisa I love these cookies!! Do you mind giving your icing recipe used for these lovelies? I’ve tried everything and nothing seems to work! Please help!!
Hi Roxanne! Here are some recipes and tips for royal icing. Let me know if you need anything else. 🙂
http://thebearfootbaker.com/2013/03/half-a-batch-of-royal-icing-recipe/
http://thebearfootbaker.com/2011/12/antonis-royal-icing/
http://thebearfootbaker.com/2014/05/royal-icing-quick-tip/
http://thebearfootbaker.com/2013/04/how-to-make-royal-icing-video/
http://thebearfootbaker.com/2013/12/beginners-guide-to-cookie-decorating/