How to Make Laminated Cash Envelopes
Today we’re going to make and laminate a few cash envelopes. There are three free envelopes below so you can make them and save whatever you want to save. If you like cash envelopes as much as I do you can find them with my Cookie Planner with Cookie Order Forms and Doodle Pages here.
I never thought I’d like cash envelopes as much as I do, but once I made them they’ve become part of my everyday routine. They help keep me organized and plan for things I use daily or help me save for things I need in the future. I love knowing that my grocery money and gas money is snug, secure, and waiting for me in the laminated envelopes.

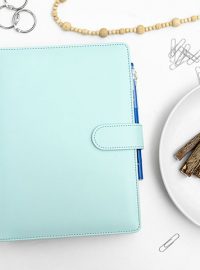
If you use a hole punch you can keep them in your planner so you’ll always know exactly where to find them. I don’t know about you, but I’m more careful when I shop with cash. It makes me pay attention and it limits my impulse buying and Alan thinks that is a good thing.
Supply List:
(contains affiliate links)
- Adjustable Metal 6-Hole Punch with Positioning Mark, Daily Paper Puncher for A5 Size Six Ring Binder
- Amazon Basics 9-Inch Thermal Laminator Machine
- Scotch Thermal Laminating Pouches
- Bone folder
- Exacto Knife
- Scissors
- Ruler
- Glue and Super Glue
- Velcro Stickers
How to Laminate Cash Envelopes Video:
Would you like to make a few envelopes with me? You’ll find three FREE PDF envelopes below that are great for money or receipts.
Heart Envelope
Bunny with Carrot Envelope
Chocolate Chip Cookie Envelope
Let’s make the cards:
- Before you get started you’ll need to decide what kind of paper you want to use to print your envelopes. Card stock is my envelope of choice. If I’m going to keep money or receipts inside I want to make sure it’s sturdy enough to keep everything exactly where I put it without breaking.
Cut out the Envelopes:

- A good pair of scissors is a must so grab them and cut out the envelopes
Oh, How I Love My Bone Folder:

- A bone folder is a great way to make the folds super flat so I use my Pampered Chef Baking Stone to help make this happen. It’s great for projects like this because it’s firm like a stone and the best part is you won’t damage your table or work surface.
- Use a ruler and bone folder to score the places you want to fold on the envelopes.

- Once they’ve been scored fold them over and use the bone folder to press sharp edges.
- Make them as sharp and flat as possible so the laminating sheets can stick around the edges. If the sides are bulky the laminating sheet will have a hard time sticking close.
Time for the Glue:

- Add some glue to the left and right sides of the tabs. Just don’t put the glue at the top of the tabs because it will glue the seal down and you won’t be able to open your envelope.
- You can use your thumb to block the top to keep it glue-free.
Now Let’s Talk About The Amazon Laminator:
- It’s the Amazon Basics 9-Inch Thermal Laminator Machine and it’s really neat. I’ve had it for about a year and I really like it. I don’t use it all the time, but when I do I always like the results.

- There are so many different kinds of laminating sheets to choose from and my choice is the Scotch Thermal Laminating Pouches. They’re on the thick side so you may want to purchase a thinner sheet. I am kind of rough so these work well for me.
Time to laminate:

- Place the envelope in the laminating sheet. Trim the sheet so you can keep the excess to use on later projects and then run it through the laminator.

- Run the envelope through the laminator. If you use cardstock you might want to run it through two times.
- Next, trim the edges and make your envelope look nice and neat.
Fix the Seal On Your Envelope:

- Time for the fun part. Be careful and use the ruler and Exacto knife to gently score the laminated area where you fold the seal. Don’t cut all the way through the fold on the envelope. Gently score the laminated sheet so the seal will fold and your envelope will close. If you watch the video you’ll see how simple it is. Just remember to be gentle.
Add a Little Heat to the Fold:

- Once you score the fold with the Exacto knife, run it through the laminator again so the heat will help the envelope close. You might want to do this more than once so the seal will bend and the envelope will close and keep your goodies inside.

- Use the bone folder to flatten the seal. You can do this each time you run it through the laminator.
Velcro Time:

- The velcro dots are sticky on the back but since you laminated the envelope you may want to attach them with a little super glue. Gorilla glue works well and it will glue your fingers shut so be careful. No, I don’t know this from experience.

- Your envelopes are now complete! I hope you enjoy keeping your money and receipts safe. If you want the envelopes shared in this post you can find them along with my Cookie Planner with Cookie Order Forms here.
Bear hugs,