Cookie Bouquet-DIY Tips
This post may contain affiliate links.
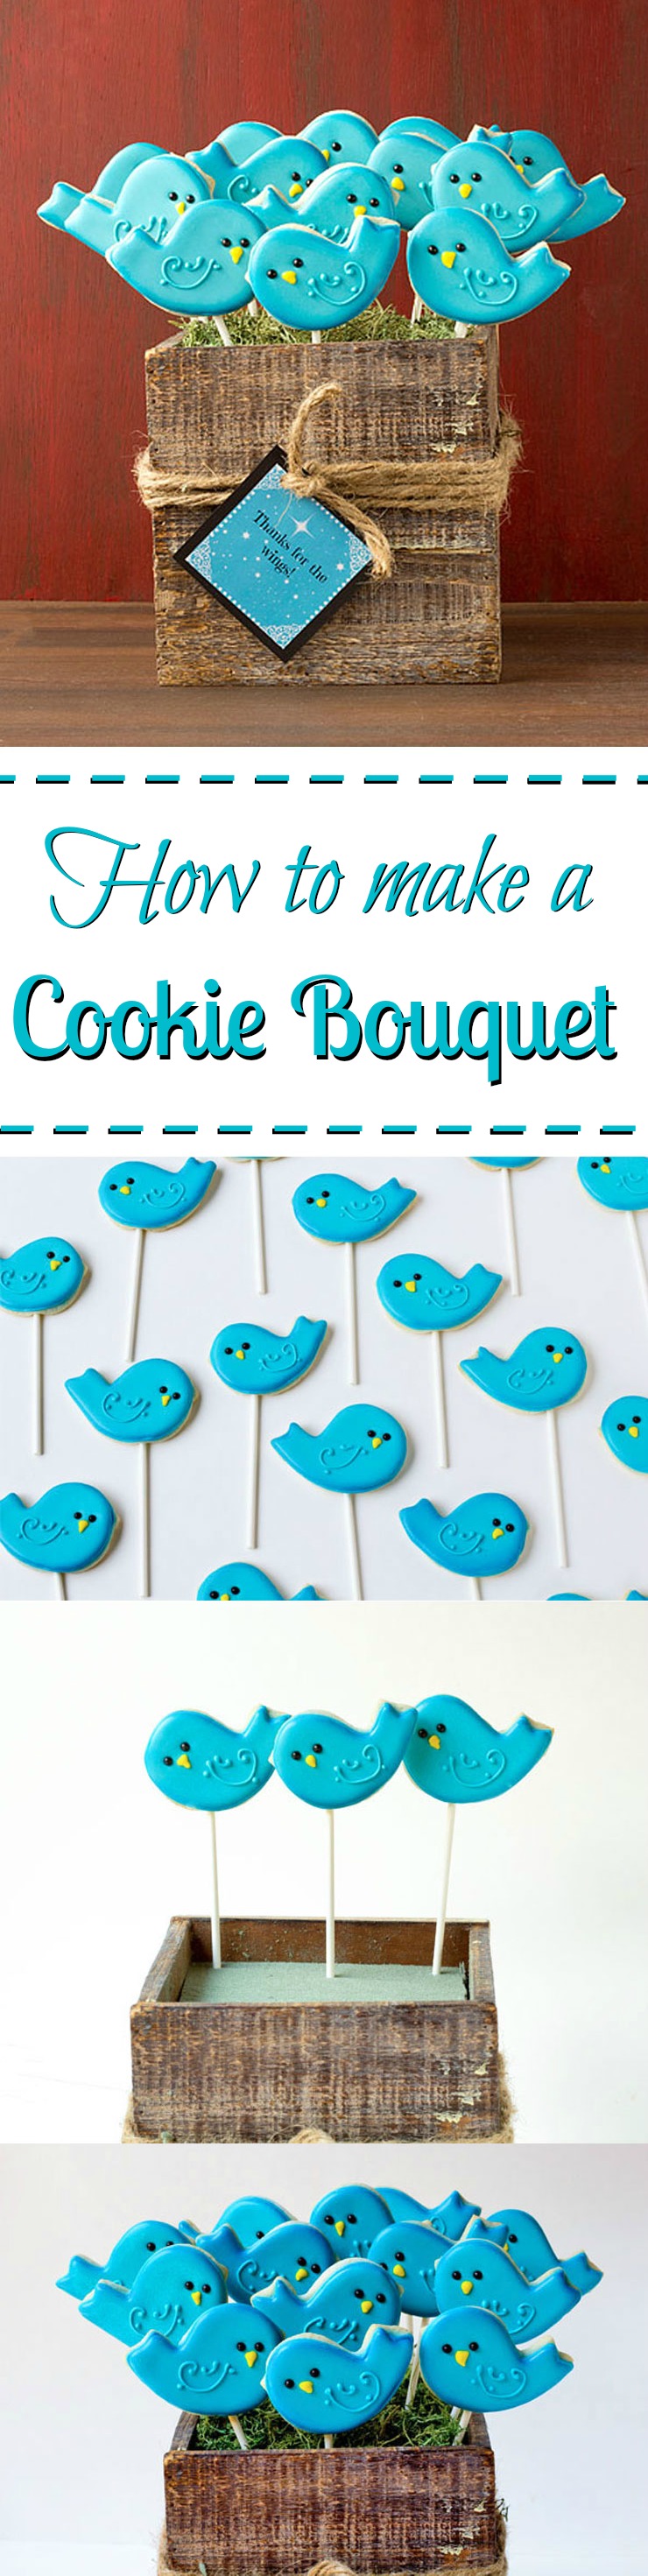
Have you ever received a cookie bouquet? It is a lot better to get a cookie bouquet than getting a bouquet of flowers. Flowers die but, you can share a cookie bouquet with everyone. I have made more than my fair share and have learned to follow a few steps for success. This Mother’s Day bouquet was simple to assemble with a little planning.
 The first thing I asked myself is what is the bouquet theme. This one was for Mother’s Day so I grabbed a pin and some paper and started jotting down ideas. I didn’t want to do flowers or anything that I have made in the past so I decided to thank mom for the wings she gave me so I could fly. That was it! I had a theme.
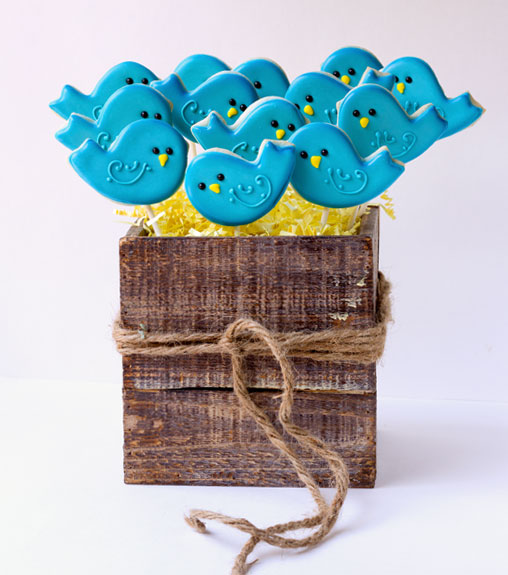
Now for the design. I have always loved these cookies by Sweet Sugar Belle and have been waiting for an occasion to make them. I followed her tutorial exactly and then decided to add a little blue airbrush to the edges.
Now for the bouquet.
Cookie Bouquet Tips:
 Something I have learned and should have done here is use small cookie sticks and larger cookie sticks for cookie bouquets. I usually bake half on the large sticks for the back of the bouquet and half on the smaller ones for the front of the bouquet. It makes things a little easier when you start assembling. If you have never baked cookies on a stick, click here.
 Next, find a container that complements your cookie bouquet. Just imagine these bird cookies in a coffee cup. It would look alright but, when you add them to a box that looks kinda like it could be a birdhouse, it is much better. If I were making coffee cookies, I might put them in a coffee cup. If I was making flower cookies, I might use a Mason jar and paint it so you can’t see the foam. Be creative with your container. Match the theme or the color scheme so it will compliment your cookies.
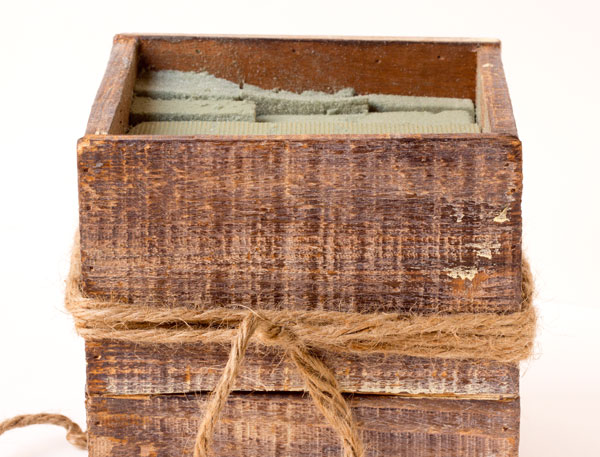 Next add the foam to your container. I don’t always use the same foam. I sometimes use what I have on hand. I get it at the Dollar Tree or anywhere I can get it cheap or on sale. I keep about 10 packs on hand.
Look at the way the foam is inserted into the box. Don’t do it like that. Those little pieces in the back will not support your cookies and they will fall. If it falls all the work you did making your cookies and cookie bouquet will shatter and so will your heart. (LOL)
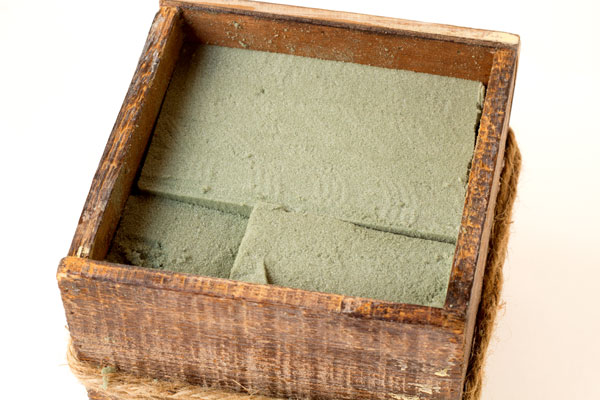 Cut the foam in a way that it is extremely tight. If your foam moves, so will your cookies.
 Then, add the cookies starting in the back row. This is where I would use the large cookie sticks so the back of the cookie bouquet would have good height. Space the cookies out but not to far apart. In my box, I used staggered rows of three but, yours would depend on the size of your container. It is important not to over fill or leave big gaps of empty space and not to place all the cookies in a straight line.
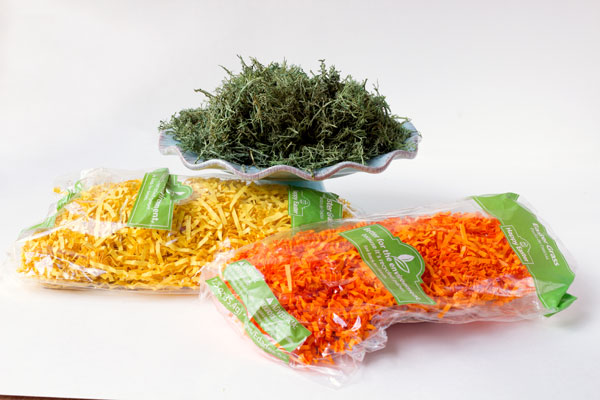 Now for the fun part. Picking the filling. I don’t use tissue paper but, that doesn’t mean you can’t. I don’t like trying to make all the pieces the same shape and look even. I have a little problem with things being even but, we will take about that some other time. I grabbed a few bags of things I had in my craft room. Let’s see how they will look with our Mother’s Day Cookie Bouquet.
 So not a fan of the yellow and the orange was so bad I didn’t take a picture of it. Let’s move on!
 There we go! I found some mossy stuff at Hobby Lobby or Michael’s one day. The only tips I have about this is, pick something that is food safe if you don’t intend on wrapping your cookies individually. You don’t want to make your friends, family or customers sick so remember food safety first.
To add the moss, carefully add a little at a time until all the foam is covered.
 All that is left to do is a cute little tag. I made this one in PicMonkey in about 3 minutes. It is free and fun! If you want to know how to make your own tags in PicMonkey, click here.
Here are the tips to remember when making a cookie bouquet:
- Theme
- Design
- Bake half on large cookie sticks and half on the small ones.
- Find a container that fits your theme.
- Make the foam tight.
- Work in rows and don’t over crowd the cookies or don’t leave big gaps of blank space.
- Filling needs to match your theme and compliment your color scheme.
- Add a cute tag and deliver some love!!
Bear Hugs,

Great post! And looks gorgeous!
Thanks Nicci!
I have one other tip, don’t let the cookies lean forward. They will fall off if you do. Ask me how I know, haha. I had a friend who was previously a florist put my first cookie basket together. It did fine. I put my second cookie basket together and the cookies were falling off. Thankfully, my niece (the recipient) was very understanding.
That is great advice Novell! Thanks for sharing.
Really cute and a fabulous idea!
Thanks Nessa!
it’s absolutely perfect. I have never made a bouquet but if I ever need to I will definitely be referring to this post. Thanks Lisa!!
You have to make one Carrie! As cute as your cookies are you have to do it for us!!!
This is the most adorable bouquet I have ever seen!!! Thank you so much for sharing and always making us smile with your amazing creations!
Thanks Cindy! You are very sweet!! ((((Bear Hugs!!)))))
Absolutely adorable! You must have the patience of Job to do all you do. 🙂 This is such a “happy” bouquet ~ I hope it is loved!
Pat
Thanks Pat! You make me smile!!
So crazy adorable, Lisa!!
Thanks Jennifer! You are crazy adorable!! 😉
What a precious bouquet – I once got to watch little birds take their first flight, they build their nest in my front porch wreath!
What a helpful post! I made my very first cookie bouquet a couple weeks ago, and these tips will definately come in handy for next time! Thank you!
so adorable and original. They made me smile.
Thanks for teaching me to make a cookie bouquet!
Great tips and one of the sweetest cookie bouquets I’ve ever seen.
Love, Love, Love this basket. How adorable. Can’t wait to try this out. I would love to see some tutorials on how you created the cute card on PicMonkey as well. I have been using that sight, but only to tweak photos, not create such cute things.
Hey Hannah! I did a tutorial on PicMonkey on how to make cookie bag toppers. You can find it here: http://thebearfootbaker.com/2012/10/cookie-bag-toppers-2/
I kinda did the same thing to make this tag.
I thought I had read every single one of your posts, but obviously I missed this one. Now I wonder what else I might have missed, so I guess I am going back! Thank you so much! As a new cookier, these tutorials are absolutely priceless.
Any idea where I could find food safe supplies? Im making my first bouquet and I’m not quite sure I want to individually wrap the cookies.. I’m having no luck googling…
Email me at lisa@thebearfootbaker.com and tell me what you are looking for and I will do my best to help you. 🙂
Did you wrap the basket at all once it was all done? I am in the process of finishing one at home (my first) and I have each cookie heat sealed on the stick. Wasn’t sure if I could just wrap the basket as a whole and it will still stay fresh?