How to Decorate Happy Little Bee Cookies
This post may contain affiliate links.
The words of the day are”BEE HAPPY!” Okay, that’s cheesy I know, but how can you see happy little bee cookies with bee’s on them and not think anything but happy thoughts. Especially if you use a couple of fun stencils, the Sugarbelle Stencil Snap, and an edible marker to make it look the bees are flying around having fun! Let’s all “BEE HAPPY” and make some bee cookies.

I list a lot of things under the supply list, but you don’t have to run out to the store or jump on the computer to buy them all. There are a few things you will need to make these like a honeycomb stencil and the bee stencil. If you’re a cookie decorator I’m sure you have several things already on hand. If you don’t have specific things like name brand of gel colors or airbrush colors, use what you have. I really like the brands I have listed below and wanted to share them with you. Now let’s bake some bee cookies!
Happy Little Bee Cookies:
Supplies for Happy Little Bee Cookies :
(may contain affiliate links)
Recipes:
Sugar Cookie Recipe
Royal Icing Recipe
Cookie Cutters:
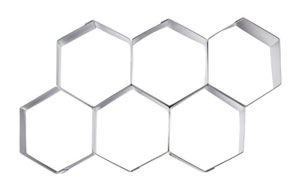
Ateco 5151 6 Linked Stainless Steel Hexagon Cutters
Jamestown Hexagon Cookie Cutter– This is the larger cookie cutter that was used to make the cookies you see in the bottom row of the honeycomb cookie image. I really like the size of this cutter and you’ll see it again on the blog.
Royal Icing Colors:
(These gel colors are The Countess Gel Colors)
Sunshine Yellow Gel– The yellow is made with The Cookie Countess Gel Color Sunshine Yellow with a very small amount of Totally Brown. Add a tiny amount of the Totally Brown with a toothpick or something so you get a tiny amount and not a drop. Keep adding a small amount of the brown with the toothpick until you get the color you want.
Tuxedo Black
Stencils:
Honeycomb Stencil
Bee Stencil 2 Sizes
Airbrush System and Airbrush Colors:
The Cookie Countess Airbrush System
The Cookie Countess Airbrush Colors: Golden Yellow and Totally Brown
Tools:
Turkey Lacer
The Cookie Countess Stencil Scraper – 3 pack
Fan-I learned from Sweet Sugarbelle
Sugarbelle Stencil Snap or you can get it at Amazon Sweet Sugarbelle’s Stencil Snap
Rainbow Dust Jet Black Double Sided Food Pen
Piping Bags:
Ateco Disposable Decorating Bags
Ateco Couplers
PME Decorating Tips #2 and #2.5
Sweet Sugarbelle Decorating Bag Ties
Optional:
Cookie Turntable Swivel for Cookies
Here is the Minimat that goes with the Cookie Turntable Swivel for Cookies.
If you’re a video person here’s one I made just for you! Enjoy!
How to Decorate Happy Little Bee Cookies Video:
I hope you enjoyed the video. The stencils and the Sugarbelle Stencil Snap make decorating a lot more fun and definitely easier than trying to make all those honeycomb images (is that what you call them?) by hand or with a paintbrush. Can you imagine painting them? Not me! LOL
Happy Little Bee Cookies:
Begin by making your favorite sugar cookie recipe and cutting out the hexagon shapes. The great thing about these cookies is the more you make the better your platter or beehive will look. There are two dozen cookies in this set and the great thing about it is you can make a lot of cookies in a short amount of time because of the stencils and the edible food safe pen. Makes decorating fun and easy.
Outline & Flood:

- This is the basic outlining and flooding of a cookie. The only difference is are you using a decorating bottle, tipless decorating bag, or a decorating bag with a tip. I chose the decorating bag with the PME decorating tips #2 and #2.5 tips this time. The #2 decorating tip is used to outline the cookies. The #2.5 tip is used to flood the cookies.
- Once you outline and flood the cookie you can use the turkey lacer to pop all the air bubbles and push the icing where you want it to go.
- Let the cookies dry completely.
Airbrush:
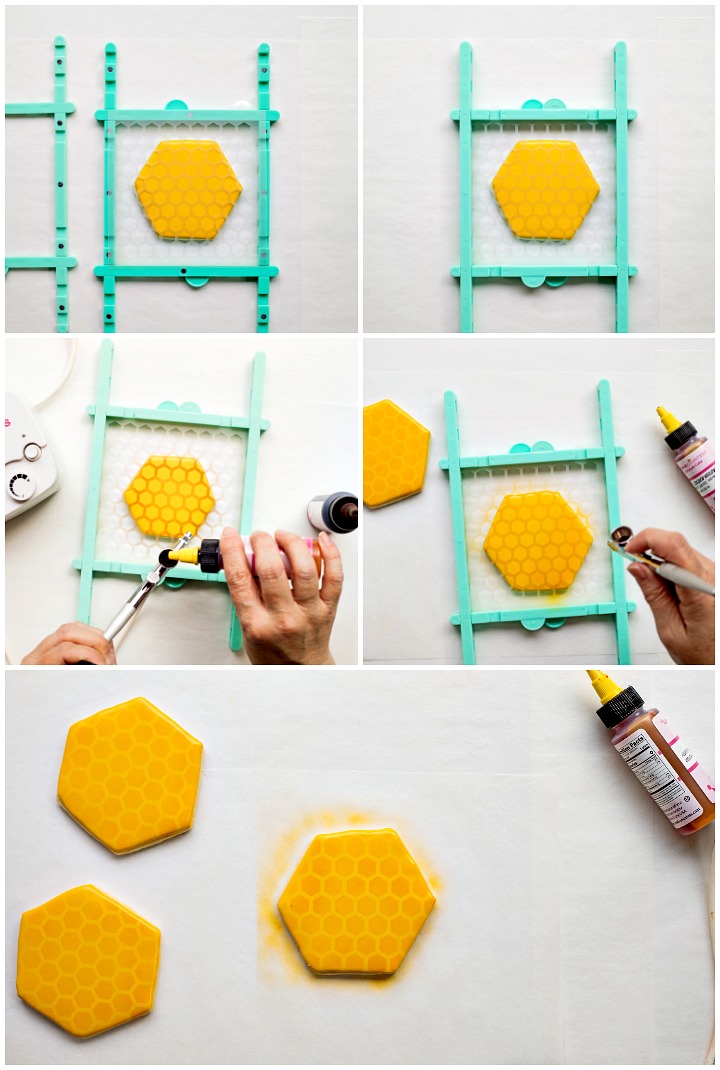
- Now that the royal icing is completely dry it’s time to airbrush. I’ve always used the Stencil Genie to hold my stencils in place and now I have a Sugarbelle Stencil Snap. I really like it because you can adjust it to different sizes so it can hold small and large stencils. You’ll see why I like it for these cookies when we add the bees to the cookies in a minute.
- Make the Sugarbelle Stencil Snap the size you want and take the top off. Lay the honeycomb stencil on the holder. Place the top of the Sugarbelle Stencil Snap on the bottom and you’ll hear it click.
- Place the honeycomb stencil on the cookie.
- Put The Cookie Countess Golden Yellow Airbrush Color in the airbrush gun.
- Lightly spray the entire cookie with the yellow.
- Lift the Sugarbelle Stencil Snap straight off of the cookie. If you pull it sideways you might smear the airbrush color. Straight up is the way to go!
- Let it dry for a few minutes before you add the next color.

- Once the yellow airbrush color has dried you can add a little bit of the brown color to the yellow in the airbrush gun. Mix the colors by placing your finger on the needle cap of the airbrush gun (that is the spot where the color comes out). Once your finger is in place, pull the trigger and you will see the colors bubble in the cap. That’s a good thing because the brown and yellow are mixing to a beautiful deep yellow or light brown color that will make your honeycomb look gorgeous.
- Place the Sugarbelle Stencil Snap on the cookie. Line up the honeycombs so they match the yellow honeycombs you made earlier.
- Spray the edge of the hexagon cookie. You can get creative and spray two edges, three edges, or all of the edges. Make it however you want so it will have character.
- Lift the stencil holder straight off the cookie and let it dry for a few minutes. Next, we’ll add the bee!
Add the Bee:

- Here’s why I like Sugarbelle’s Stencil Snap so well. You can see that I’ve adjusted the size so it will hold the bee stencil at an angle. FUN! Add the bee stencil however you want and snap it into place.
- Next, place the stencil holder with the bee over the cookie.
- Grab something to spread the icing on the cookie. I like using The Cookie Countess Stencil Scraper. It’s a perfect size and sturdy enough to spread the royal icing over the bee.
- Pipe some royal icing at the top of the bee on the stencil.
- Use the stencil scraper to pull the icing over the bee. You may need to do this a few times until you like the look of the icing. You don’t want it really thick or really thin. You’ll know when you have it at a good thickness.
- Lift the stencil holder straight off the cookie.
- Remember to wash the stencil and the stencil scraper often so you don’t accidentally transfer the black icing on other cookies.
- Let the bee dry for a little while.
- While you’re waiting on it to dry you can lay the cookies out and draw dotted lines on the cookies without the bees. You can make it look like the bees are flying crazy from cookie to cookie by making the black dots start and end at the same part of the cookies. It makes it look like they’re flying like crazy bees so they’ll Bee Happy!
- Let all of the icings dry before you package the cookies.

I hope you enjoyed these cookies. The stencils make them simple and add a lot of detail with a little bit of work. Let’s all Bee Happy and have a good rest of the week!
Bear hugs,

This such the cute idea and I love the look of them flying a path across the cookies! What a fun set!
Thanks, Tracy! Making any kind of cookie is fun! LOL, I’m glad to be decorating again! 🙂
These cookies are bee-utiful, Lisa.
You are so sweet to share them with us!
Hive got to make them right away.
I’m not blowing smoke…people are going to swarm me when I give them away.
And I don’t want to get stung, so I better double up!
Thanks again for sharing, you are the bees knees and my queen!
Janis!!! Hahahahah You’re making me so happy with your “BEE” poem! It’s as you say, bee-utiful!
Thanks for the smiles! SMOOCH!!!!
U always do such a fantastic job decorating cookies Lisa! I’m so glad that your feeling better! ☺
Thanks, J.
I’m doing much better and recovery is going very well! But hey, Happy Little Bee Cookies make us all feel better!
Hello to every one, the contents present at this web page are in fact amazing for people knowledge, well, keep up the good work fellows.
Your recipe of ‘little-bee-cookies’ looks very yummy, My kids love it, thank you for sharing it.