How to Make Adorable Little Royal Icing Leaves
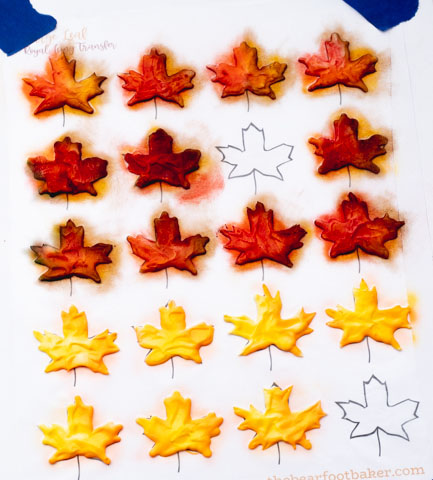
It’s fall y’all and I don’t know about you, but I love watching the leaves change colors. The best thing about fall as a cookie decorator is making adorable royal icing leaves full of those beautiful fall colors. Red, orange, yellow, and brown are some of my favorite colors all the time, but fall says it all! Let’s see if we can make a few autumn colored leaves to use on our sugar cookies and celebrate with adorable royal icing transfers.
I hope you’re ready!
How to Make Little Adorable Royal Icing Leaves
Supply List:
(may contain affiliate links)
Recipes:
Templates:
Maple Leaf Templates:
- Small Maple Royal Icing Leaf Transfers
- Medium Maple Leaf Royal Icing Transfers
- Large Maple Leaf Royal Icing Transfers
Elm Leaf Template:
- Small Elm Leaf Royal Icing Transfers
- Medium Elm Leaf Royal Icing Transfers
- Large Elm Leaf Royal Icing Transfers
Airbrush System:
The Cookie Countess Airbrush Colors:
- Golden Yellow Edible Airbrush Color
- Outrageously Orange Edible Airbrush Color
- Totally Brown Edible Airbrush Color
Tools:
- Turkey Lacer, Boo-Boo Stick also is known as 2 in 1 Stick, Thingamagenie at The Flour Box or Thingamagenie at The Cookie Countess, or an offset spatula
- Roxy & Rich Cocoa Petal Dust- Webstaurant Roxy & Rich Cocoa Petal Dust. I do shop at Webstaurant, but when I do I usually order equipment or several items because the shipping on one item can get expensive. If you shop at Country Kitchen Sweetart you can use their Cocoa Petal Dust and they have all kinds of amazing petal dust for projects like this.
- Crystal Colors Poinsettia Petal Dust
- 2 Paintbrushes for the petal dust.
- Tipless Decorating Bags- The Cookie Countess or The Flour Box
- Foam Board or something you can use as a base for your template.
- Wax Paper
- Painters Tape
- Fan or Food Dehydrator to dry your leaves so they’ll have a nice shine when they dry.
How to Make Little Adorable Royal Icing Leaves Video:
Enjoy the video!
Print your templates and get started.
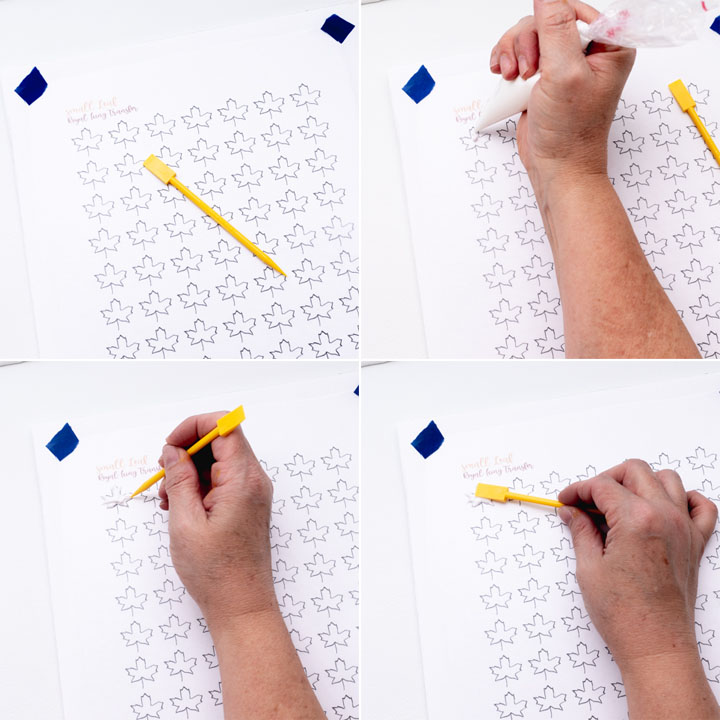
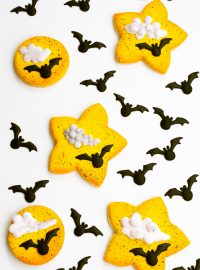
- Begin by printing your templates and finding something to use as a base for your transfer pattern. I like using a piece of foam board because I can cut it a little larger than my template and it’s lightweight and easy to move out of my way as the royal icing dries. You can find the foam board at The Dollar Tree and each piece is only $1. You can get four pieces from each piece of foam board with a little leftover we can use to make fun transfers like Cute Royal Icing Pumpkins and Clouds in this Bat Royal Icing Transfer Set.
- Cut the foam board into four sections with each a little larger than a piece of paper.
- Then, print your templates found under the supply list and tape them to the foam board with painters tape. You don’t have to have painters tape, but it works well and will let go without breaking your transfers.
- Next, cover the template with a piece of wax paper and tape it into place. Try to tape nice and smooth without wrinkles so your transfers will dry nice and flat.
Time to make royal icing.
- It’s time to make your royal icing and here is my Half a Batch of Royal Icing Recipe. I like to use this recipe when I make royal icing transfers because it’s not a large batch so I don’t have to worry about wasting or storing the icing I don’t use.
- For this project, we will only use white royal icing. Don’t you like it when you don’ have to mix and bag several different colors of royal icing? Don’t get me wrong, I like royal icing colors, but sometimes it fun to start decorating without having to spend time mixing and bagging.
- Wait, did I mention you don’t have to spend a lot of time making your royal icing consistency because you can use a thick consistency to make the leaves. This is a great project for beginners or experienced decorators. If you look outside during autumn you’ll notice that no two leaves are the same so why should our royal icing transfers be any different? Have fun with this project and enjoy yourself while making them.
- Place the royal icing in a disposable piping bag and cut a small amount off the tip.
Let’s add some petal dust:
- Pipe a little royal icing on your leaf and use a Boo-Boo Stick or turkey lacer to push the icing to the points of the leaves.
- Next, take the end of the Boo-Boo Stick or Thingamagenie to push the icing around and make waves and lines on the surface. When it dries it will resemble a leaf that has dried and fell off the tree.
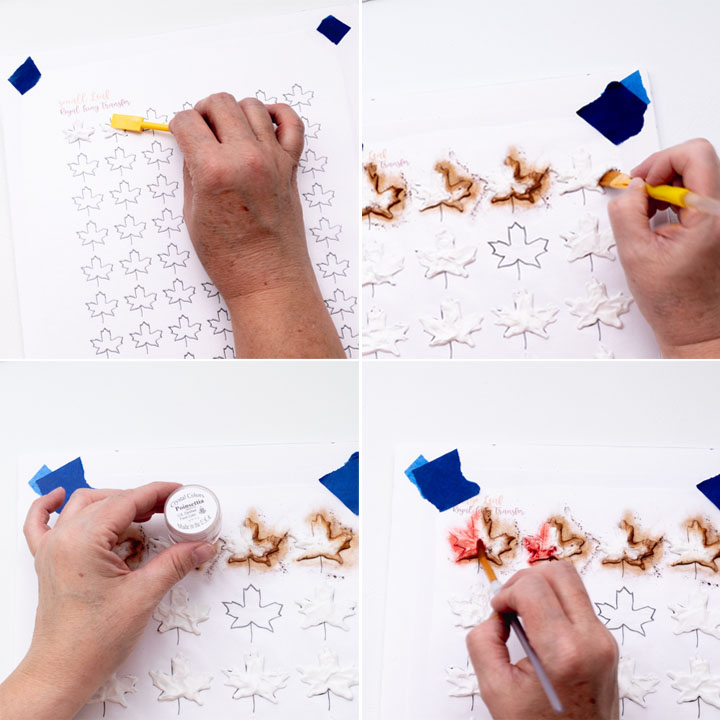
- Let the leaves dry completely in front of a fan or in a food dehydrator.
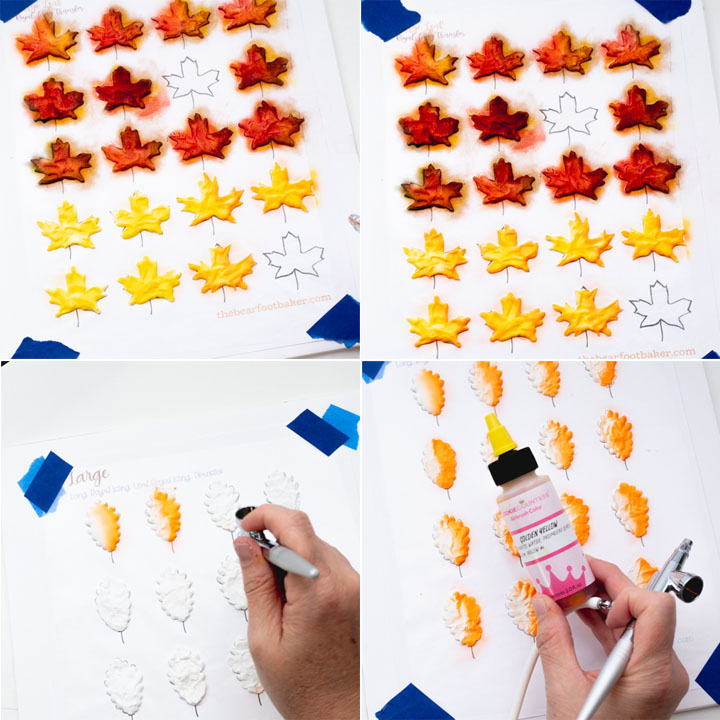
- It’s time to add some color. For the brown, I used Roxy & Rich Cocoa Petal dust and dusted the brown on each leaf. You can add it all the way around the leaf or only one side. I prefer to add it to the bottom and one side of the leaf but you do what makes you happy.
- Dip the paintbrush in the cocoa petal dust and rub it on your leaf where you want the brown.
- Then, dip the other brush in the poinsettia dust and brush the opposite side of the leaf. The two colors should meet to make it look like a real fall leaf.
- Do this to each leaf and I hope you enjoy this part as much as I did. It’s really fun!
Time to airbrush:
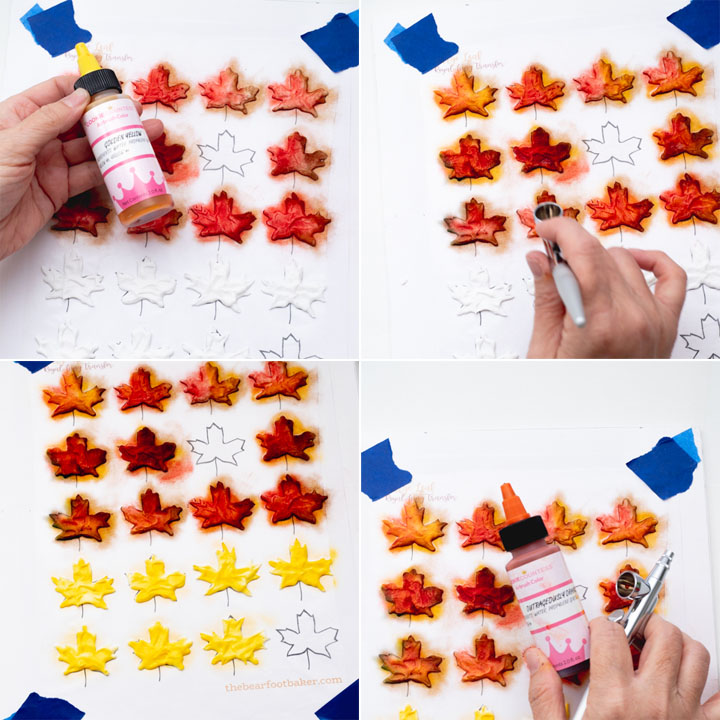
You can add any airbrush color you’d like. I chose:
- Golden Yellow Edible Airbrush Color
- Outrageously Orange Edible Airbrush Color
- Totally Brown Edible Airbrush Color
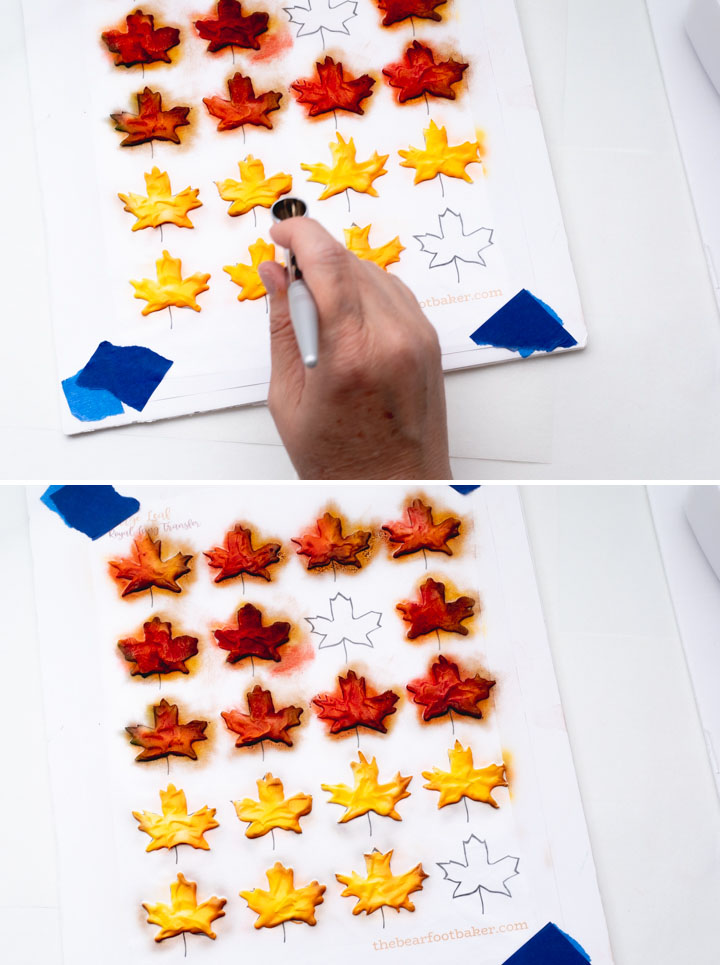
To see how to do this step you can watch the video to see how fun and easy it is to airbrush. Basically, you add a little yellow over the red and brown, then add a little orange, and finally finish with the brown. It really looks great on the petal dust.
- If you don’t want to use petal dust, airbrush the entire leaves with the golden yellow.
- Then, airbrush one side with the orange.
We’re not done yet!
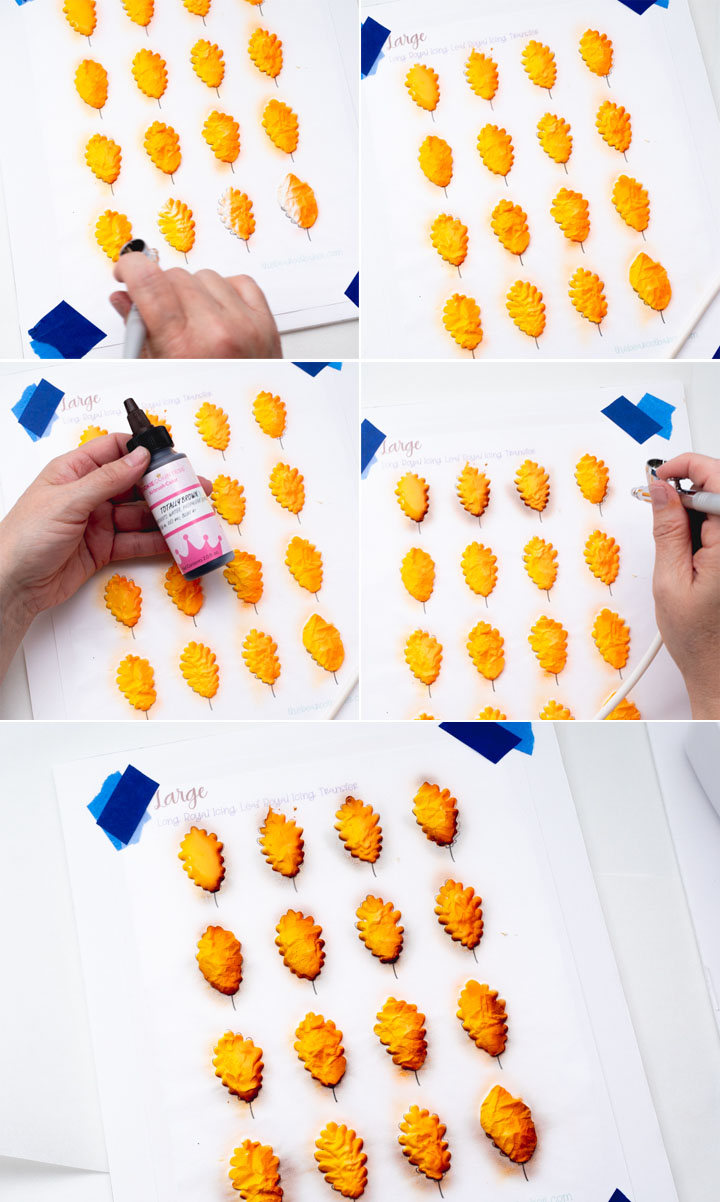
- This tutorial has been about the maple leaves so far, but you can use it on the elm leaves also. Just follow the same steps as the maple leaves, but if you don’t want to use the petal dust you can do everything with the airbrush gun. The video will show you exactly how to do it, but let me see if I can explain it to you.
- Airbrush one side of the leaf with the orange airbrush color.
- Then add golden yellow to the entire leaf.
- The Totally brown airbrush color really adds the story to the leaves. When you add it, go slow and be careful not to add it to the entire leaf. Just carefully spray some of the edges.
Take a step back!
- Take a step back and enjoy your work. If you look at the leaves with petal dust they have a deep rich color and the airbrushed leaves tell their own story and I love the look of both. They’re pretty and look great on sugar cookies!
I hope you enjoy this tutorial. It’s fall y’all and nature knows it time to get outside, hike, and look at all the beautiful colorful leaves. One of the great things about being a cookie decorator is you can have colorful leaves any time you want because you can print this template and keep it year-round so you can stock up for future fall seasons.
Enjoy fall y’all!
Bear hugs,

