Shark Tooth Cookie Decorations that Will Make You Happy
Have you ever had a shark tooth necklace? I haven’t until now. And you know what? This shark tooth necklace is totally edible because it’s a sugar cookie with a royal icing cookie decoration on it. If you make the cookie decorations ahead of time these will be some of the easiest cookies you’ve ever made. Let’s do this!
Shark Tooth Cookies:
Supply List:
(may contain affiliate links)
Royal Icing Recipe:
- Sugar Cookie Recipe if you want to make the shell cookies
- Half a Batch of Royal Icing Recipe
Royal Icing Colors & Consistencies:
- White 20-Second Royal Icing
- Blue 15-Second Consistency for the shell
- Black 15-Second Consistency for the necklace
Cookie Cutters:
- Shell Cookie Cutter- You only need this if you want to make the shark necklace in this tutorial. I can’t remember when I bought this cookie cutter but any shell cutter will work if you make sure one of the shark tooth patterns fit on it with room to add the necklace.
FREE Shark Tooth Printables:
- Small Shark Tooth Royal Icing Transfers
- Medium Shark Tooth Royal Icing Transfers
- Large Shark Tooth Royal Icing Transfer
Airbrush System
Airbrush Colors:
Tools:
- Turkey lacer
Shark Tooth Cookie Decorations Video:
Enjoy the video!
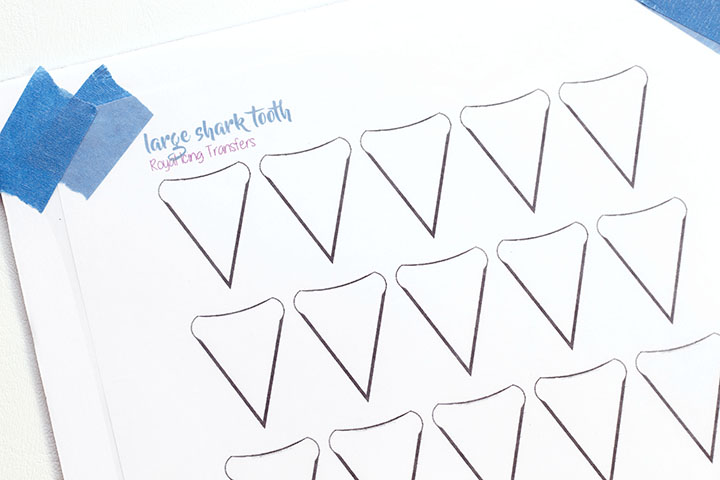
Print your patterns:
- If you want to add your shark tooth to a necklace to a cookie bake your cookies and allow them to cool before you cover them with royal icing.
- You can make your royal icing sharks teeth weeks before you bake your cookies.
- Let them dry completely before you store them. If you store them while they’re wet they will be pretty gross when you want to use them. Dry as dust works best.
- Store them in an airtight container away from the sun so they’ll stay nice and neat for your cookies.
- Begin by printing your FREE Patterns and taping them to a piece of foam board.
- Then, cover them with a piece of wax paper and tape it down. Make sure there aren’t any wrinkles or your royal icing cookie decoration will have wrinkles. That might look cool for a creepy cookie but for these we want them to have a nice flat back.
- Make your royal icing.
Outline your cookie decorations:
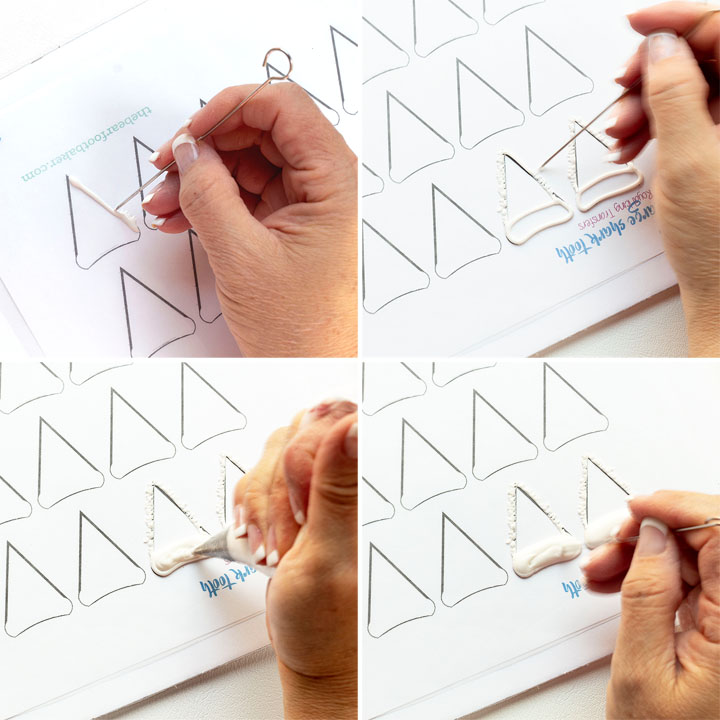
- Begin making your teeth by piping a line around the tooth.
- Immediately use your turkey lacer to pull the royal icing away from the center of the pattern to make little jagged edges.
- Repeat all the way around the point of the tooth.
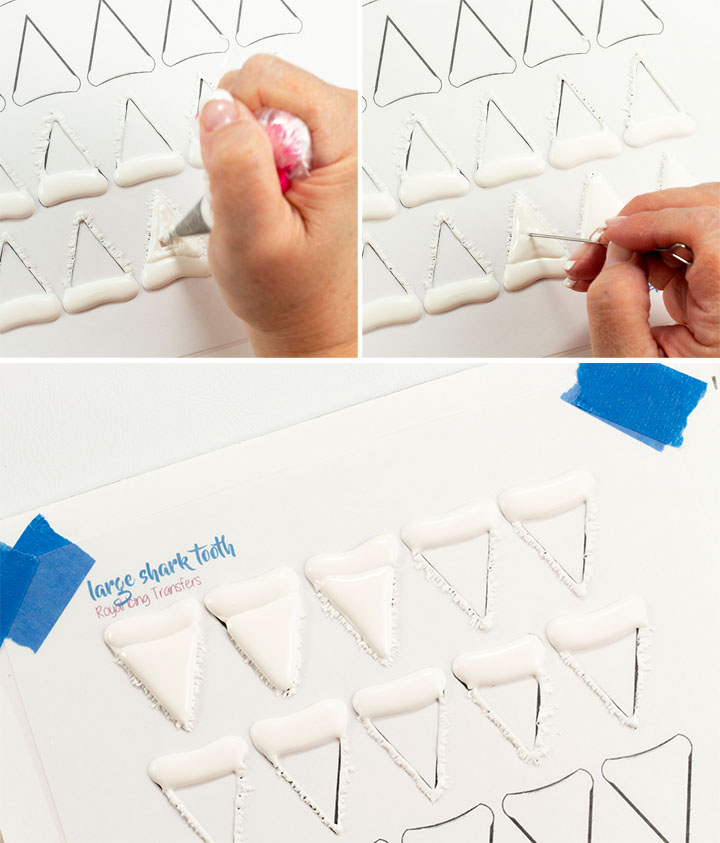
- Outline and flood the top of the tooth with white 20-Second royal icing.
- Let it dry for about twenty minutes.
Flood the teeth with the white royal icing:
- Flood the point of the tooth and let the teeth dry completely before you remove them from the wax paper.
- To remove them all you need to do is remove the tape, lift off the wax paper, gently peel the teeth from the paper. You should make extra because some of your teeth might break but that’s okay.
Also, this is a great way to use your leftover royal icing. Don’t waste it because you can make royal icing transfers with it.
Now for the necklace:
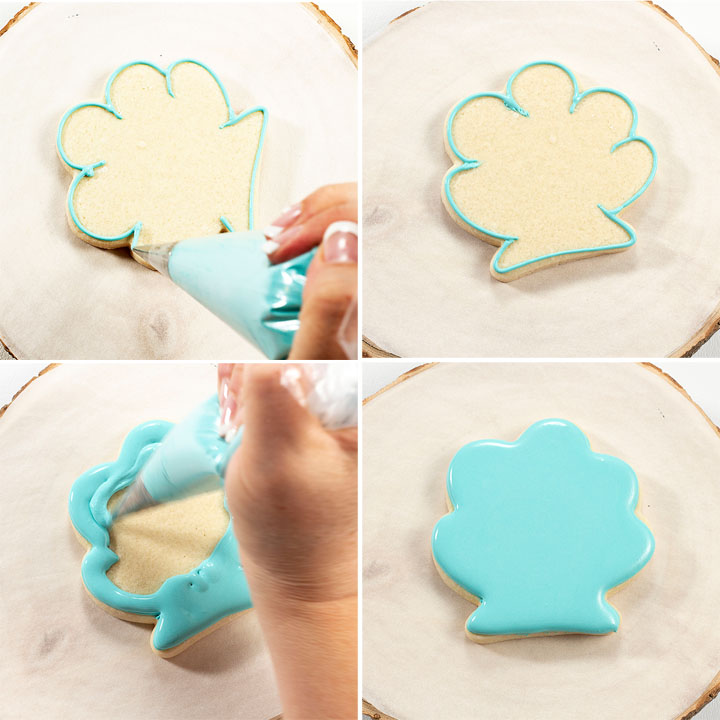
- Bake your cookies and let them cool completely before you begin to decorate.
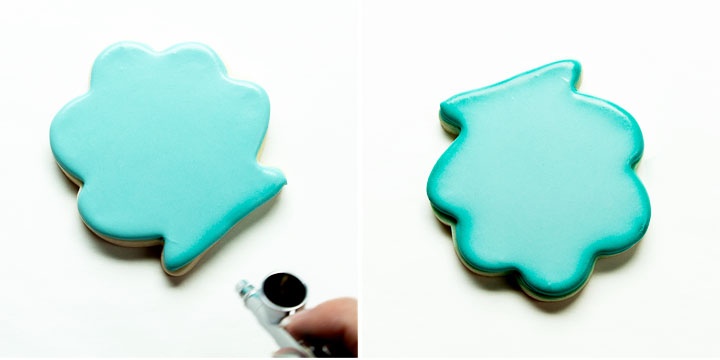
- Outline the cookie with blue royal icing and wait about ten minutes before you flood it.
Airbrush the edges:
- After your icing has dried, airbrush the edges with edible blue airbrush color.
- If you’re wondering what color I used it was The Cookie Countess Mermaid Teal.
Make the necklace and put it all together:
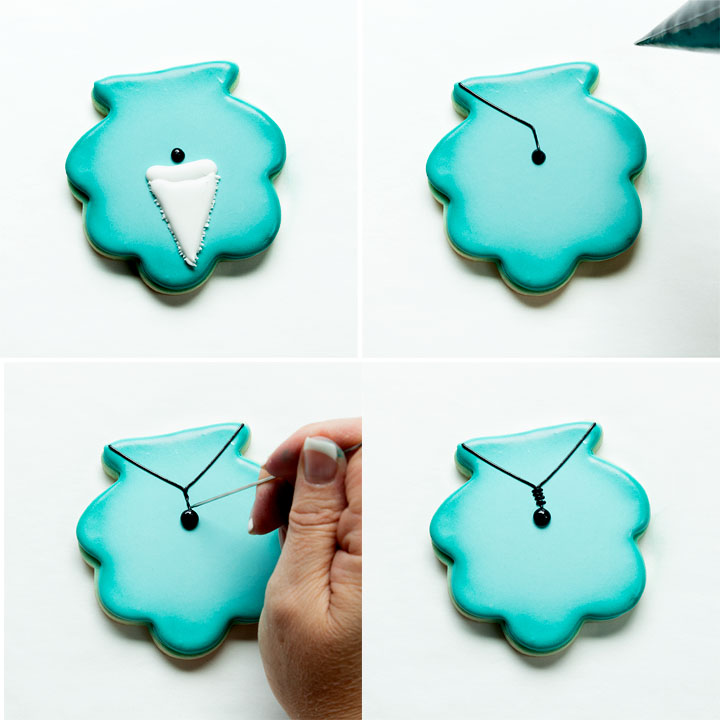
- Before you begin piping the necklace on the cookie you should probably place the shark’s tooth on the surface of the cookie to make sure it’ll fit and where to pipe the necklace. If you skip this step you may not be able to make the tooth fit on the cookie. Or you can use one of the other templates for a different size tooth. I usually make all three of the cookie decoration patterns so I’ll have choices when I start making cookies.
- Pipe a dot where the tooth and the necklace will meet.
- Now add the line of the necklace.
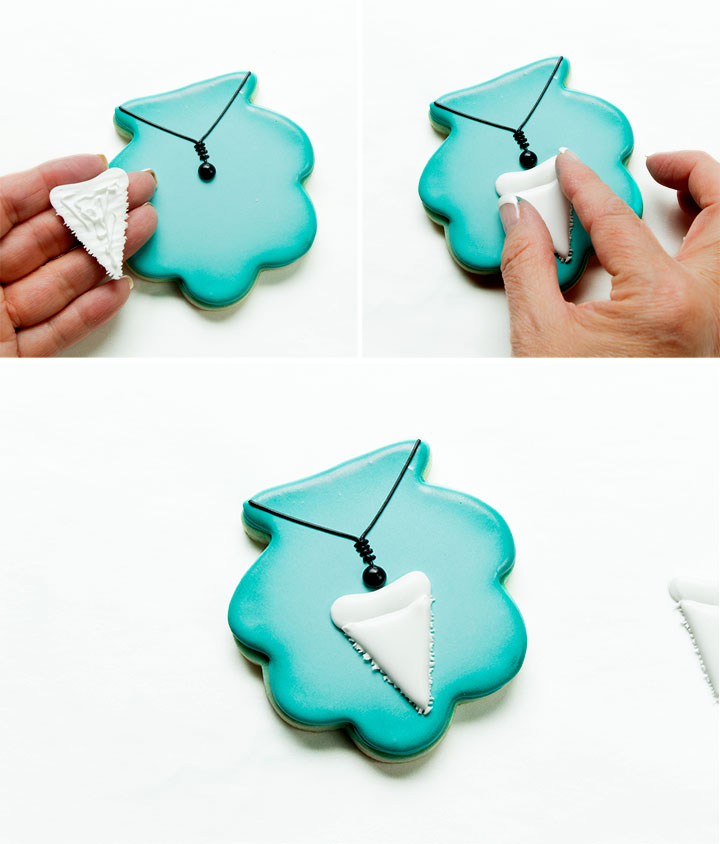
- Add a little royal icing to the back of a tooth and place it on the shell cookie and gently press it into place.
You’re all done!
You may be wondering why I didn’t tell you how to make the white shell cookie. Well, it’s because I thought I’d save it for last.
- Outline and flood the shell with white royal icing and let it dry for about twenty minutes.
- When the surface of the cookie has formed a crust you can splatter it with a little food gel color mixed with a little water or vodka. I used vodka for this one and kind of wish I would have splattered the blue royal icing shells. Oh well. I’m happy with the way they turned out.
What do you think you can make with these shark tooth royal icing transfers? I’d love you to leave a comment and let us know!
Bear hugs,

