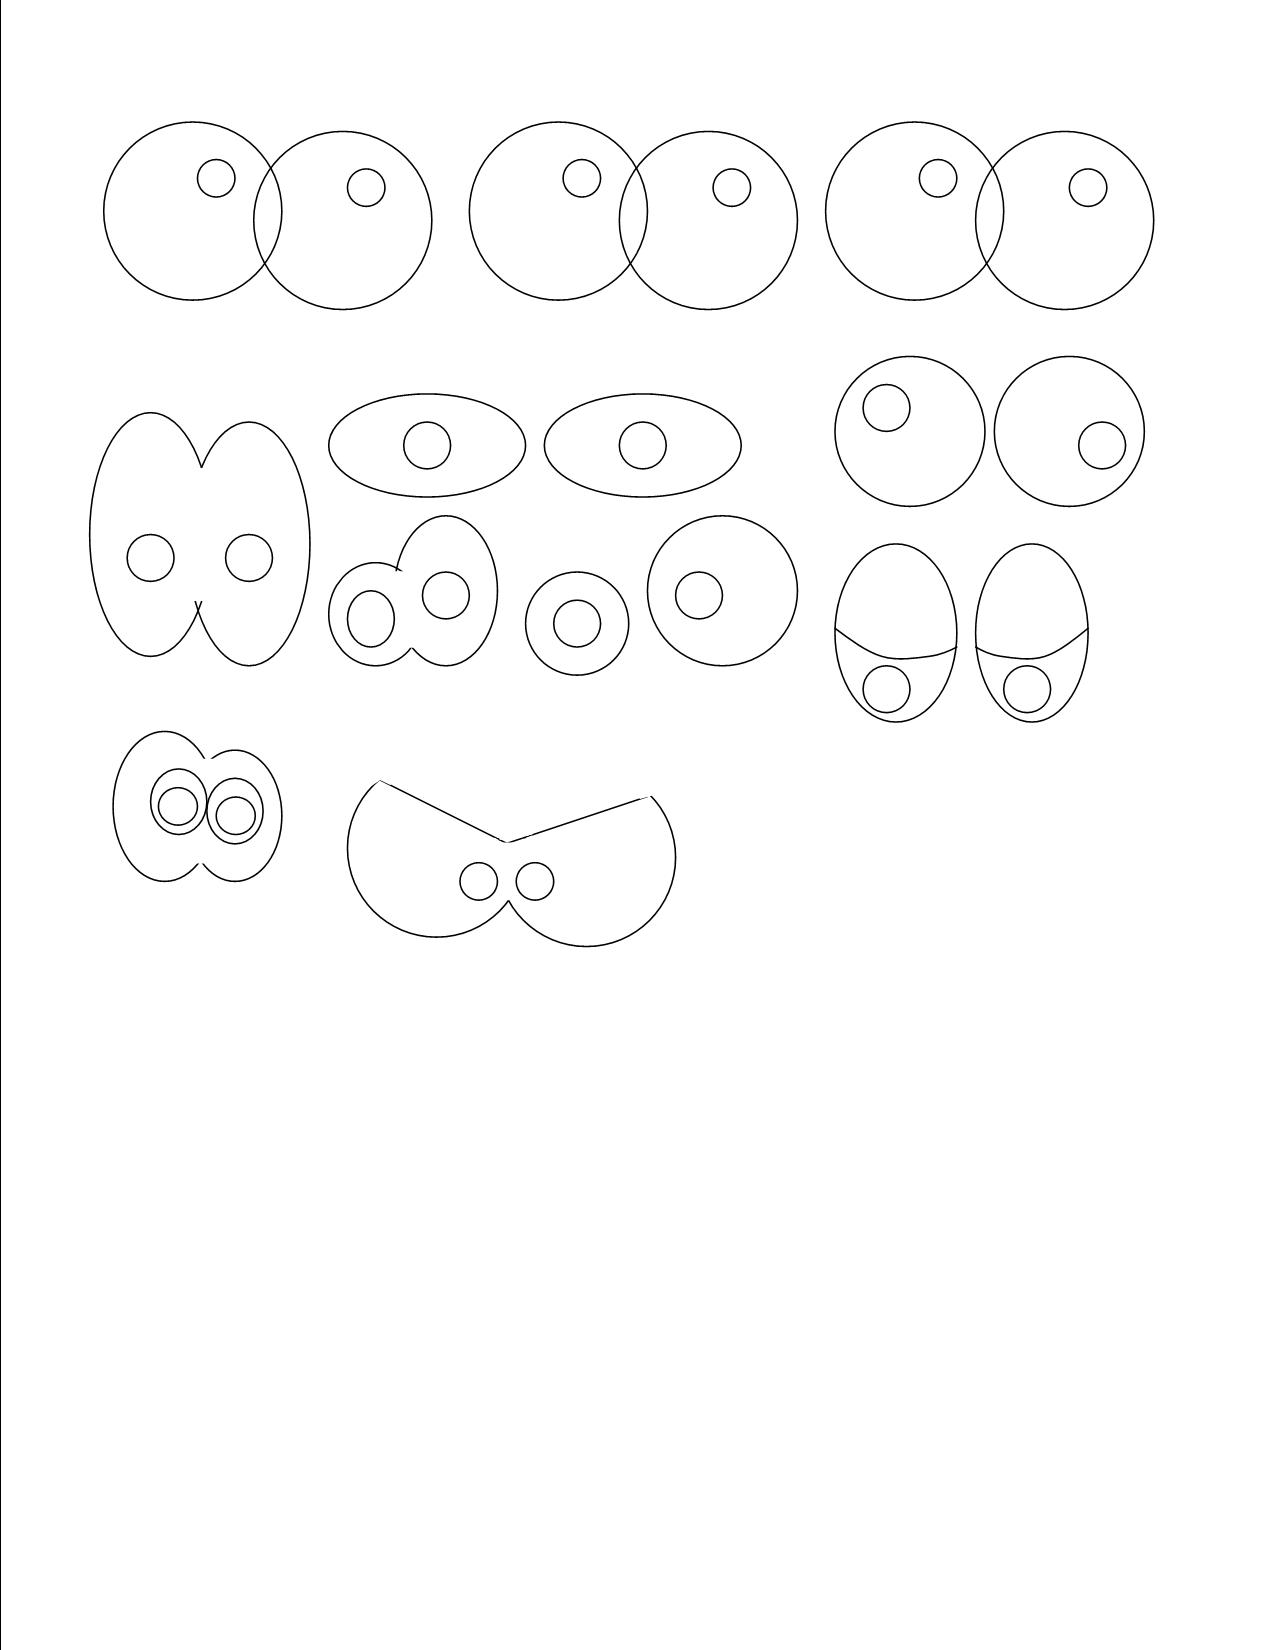
Royal Icing Eyes & Templates
I wanted to take a minute today to talk to you about one of my favorite cookie time savers. If you are a regular around here, you know I like royal icing transfer and especially for eyes. I make a lot of royal icing eyes in different shapes and sizes.
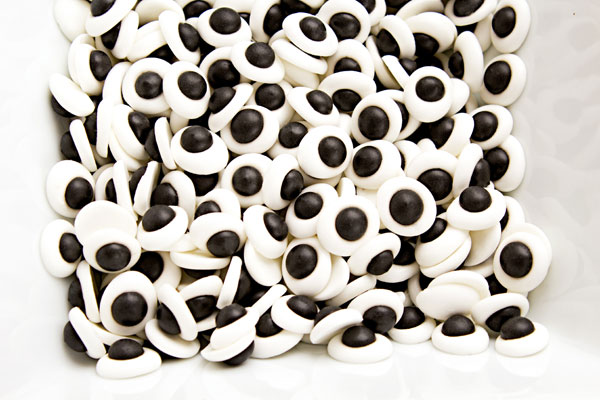 I make different shapes and colors so I am ready for any project I am working on. Oh, wait! I forgot to tell you the best part! You can make it with leftover icing so not only does it save you time decorating, but it will also save you money.
Royal Icing Eyes & Templates:
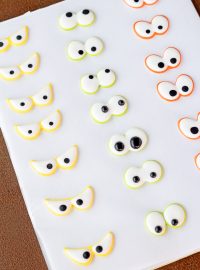
Small Eyes
Monster Eyes
Medium Eyes
Royal Icing Recipe
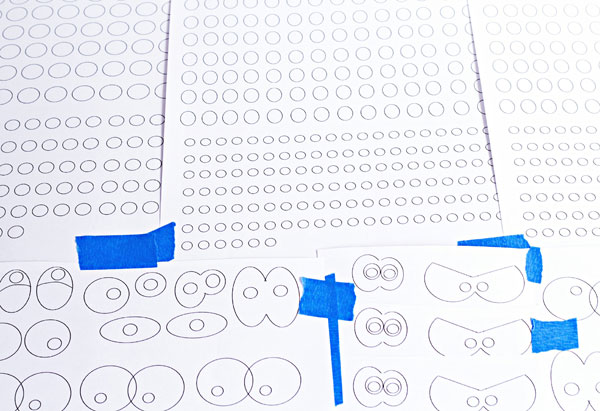
First, print your templates and tape them to a cutting board or the back of a cookie sheet. Sweet Sugar Belle shared the blue painter’s tape and back of the cookie sheet tip here.
Once the pattern is secure, cover it with wax paper and tape it so there aren’t any wrinkles in the wax paper. If the paper is wrinkled, your transfer will also be wrinkled.
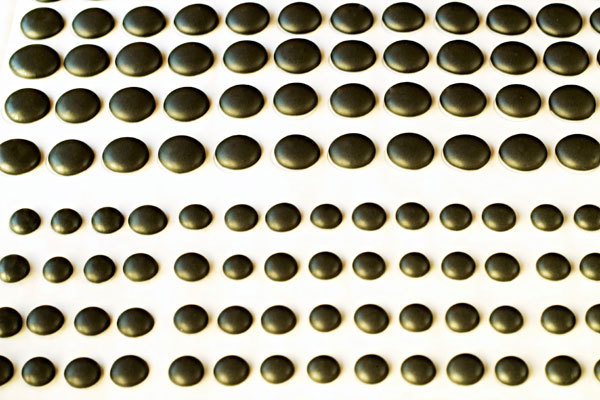
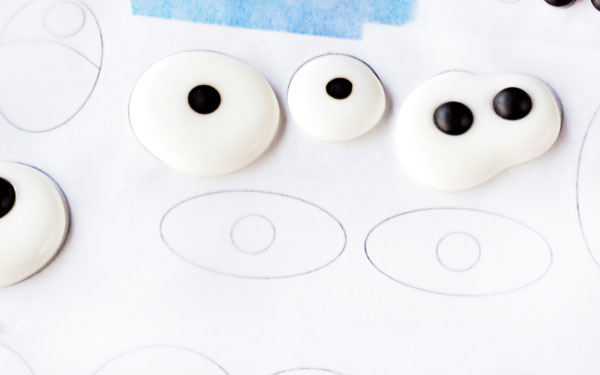
I make mine in 2 steps. First, I make the pupil of the eyes and let them dry overnight. Depending on the humidity in your area, you may need to let them dry for a couple of days. Sometimes I stop there as I did for these cookies.
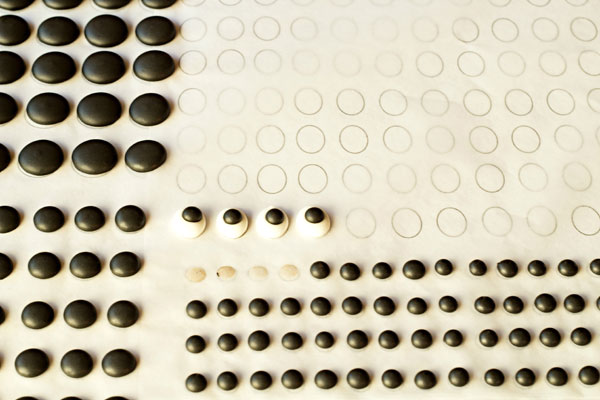
Once the pupils are dry, make the sclera (white part) of the eye. While it is still wet, pop off one of the pupils and place it in the center of the sclera. I work one row at a time.
If you want to color the iris, you can add a drop of color before you add the pupil.

Continue until you have as many as you want.
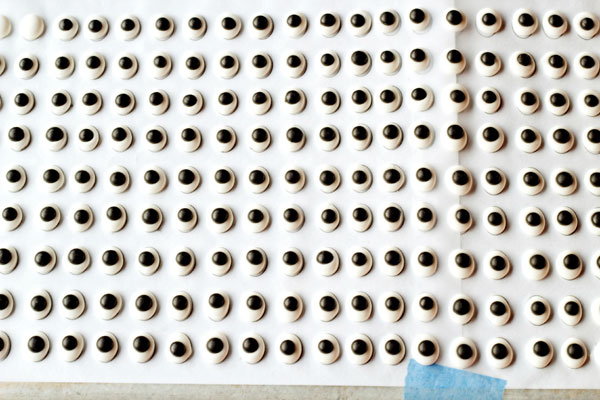
Let them dry completely before removing them from the wax paper.

If you are afraid of the black bleeding on the white, don’t make the black. Once you place them on your decorated cookies, you can add a drop of black for the pupil.
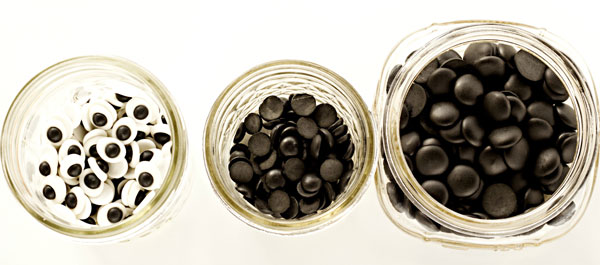
Now for storage. I separate them by size and color. Once they are completely dry, you can store them in airtight containers in a dry cool place and they will last a really, really long time. I keep them in cute little canning jars in my cabinet with all the other transfers I have made. I have hearts, roses, bows, ties, mustaches, shabby chic roses, and ribbon roses. Seriously, transfers are amazing. The only downside is you need to make more than you need because they will break easily.
Now go make some and remember, we are watching you.
If you are looking for more tips and tricks, you may enjoy the “Beginners Guide to Cookie Decorating.” If you would like information on how to store royal icing transfers, click here.
Bear hugs,


Thank you SO much for the templates!! 🙂
You are welcome. I am working on more now so keep and “Eye” out for them! LOL
Thank you, great idea!
😉
Super useful! Now only if I can find the energy to get this going with some extra icing after decorating a batch of cookies. My frugal self would be so proud 🙂
You can do it Michelle! Get the templates ready before you start the cookies so you don’t break the decorating flow.
Sage advice that I will definitely take! Thanks gal 🙂
It’s a very good idea, thanks
You are very welcome!
Thank you! Thank you! Thank you!
You are welcome Melissa!
Neat idea, Lisa 🙂
Thanks Jennifer. I am going to email you later today 🙂
Great idea! You have a lot of patience ~ 🙂
It is very relaxing Pat! Almost as good as a bubble bath! 😉
Thanks for the templates, Lisa! This is one of those great cookie decorating time savers that you can do when you’re parked in front of the TV for a Law & Order marathon! 🙂
I am glad you like them Janine. More on the way:)
So that’s the the white of an eye is called. Good to know! Great tutorial. I just bought 7 boxes of varying size candy eyes (wholesale, thankfully) but they are regular round eyes. I love your templates for the spooky eyes. Will have to make some of those.
Hahaha! I had to Google it!
Lisa THANK YOU so much for the templates!!!!
oh my goodenss! i LOVE candy eyeballs (that sounds weird) anyway, i’m always trying to get different eyes because they’re always a lot funner than using regular round ones. so this is a must try for me-thank you SO much! :>D
I hope your organization rubs off on me! Great tips!
So great, thank you! Do you have any tips on how to avoid little holes in these? I just made some sheets of candy buttons for a birthday party and Some of them ended up with little holes in them. I thought swirling a toothpick in each button, but I didn’t do it because I had SO many of them. I’m thinking the same thing will happen with these. Your pics look perfect! Not a single hole! Any advice is appreciated!
Hi Cristina,
Holes in your icing stinks! All that work and then you wake up in the morning and see all the craters and your heart sinks. That has happened to all of us before. There are a few things you can do to prevent them. The first is getting the right consistency of icing. Second, let your icing rest after you mix it so all the air bubbles rise to the top and you can pop them before you put them in the piping bags or bottles.
your page is amazing i love it. Thank you for all the cool things you have on here inspired big time 🙂 god bless your talent…….
I have made these several times, as well as others and when I use black icing, it dries to a marbled grey color..never shiny black? I live in a very humid area (Miami) and it takes a long time for my icing to dry…any tips?
In fact, all of my colored icing dries marbled when I try to do transfers…
Hi Jennifer! Try drying your icing with a fan. I live in a humid area and once I decorate about 3 cookies, I place them in front of a fan and it helps them dry shiney and smooth. Try it and let me know how it works. If it doesn’t work, I will offer more suggestions.
Hi Lisa..I think I posted and it didn’t show..but I use a fan all the time on my cookies because of the humidity..I have an issue with bleeding too..but that is another story – tried heat fans, dehydrators..no luck. I have thought of putting the RI transfers in the dehydrator, but haven’t tried that yet. Any other ideas would be greatly appreciated.
The only other thing I can think of is using less water to mix your icing. Try it a little on the thick side and see if that helps.
Also, I had a reader suggest drying them in the over with the light on. No heat at all! Just the light and she siad it works great.
amazing!! so much time this will save me!! pure genius….
I absolutely LOVE these and am going to have to try them.. i go through SOOOOOO many of these and other transfers. I am a huge home baker so the soldiers in my husbands unit are CONSTANTLY coming to see if he brought any goodies in to work with him and love the little pick me ups when they are deployed and this will save me SOOOO much time AND money! Who doesnt like to save money!
Thank you, Thank you, Thank you
You are so welcome! Thank you for spreading some smils to our soldiers!!!
PS-Adding more eye templates soon like maybe tonight!
Hello! I love all your royal icing templates. What icing consistency do you find works best for RI transfers?
Thank you
I like the 15 second icing for my transfers unless I need a thicker icing. If the template calls for thicker, I will mention it under the supply list.
Thanks!
i am new to this cookie world and just wanted to say how inspiring you are! The fact that you are willing to share your tips/tricks and techniques helps beginners like me immensely! Thank you SO much 🙂
You are very welcome Tracy! Let me know if you ever have a question. I am happy to help people become as addicted to cookie decorating as I am! LOL
Thank you
I’ve just started to decorate cookies and making transfers has helped me immensely…I’ve had pretty good luck, too…only had a few break since learning how to do them!! 🙂
Thanks for the tutorial on the eyes. I am sure it will come in handy.
I use royal icing transfers a lot on my cookies. I have an issue with the color of the transfer changing after it’s been placed on wet icing. The color of the transfer becomes spotty. Do you know how to avoid this?
Hi Jamie,
Are you placing the transfer on royal icing or buttercream?
I use them on Royal Icing. Are you using them on butter cream?
Hi Lisa, I plan on trying this soon but quick question what piping tip do You use to make the circles…. Specifically the snowmen one? Love love your stuff!
Hi Tc,
I use a PME #2 tip to pipe almost everything including the Royal Icing Eyes. You don’t have to use a PME tip but they are my fave. 😉
hello ….. I wonder how you do for the black one with no white when working with black royal provided it meets the other color and does not look nice
Hi Sandra,
I am not sure I understand the question you are asking. Can you give me a little more information? I am sorry.
How do you make the repeating pattern transfer sheets?
I make it on the computer with Publisher or PicMonkey.
These are awesome! I’ve never worked with royal icing and my DIL wants me to make monster cake pops for my twin grandsons 1st birthday. These should stick to the cake pops no problem right? Stupid question, how do I pipe the monster eye shapes? I keep looking at the template wondering what the?
Twin grandsons! You lucky lady! I bet you have a ball with them.
The eyes will stick to the cake pops but I have found it best to use a small amount of royal icing to glue them into place once the chocolate on the cake pop has dried. Sometime due to humidity royal icing will get weird and melt a bit especially if there is a lot of moisture in the surface you are sticking them to.
Also, make the eyes with 15 second royal icing. That just means once you make the icing, pull a knife through the icing and start to count, one Mississippi, two Mississippi until you get to 15 Mississippi. When you count to 15 Mississippi the line should disappear. Thicker icing will hold better than thin icing.
Monster eyes are simple. Print the templates and tape them to the back of a cookie sheet and tape them down. Cover them with wax paper and tape it into place. Pipe the eyes and add the pupil. Let them dry for a few days. Remove them from the wax paper and then store them into an air tight container. You can make them months ahead of time. Just don’t store them in the sunlight. It will cause them to turn colors.
If you have any problems or questions, email me. I am here to help!
Bear hugs and give those grandkids a big hug from Tennessee!
Lisa
I have used 2 brands of black pearls for the pupils for my eyes, but I always have a problem with the black bleeding into the whites of the eyes or any light color that I have placed them into. Is there a specific type of black pearl that you use, and if so, what brand do you find is the best for this type of work?
Hi Linda,
I use Alan Tetreault’s and you can find them here: https://www.globalsugarart.com/black-pearl-dragees-4mm-4-ounces-by-chef-alan-tetreault.html.
I always try to use thick icing when making eyes. The thicker the icing, the less chance of the color from the pearls bleeding. Also, dry them in front of a fan to help the top layer crust faster. I hope this helps!
I NEED to tell you that not only are you talented and creative you are also generous and nurturing.. I am always in awe of the tips and instructions you share. During this time of being confined to our homes you print out this recipe for Royal Icing Eyes. What great timing! This gives us an opportunity to stock up on future decorations. Bless you for your kind and giving nature. Just know you are treasured.
Thank you for all of your amazing tips.
I have trouble when making eyes with the centers caving, how do I prevent this from happening?
I would love some suggestions.
Hi Eileen,
Eyes can be hard to make sometimes. That is why I like to make them as royal icing transfers because you can make them ahead of time and you know they look good. Once you pipe the eyes you can place them in front of a fan to dry. Drying the outer layer of the royal icing quickly will help them dry without falling in the center.
Hope this helps!