How to Make Simple Bunny Cookies with Video
I don’t know about you but I have about a million bunny cookie cutters. The last thing I needed to do was to go out and purchase a new one. I guess that deep down in my cookie obsessed mind I did need a new one so I bought the cute little Wilton one with the adorable floppy ear. It had a cute chick and sheep that came with it so I’ll add them to the many sheep and chick cookie cutters I have on hand. But I needed that bunny cookie cutter because its ear is so cute.
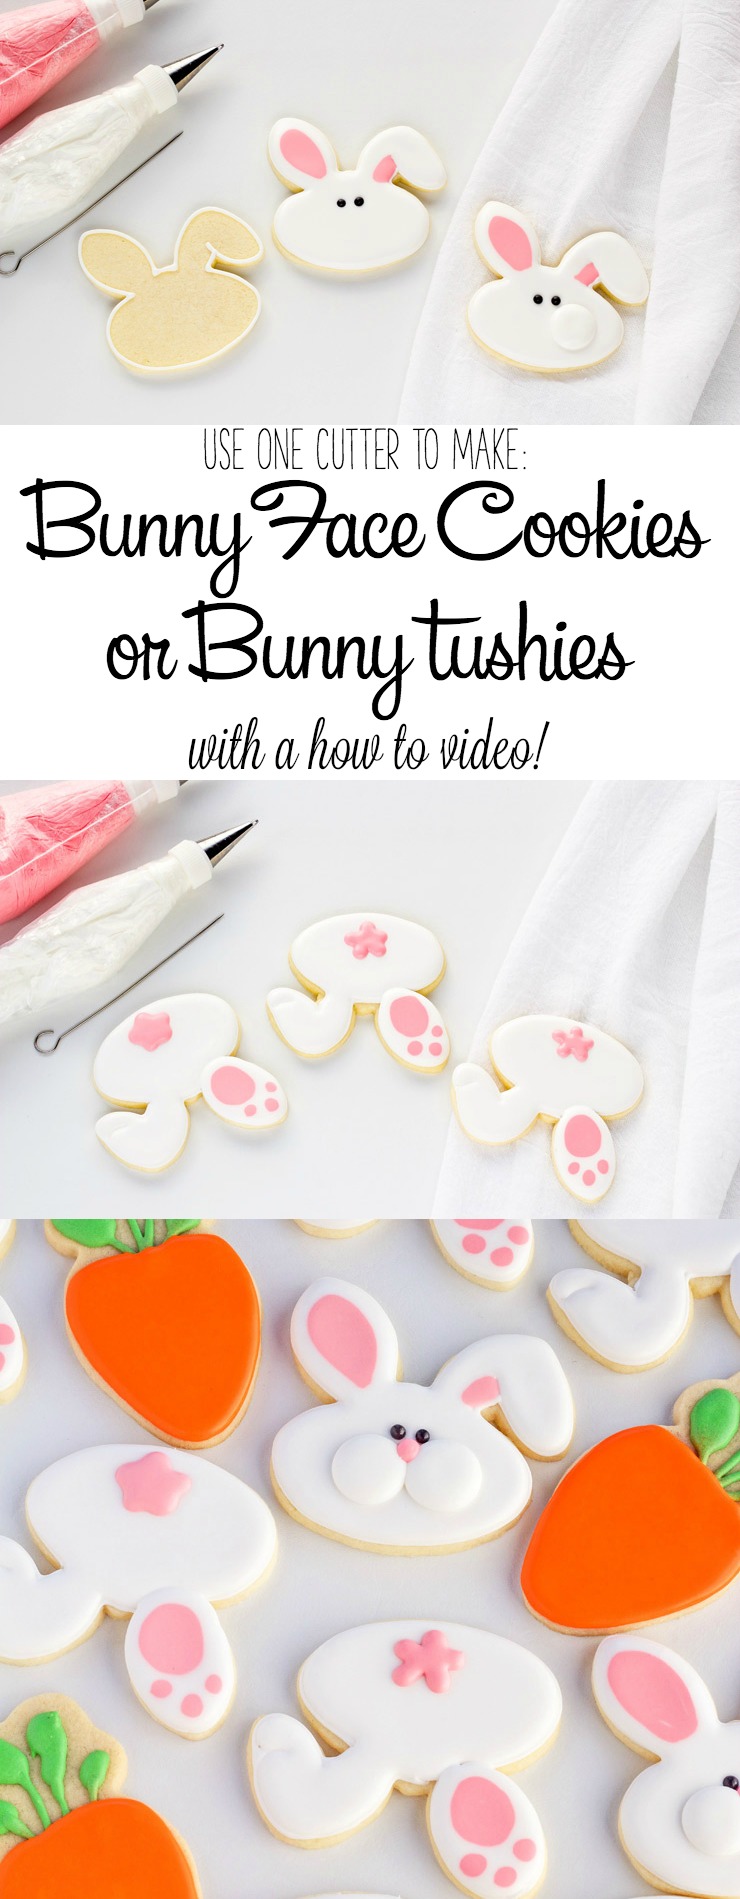
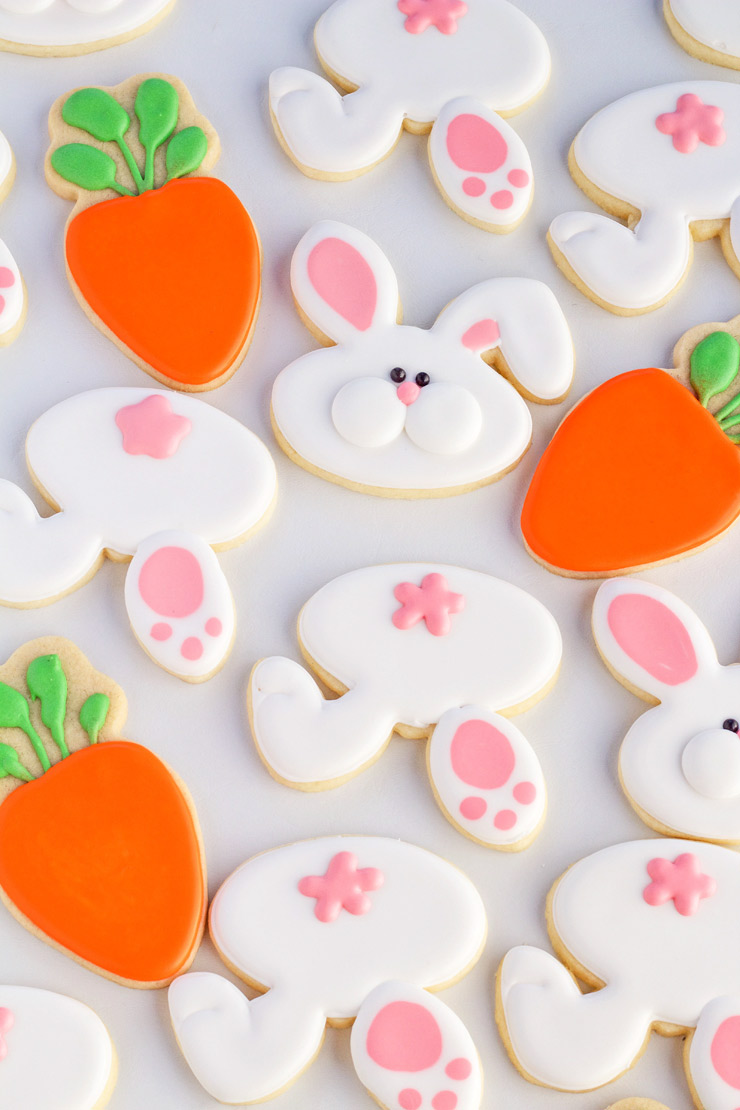
You see the floppy little ear set my mind in overdrive and I imagined a cute bunny face, but I got really excited when I thought about flipping the cutter upside down to make a bunny tush. Cute bunny cookies need cute bunny tushies because that what we see when the real bunnies hop away.
If you need a cute Easter cupcake, place one of these bunny cookies on top so you have the excuse to eat a cupcake and a cookie. Shucks, you don’t even have to bake the cupcakes if you don’t want them because you can pick some up from your local grocery store. All you have to do is pop a cookie on top and you will have an instant Easter treat that’s perfect and simple. You’ve gotta love that!
Supplies to Make Simple Bunny Cookies:
(may contain affiliate links)
Recipes:
- Sugar Cookie Recipe
- Royal Icing Recipe- Full Batch or a Half a Batch of Royal Icing Recipe (I used 15-second icing to make these little bunnies)
Cookie Cutter:
Royal Icing Colors:
- White
- Pink-White Icing with a touch of AmeriColor Super Red
Sprinkles:
Tools:
- Turkey Lacer for Popping air bubbles
- #2 PME Decorating Tips
- Couplers
- Piping bags or bottles
- Baking Sheet
- Parchment Paper or Silpat
Simple Bunny Cookies Video:
Enjoy the video.
Of course, every cookie begins with a good sugar cookie and royal icing recipe so if you have one, great. If you need one, I would be honored if you gave mine a try because I think it’s a good recipe that won’t spread that much when you bake your cookies. Here is my sugar cookie recipe and my Full Batch and Half a Batch of Royal Icing Recipe.
Let’s Decorate the Bunny’s Backside
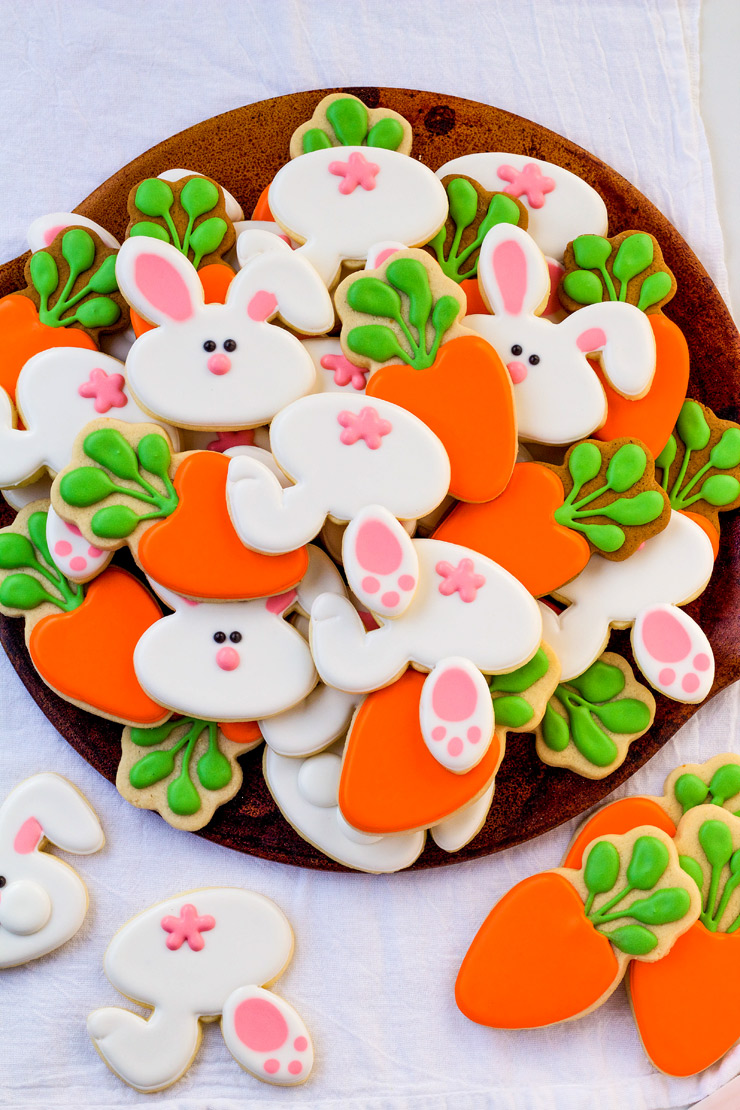
- Bake a batch of sugar cookies and cut out that super cute little bunny shape. If you decorate him the way Wilton intended, you will get a face. If you flip it upside down, you will have a cute little bunny tush because the little ear will become one of the feet when it’s turned upside down. That little floppy ear is what totally inspired these cookies.
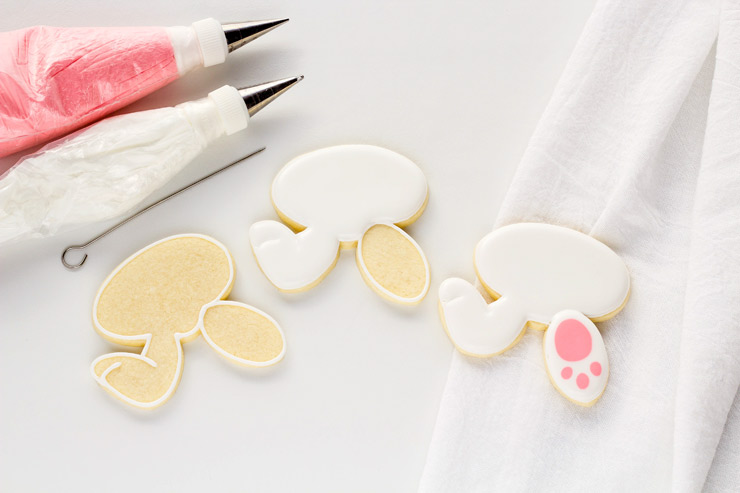
- Outline the bunny with the white royal icing.
- Flood the left foot and the tush area with the white icing and let it dry for about 10-20 minutes
- Then, flood the oval foot with the white icing.
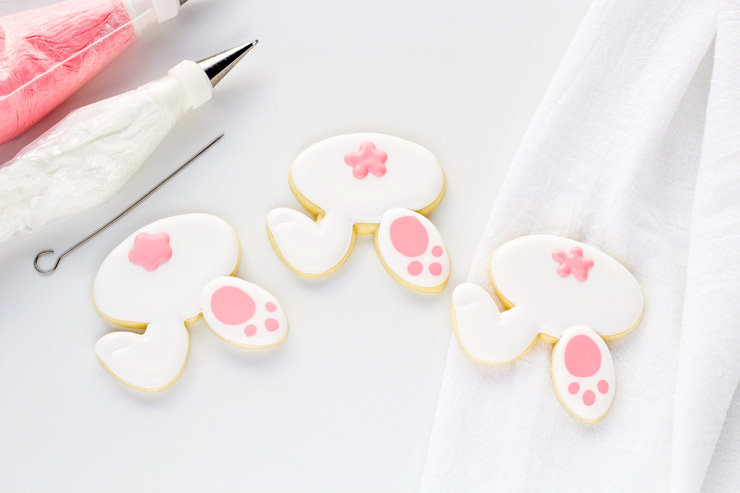
- While the icing on the foot is wet, pipe the paws with the pink icing and let it dry for about an hour or so.
- Pipe the cute little pink bunny tail because let’s face it, the tail is the cutest part.
- Let the cute little bunny bottoms dry completely.
Let’s Decorate the Bunny Faces
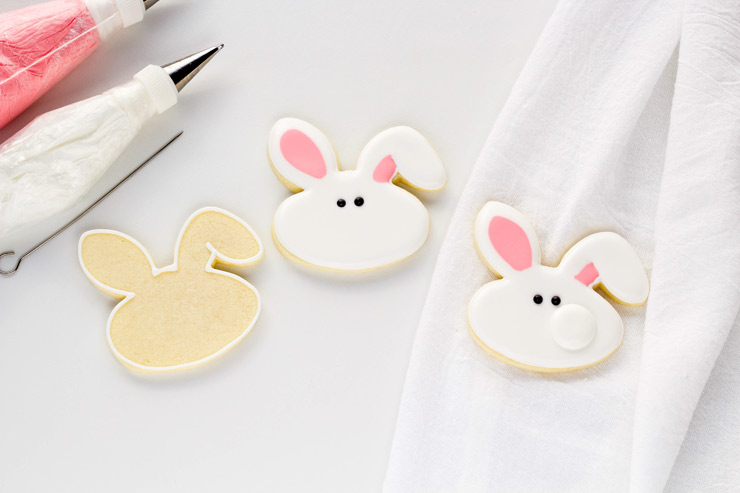
- Outline and flood the bunny face with the white royal icing.
- While the icing is wet, pipe the pink on the inside of the ears and use the turkey lacer to help move the icing into place.
- Next, add the 4 mm black pearl dragees and let the cookies dry for about 20 minutes.
- Add the cheeks one at a time with the white royal icing. Let the icing dry for about 20 minutes before you add the second cheek. Piping them one at a time will allow the first cheek to crust over and help keep the cheeks separate so they don’t run together and make one big blob.
- Let the cheeks dry for several hours and add the nose with the pink icing and then let the cookie dry completely.
These will make a great gift for teachers and co-workers because they’re so darn cute!
If you don’t already have this cutter I think you need it or one like it that has the floppy ear. Okay, maybe it’s my cookie obsession that thinks every cookie decorator in the world needs every cute cookie cutter that’s ever been made. I wish there was a way we could make that happen, but since we can’t, you should go pick out some Easter cookie cutters and have fun decorating.
More Cute Easter Treats:
Easter Pies
Baby Bunnies
Bunny Paw Thumbprint Cookies
Easter Cookies with a Twist
Speckled Eggs
Bear hugs,







I was in my local cake supply store on Monday. I stopped & stared at all the cute Wilton Easter cutters, and, sternly told myself to WALK AWAY while I pictured my overflowing Easter cookie cutter bin.
Of course, now that I read this post, I’m just going to have to get a bigger bin.
I am a total cookie pusher! Sorry you got sucked in! LOL
I’ve done cakes for 40+ years, and just starting to do cookies. It seems to be different techniques. Your tutorial looks like it would be quite helpful, if only I could see the whole cookie not just the edge. ??? Do you use the same piping bag for the outline and the flooding? Or are they a different consistancy? Thanks in advance.
I use 15 second icing for outlining and flooding. It makes life simple to use one consistency! 😉
You are so awesome! Thank you for a great tutorial! I love watching your videos!
Thanks Karyn! I love making them for everyone. Have a great weekend! 😉
Brilliant!
I am IN LOVE with your cute bunny tushies! I MUST NOW GET THE FLOPPY EARED CUTTER SO THAT I CAN MAKE THE TUSHY! Like you, I have “one too many” bunny cutters but I MUST HAVE ONE MORE!
This is such an adorable set of cookies, Lisa! You AMAZE me every time I open my email and see a message from you.
By the way, any updates on when we can see you in Martha’s magazine? SO EXCITING!
Lisa, These bunny cookies are just adorable! As always, I enjoyed the video tutorial. Have a Happy Easter! Joan
Lisa, you’re so clever! These are adorable. Simple with a big impact. I’ve got the cookies baked and the icing made. Going to try these tomorrow. Thanks gal! 🙂
I can’t find these cookie cutter. Would you have an idea as to where I can get one. I tried amazon, wilton.. Thank you in advance. I need one desperately for a birthday party.
Hi Debbie,
It’s the Wilton Bunny cookie cutter. All you have to do is flip the bunny head upside down and make the feet. Easy peasy lemon squeezy! 🙂 Enjoy!
Thanks for your tutorials, you are awesome. I learn so much.
Wow, these cookies look delicious. I look forward to making this soon.