Five Cute Bunny Cookie Cutters by The Bearfoot Baker
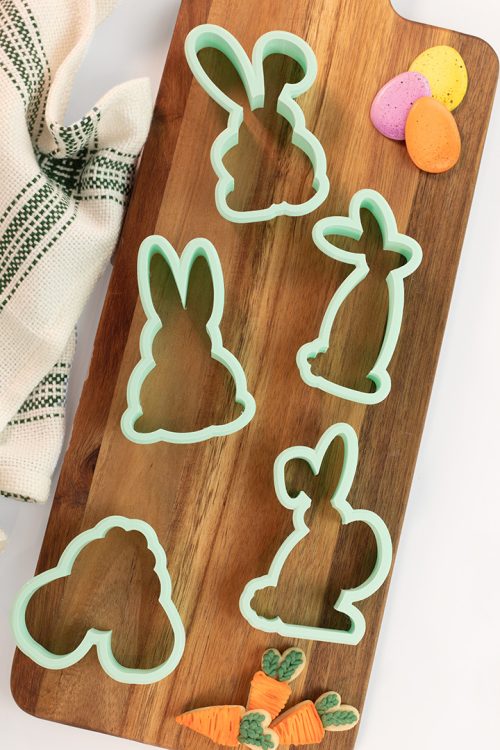
If you would have told me years ago I’d have a life that included decorating cookies I probably wouldn’t have believed you. The good thing is, it’s true! I honestly didn’t think it could get any better, but guess what? It did! I have a 3D printer and I’m having a blast making cookie cutters. Here are five cute bunny cookie cutters I made and I can’t wait to show you how I decorated them. If you don’t have these cookie cutters don’t worry. The decorating tips can be adjusted to other bunny cookies so don’t feel any pressure to purchase these. You all are the master decorators and I can’t wait to search social media to see how you make your own bunny cookies for Easter this year.
Supply List for Five Cute Bunny Cookie Cutters:
(may contain affiliate links)
Recipes:
Cutters:
Royal Icing Colors
- Bright White- Americolor
- Super Black- Americolor
- Countess Pink- The Cookie Countess
- True Blue- The Cookie Countess
- Totally Brown- The Cookie Countess
- Mushroom Gray- The Cookie Countess
- Succulent Green- The Cookie Countess– cut a “V” in the tip of the bag to make the small leaves for the Tall Bunny.
- Positively Purple- The Cookie Countess
Airbrush System
Airbrush Colors- Edible Airbrush Colors by The Cookie Countess
Stencil:
FREE Royal Icing Transfers- Make them ahead of time so they will be dry when you make your bunnies.
- Royal Icing Eggs- FREE Colorful EasterEgg Cookie Decorations
- FREE Bunny Bottom Royal Icing Transfers
- Toothpick Roses– You only need a few.
Tools:
(some are optional)
Five Cute Bunny Cookie Cutters by The Bearfoot Baker
Enjoy the video!
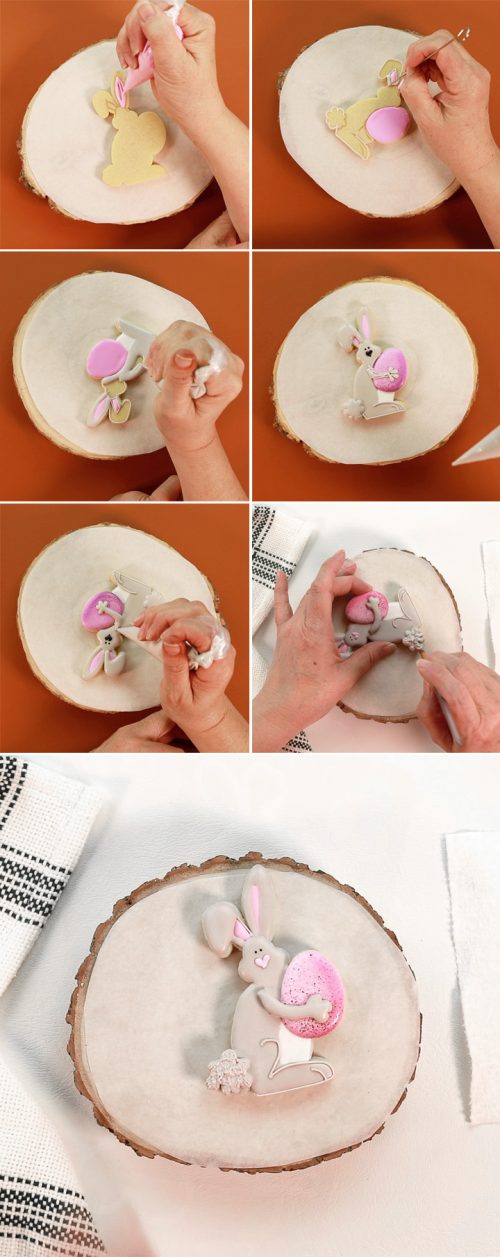
Bunny Holding a Pink Egg:
- These images may look a little different because of the way I added the egg royal icing transfer. It’s not a big deal, but I wanted the edges of the egg on the bunny to be pink instead of white. You can do it any way you want, but I wanted to show you what I did. Next time I will do the entire base white except for the inside of the ears because it will save a step or two.
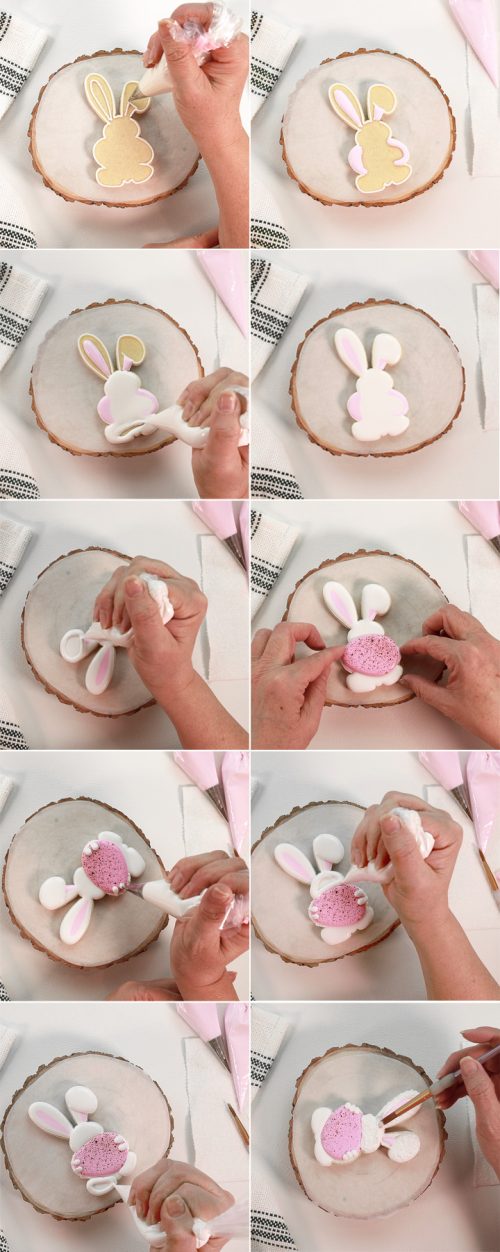
- Outline and flood the rabbit with white royal icing.
- Pipe some pink royal icing to the inside of the ears so he will be extra cute.
- Let the icing dry for a bit so it will set enough to add the rest of the details.
After the icing dries:
- Outline and flood the top part of the floppy ear so it will look thicker like a real ear.
- Add some royal icing to the tummy area and add the royal icing egg decoration.
- Place the eggs on the tummy and carefully push them on the cookie so it will dry and stay in place. Click here for the Free Transfer Patterns and tutorial for the Colorful EasterEgg Cookie Decorations. You will need to make the Extra Extra Large Egg Royal Icing Transfers for these bunnies.
- Once you add the egg to the tummy pipe the fingers on the egg with the outline consistency of royal icing. Pipe two and leave a space in between them. Let them dry for a few minutes before you add the center finger. If you don’t wait, the fingers will mush together and that’s alright if that is the look you want. If not, wait just a few minutes before you add the last finger.
- Outline and flood the face and feet with the white royal icing and let it dry. You want the icing to be dry enough so you can add the fur look. If the base icing is wet you can push holes in it with the paintbrush. That’s why it is important to let it dry for a few hours in front of a fan before you add the fur.
- Adding the fur is simple. Pipe some outline royal icing on the bunny and tap the brush up and down to make fur. This part is super fun!
Time for the cheeks, eyes, and nose:
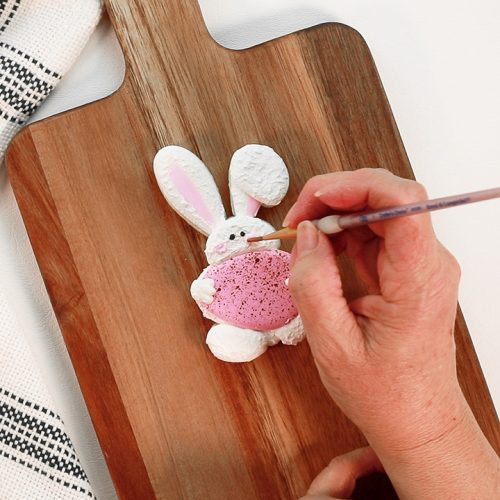
- Add the eyes with a dot of black royal icing.
- Pipe a dot for the pink nose and add a tiny amount of pink for the cheeks. Use a brush to tap the pink until you get the cheeks you like.
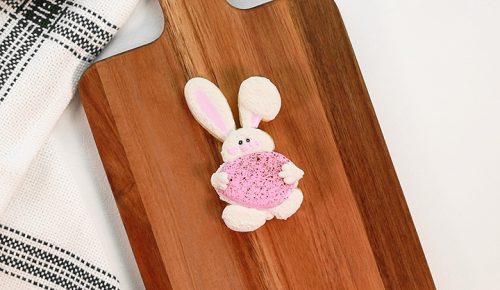
- You’re all done with this little guy so let’s move on to the next one.
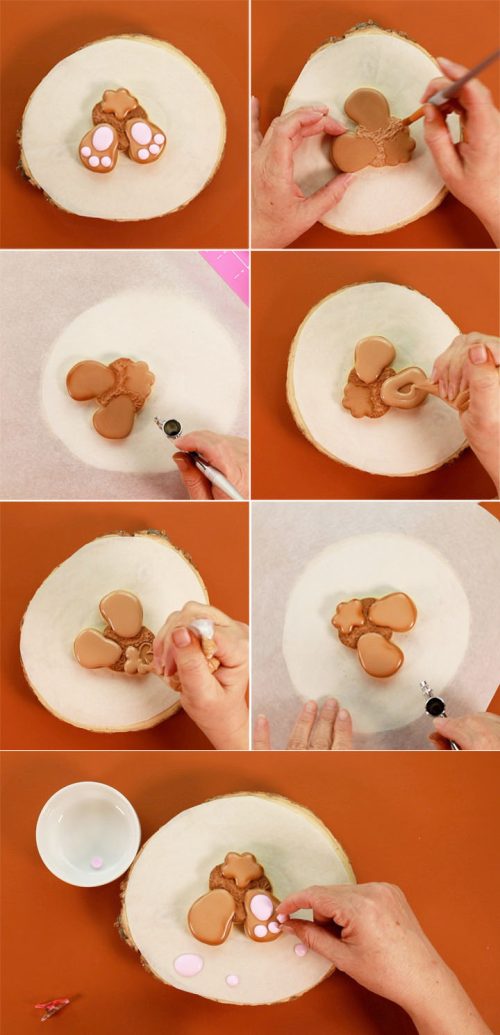
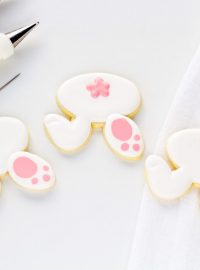
Bunny Bottom Cookie:
Before you begin decorating the bunny bottom cookies you might want to make the dots for the feet first. Here is the FREE Bunny Bottom Royal Icing Transfer pattern.
- Outline and flood the cookie with the brown royal icing and let it dry so you’ll be ready to add the feet and tail.
- Use the pattern above and cut out the feet so you can use a food-safe marker to trace them on the bunny.
- Add some brown outline royal icing to the bunny bottom and use a paintbrush to tap it into place so it looks like fur.
- Airbrush it with the totally brown edible airbrush color.
Feet and tail:
- Outline and flood the feet and tail so it will look like he has actual feet and real tail.
- You can add the pink royal icing transfers to the feet area or you can wait until the feet dry for a little while. If you wait, add a dot of royal icing and drop them in place.
- Airbrush the edges with the brown edible food gel color.
You’re done! Let’s move on to the tall bunny with the flower.
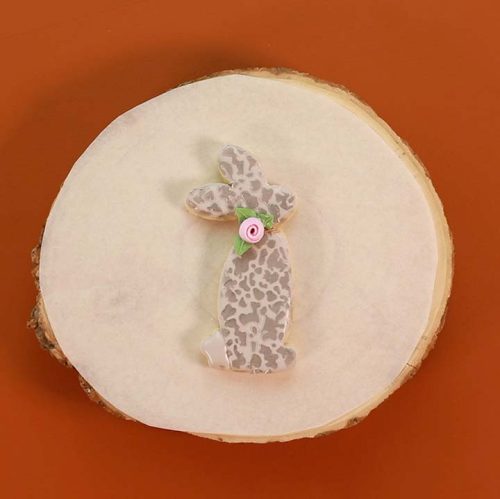
Tall Bunny with Flower:
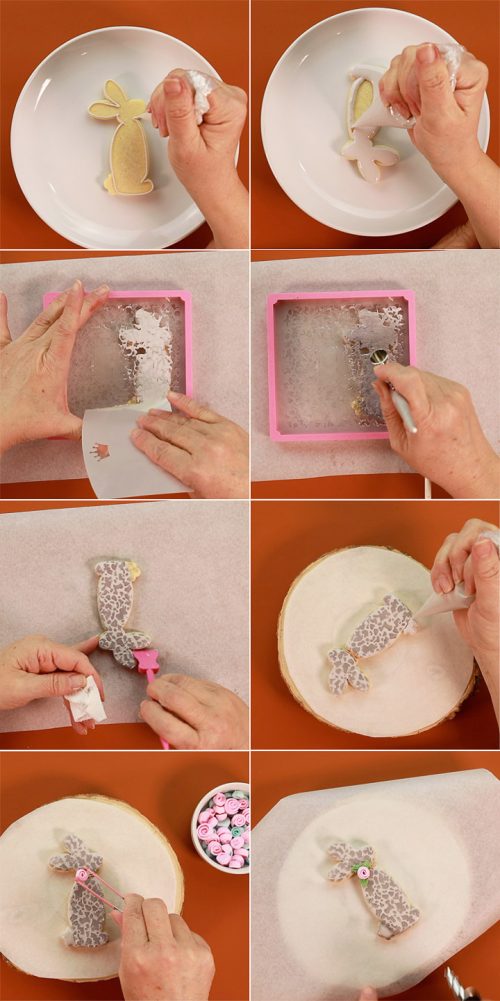
Find s simple decoration for this cute bunny cookie. I like royal icing roses and had plenty on hand. You can buy cute little flowers to add. You can even find them at Walmart. If you want to make your own here is my tutorial for toothpick roses. Making these are some of the most relaxing things you can make. I spend hours making them and I love every minute of it!
- Outline and flood the tall bunny cookie with the gray royal icing.
- Let it dry for a while before you stencil it.
- Use the Composition Notebook Cookie Stencil to add a cute little pattern. Before you remove the pattern, spray the icing with the Gray Matters edible airbrush color. Watch the video above to see this in action.
- Gently lift the stencil off the cookie.
- Use a Thingamagenie or your turkey lacer to remove the extra icing from the edge so you’ll get a nice clean look.
Add the flowers and tail:
- Pipe a few brown lines across the neck.
- Add a few leaves with the green royal icing.
- Add the rose.
- Outline and flood the tail.
- You can add a little airbrush around the edges or on the tail and feet. Do whatever you’d like and make it your own!
- So what do you think?
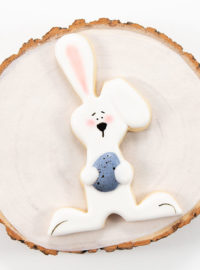
Cute Bunny Holding an Egg:
Before we begin you will need to make some Extra Large Royal Icing Eggs.
Here is where you can find the pattern for the Colorful EasterEgg Cookie Decorations.
- Draw the ear patterns with a food-safe marker and outline and flood them with the pink royal icing.
- Outline and flood the egg area with whatever color egg you’re going to add so the icing will match.
- Pipe the tummy area white so everything isn’t totally gray.
- Outline and flood the rest of the cookie with the gray royal icing.
- Let it dry until the icing forms a crust.
The egg, arm, and tail:
- Add some royal icing and place the egg transfer on the cookie so it will be super cute.
- Pipe another layer of icing to the tail and the bent ear and let it dry for a little while.
- Add the hand on the egg and the arm on the bunny so it will look like he’s holding the egg.
- Next, add a little royal icing to the tail and use the brush to make it look furry.
The cute little bunny face:
- Add the eyes with the black royal icing and the nose with the pink royal icing.
- Pipe a line for the leg and foot so it looks like he can hop away with his egg.
This one is finished so get ready for the last bunny cookie!
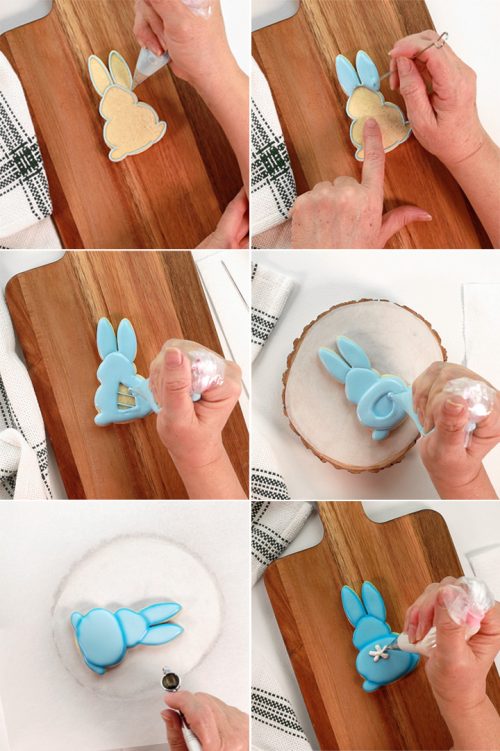
Bunny Backside:
Last but not least!
- Outline the bunny with any color of royal icing you’d like.
- Pipe a line at the top of the head so it will separate the head and ears.
- Also, mixing several different spring colors for this cookie works well. You’ll kind of get a “Peeps” feel and it makes people happy so be brave and mix up some color.
- Flood the ears and let them dry for about 15- 20 minutes before you flood the body.
- After the royal icing on the body dries for 15-20 minutes outline and flood the bunny bottom and let it dry so it will be ready to airbrush.
- Airbrush the edges, in between the head and ears, and around the bottom so he will look interesting.
- Add the white bunny tail so he will look complete!
Are you ready to decorate some bunny cookies because Easter is getting closer by the day so get ready? I hope you find something in this tutorial you like and if there is something you want to see let me know so I can try to make it for you.
Click here if you are interested in this set of bunny cookie cutters and be sure to save this page for the FREE Royal Icing Patterns.
Bear hugs,

