How to Hand Cut Cookie Dough
This post may contain affiliate links.

When I began my cookie adventure, I only used cookie cutters to get my shapes. I didn’t know much about how to hand cut cookie dough or using different cookie cutters to obtain the shapes I wanted. It was driving me crazy because everything I saw, I wanted to make into a cookie. Like these adorable wooden cutouts I got from Wal-Mart.

There are a ton of wooden shapes at craft stores. During the holidays they add cute seasonal ones that I can’t resist. The best part is they don’t cost much so go crazy and buy yourself some cute cookie patterns.
The world is full of cookie inspiration but unfortunately, they didn’t make a cutter for everything we see. I have learned with a little practice and a freezer, we can cut any shape we need.

See, the wooden shapes make cute cookies!
How to hand cut cookie dough supplies :
Sugar Cookie Dough
Pattern
Sharp Knife
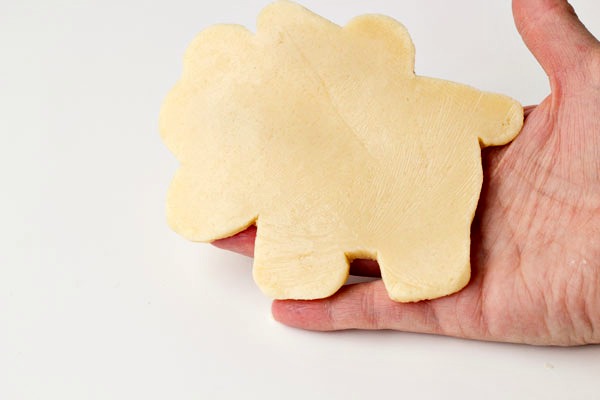
The secret to hand cutting cookies is to roll you dough out on a cutting mat or whatever you normally use. Then, place the mat with the rolled dough in the freezer for about 15 minutes. The dough will be nice and firm and easy to cut.
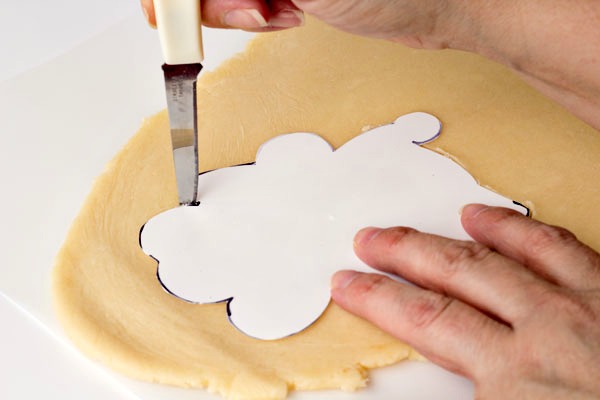 While your dough is chilling, you can trace and cut out your pattern. I know we all worry about food safety and this is one of the best tips I have ever seen. Sweet Sugar Belle came up with an awesome idea for a plastic cookie template with something we all have in our kitchen.
Trace the wooden pattern on the lid and cut it out with scissors.
Then, place the pattern on you very cold dough and cut around the template with the sharp knife.
 If your dough is cold, your cookies will cut very easy.
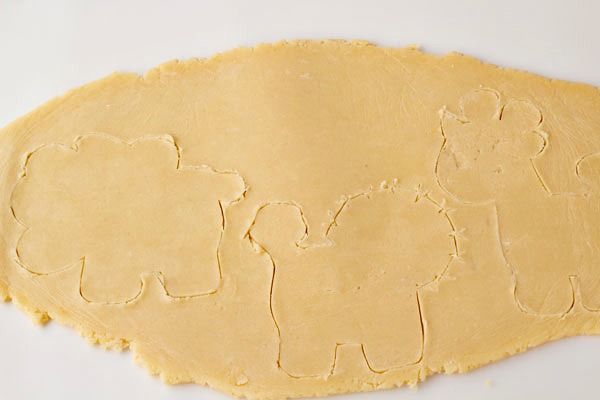
 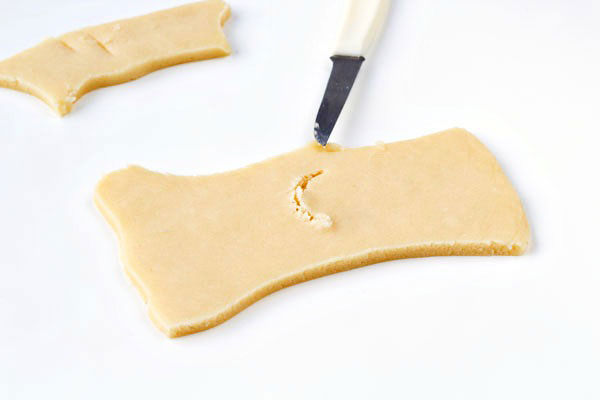 If the dough gets a little too warm, it will begin to tear as you cut. Just toss it back into the freezer for a few minutes and pick up where you left off when it is cold again. I can usually cut 3-4 cookies out before I have to place in the freezer again.
 If your cookie has a rough edge, use your finger to smooth it out.
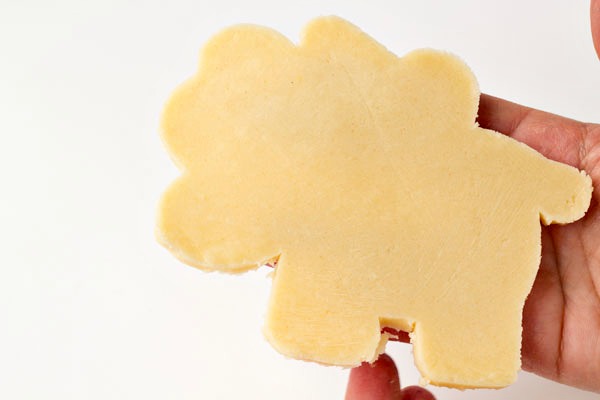
 That is all there is to it. Don’t be afraid to hand cut. I personally would not do an order or platter with more than 20 hand cut cookies because it does take a little more time than using a cookie cutter.
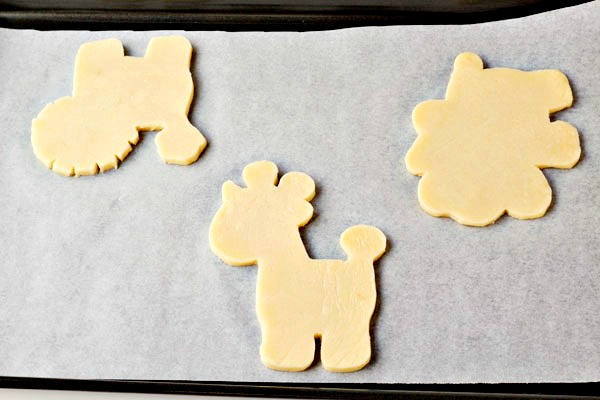 I made the cookies the same size as the wooden shapes but, you can always adjust the size on a copy machine and then trace your pattern on the lid. I do that if my shape is a little too small or too large. I wish my cutters were that easy to adjust but, this can work for cutters also. I have one that is large so I made a smaller template and I keep it in my storage container with the original cutter.
If you cookies ever have an uneven surface, here is a good little tip to smooth them out.
Come back Wednesday and I will share the tutorial to make these cute little zoo animals.
If you would like to make these cut little guys, click here for the tutorial.
Happy Creating,

so cute!!! 🙂
I will definitely be making a trip to Wal-Mart to check out these cute little wooden cutouts. Any possibility that you could outline them in black and white to create a downloadable template for us? Thanks for considering.
Hi Diane,
I will be happy to do that for you. I am out of town now and will add it next week! Thanks for the suggestion:)
GREAT tip Lisa! I personally can’t stand hand-cutting shapes but mostly because my dough always rips. I never thought to freeze it and will be slightly more open to hand-cutting now! 🙂 Thank you for sharing!
Great tips, Lisa! I hand cut quite a bit and this is exactly how I do it! 🙂
what a great idea! i HATE having to hand cut shapes but it would be a lot easier if it was cold.
Those zoo animal shapes are so cute! While just thinking about the effort of hand-cutting makes me sleepy, looking at your cute and custom cookies make it seem worth the while. Can’t wait to see your upcoming post on decorating those cuties!
Love these Lisa – and I never thought about chilling my dough before I cut out all those Doc McStuffin Cookies! I will NEXT time! 🙂
I use a designated x-acto blade knife to cut out my shapes. The smaller blade and oh so sharp tip makes for smoother lines, especially after freezing the dough.
Wonderful tips, Lisa! You pretty much describe how I do it. I use a sharp parrying knife to do my cutting. It has a nice, sharp, pointy end to get into all the corners if needed.
Adorable. Looking forward to the tutorial and templates. Thanks.
Thanks for the great tips on hand cutting cookies. I also love the idea of shrinking and enlarging the traced shapes to make them even more specific to decoraring needs. Did you hand cut each notch of the lion’s mane? At first glance I couldn’t tell which photo showed the cookies and which one was of the wooden shapes! Great work!
I love those little wooden shapes found in craft stores! I couldn’t find a fence cookie cutter for a “new house” theme and adopted the idea from Bake at 350 of using a wooden shape of a picket fence for a cookie cutter. It is a slight pain to cut out the shape but I was only making a few of the fence cookies. I now always look at the wooden shapes in the craft stores to add to my collection. I have picked up a cute train and airplane that I can’t wait to use. Thanks for all your ideas and templates!!
I have found that cutting the shape out of the center of the lid, then discarding the cut-out and tracing INSDE the lid is a lot easier than tracing around a cut-out. Benefits are, 1) the hand holding the template doesn’t get in the way; 2) don’t have to turn the pan in order to go around awkward angles; 3) no danger of leaving fingerprints or dents, if dough starts to soften, from pressing on the template.
I use this technique for cutting out fondant and gumpaste also. Sometimes I like to ‘glue’ my template to my dough or fondant with a smear of shortening to prevent it from sliding. By applying the shortening to the outside of the template, nothing is left on the finished product.
Thank you so much for the tip 🙂