How to Make Adorable Colorful Tassel Cookies
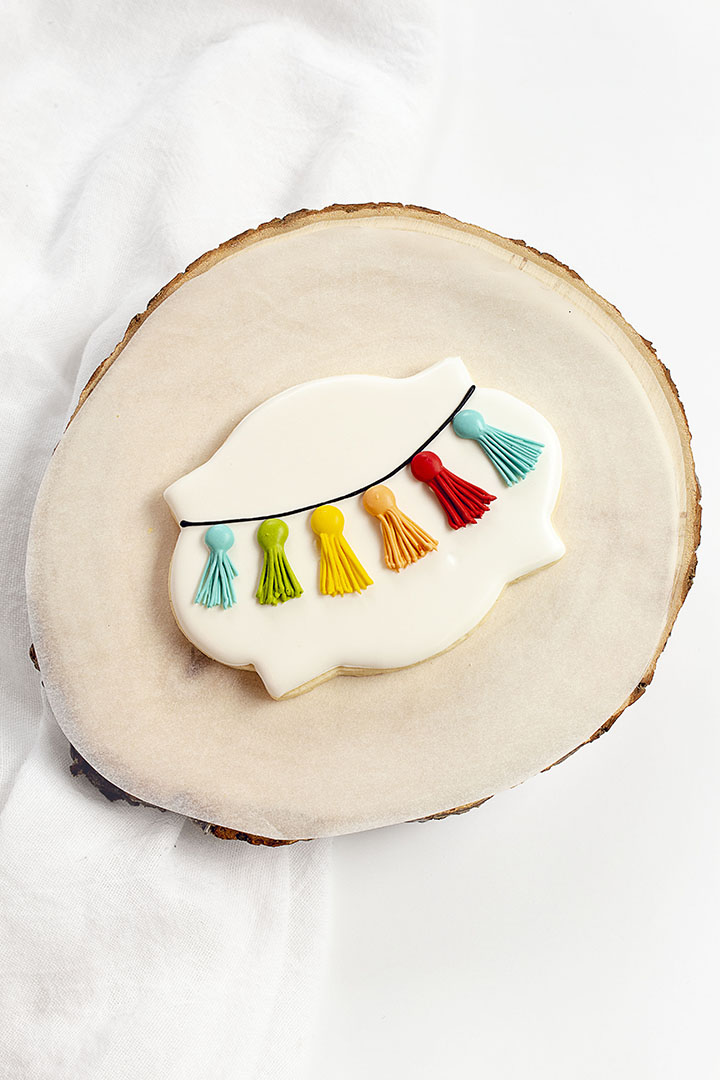
I love a little color in my life especially if it’s beautiful colors of royal icing like I used in these tassel cookies. Red, blue, green, yellow, and orange are wonderful colors, and making a plaque cookie is a great way to share those colors on a cookie in an organized beautiful way. I hope you like these cookies as much as I do and bake some for your friends and family. Let’s decorate!
Tassel Cookies:
Supply List:
(may contain affiliate links)
Recipes:
Cutter:
Royal Icing:
- White- Outline and flood consistency
- Black- Outline consistency
Tassel Templates:
How to Make Simple Tassel Royal Icing Transfers Tutorial– Click here for the full tutorial and video on how to make the tassels that were used to make these fun colorful cookies.
Tools:
- Turkey Lacer
- Wax Paper
- Foam Board
- Tipless Decorating Bag
- Food Tongs (Tweezers)- I struggled using these, but you might have better luck or you can use your fingers.
How to Make Adorable Colorful Tassel Cookies Video:
I hope you enjoy the video. If you make royal icing transfers ahead of time it will help you complete your cookies faster. If you have a birthday party or big order approaching, make some royal icing transfers a few weeks ahead of time. They’ll be dry and ready for you to decorate your cookies so things will go smooth and quick. I love royal icing transfers for that exact reason. It’s also a great way to use your leftover royal icing so there isn’t any waste. Royal icing transfers ROCK!
Let’s Outline and Flood our Plaque Cookies for our Tassel Royal Icing Transfers:
- Begin by baking your sugar cookies and let them cool completely before you begin decorating them.
- Make the royal icing and add a little white food gel color to make it nice and bright.
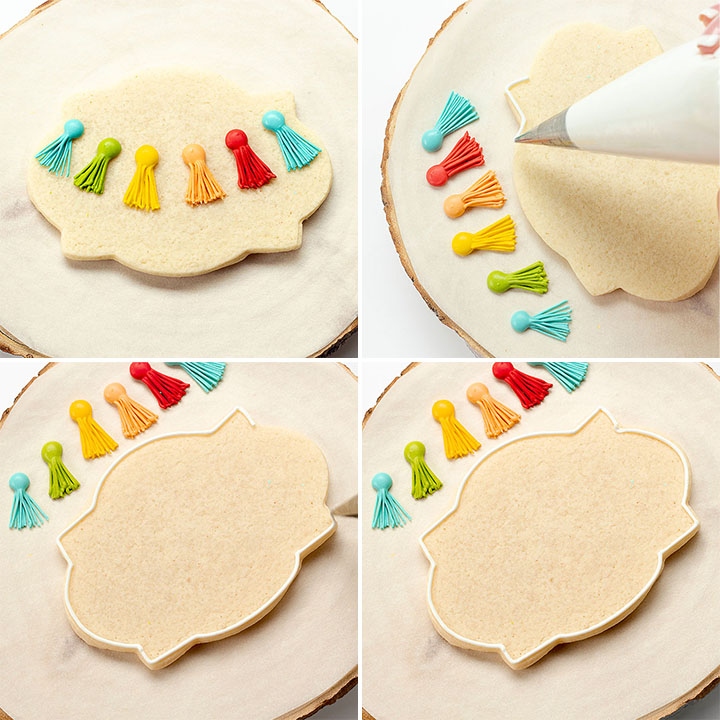
- Get your royal icing tassel transfers ready for this plaque cookie.
- Now you’re ready to decorate.
- Outline the cookie with white royal icing.
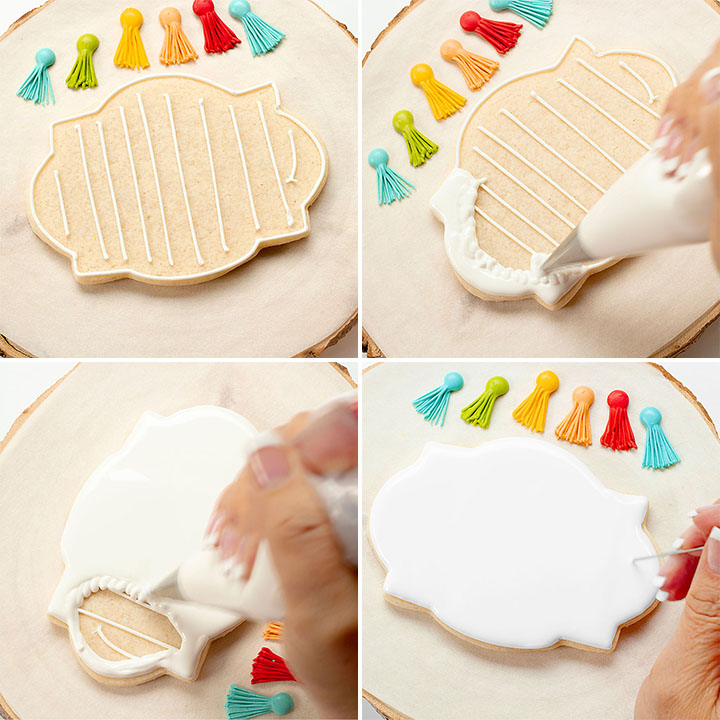
You might be wondering why I pipe all of those lines across the cookies after I outline them. Sometimes my royal icing will sink after it starts to dry. I think there are several reasons this happens and for me, it’s humidity and royal icing consistency. I’m not a scientist, but I do believe that is what causes the problem for me. I can control the consistency of my royal icing, but humidity is another story so I pipe the lines with my outline icing across the base of the cookie right before I add the flood consistency. This has helped me tremendously with the sinking problem.
If your icing sinks or forms craters you should try this method. If you are piping in a small area this is a great way to prevent air bubbles. It really does work for me and I hope it works for you too!
- Now that you’ve outlined the plaque cookie with the outline white royal icing let it dry for a few minutes.
- Next, pipe some lines across the base of the cookie with the same outline icing.
- Immediately flood the cookie with the flood royal icing and place it in front of a fan so it’ll dry with a nice smooth shiny surface.
- Let the icing dry completely before you move on.
Where Are You Going to Place the Tassels?
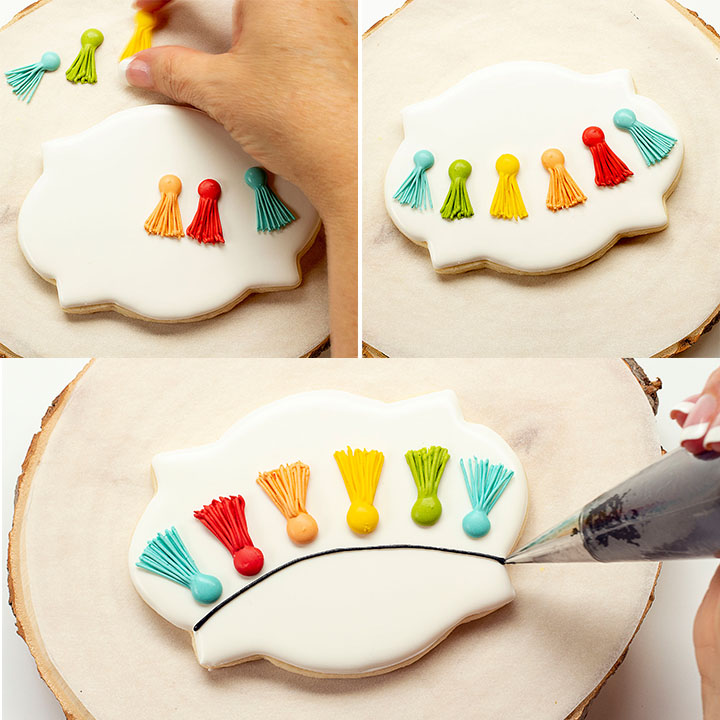
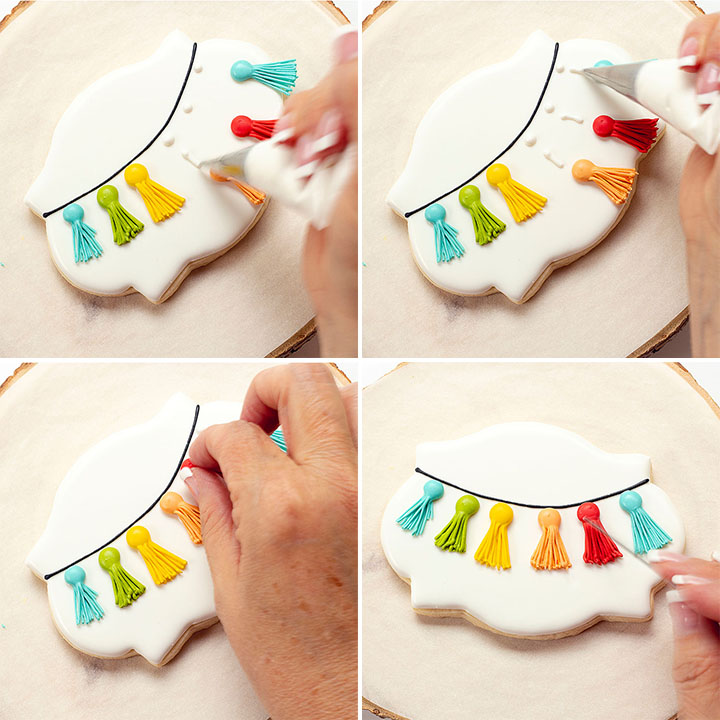
- Grab a set of your royal icing tassels and place them on the cookie. This is a great way to find out where you’re going to add them.
- Start in the middle and place the tassels where you want them and then work out towards the edges by spacing them evenly.
- Once they’re in place pipe a black line across the cookie. Get ready to glue them in place.
Glue on the Tassels Royal Icing Transfers:
- Push the tassels down a little and then place a dot on the base of the icing.
- Pipe a line below the dot.
- Place the tassels on the lines and dot and use a scribe tool or turkey lacer to gently nudge them into place.
- Let the cookies dry completely.
Enjoy Your Work and Eat A Cookie:
I don’t know about you, but when I look at my finished cookies I don’t always want to eat one. However, when its simple, colorful, and happy I need to take a bite. So enjoy your hard work even though you used royal icing transfers that were premade and take a bite out of your cookie. Now go have fun and enjoy the rest of your day!
Bear hugs,





Great video, Thanks! I will try theses.