Igloo Cookies That Will Make Your Heart Happy
Have you ever seen an igloo? I’m not talking about igloo cookies, I’m talking about a real-life you can’t build a fire to stay warm or it will melt all over your head kind of igloo. I haven’t, but I want to. I’d like to stay in one for a few hours, drink a cup of hot cocoa and see if an igloo is warmer than a tent. Even though I haven’t been in one I bet it’s warmer than the fabric of a tent.
Unfortunately, we don’t get enough snow here to make an igloo, but someday I want to go inside one and make myself at home for a few hours. I know one thing for sure, I’ll have some igloo, mitten, and hat cookies ready so we’ll have some proper igloo snacks.
Supplies for Igloo Cookies:
(may contain affiliate links)
Cookie Cutter:
- Winter Shape Shifters Cookie Cutter Stencil Set by Sweet Sugarbelle – I used the igloo cookie cutter and stencil. If you don’t have these cookie cutters you can use any gum drop cookie cutter or cut the bottom off of an Easter Egg Cookie Cutter.
Royal Icing Colors:
- Blue – AmeriColor Soft Gel Paste Food Color Sky Blue was used to make a light and darker color of blue
- White
Tools:
- Turkey Lacer
- Tipless Decorating Bags
- Food Safe Marker
- Coarse Sugar or Sugar Crystals
- Food Safe Marker
- Paintbrush for the lines on the igloo
Igloo Cookies That Will Make Your Heart Happy Video:
See if these give you a chill.
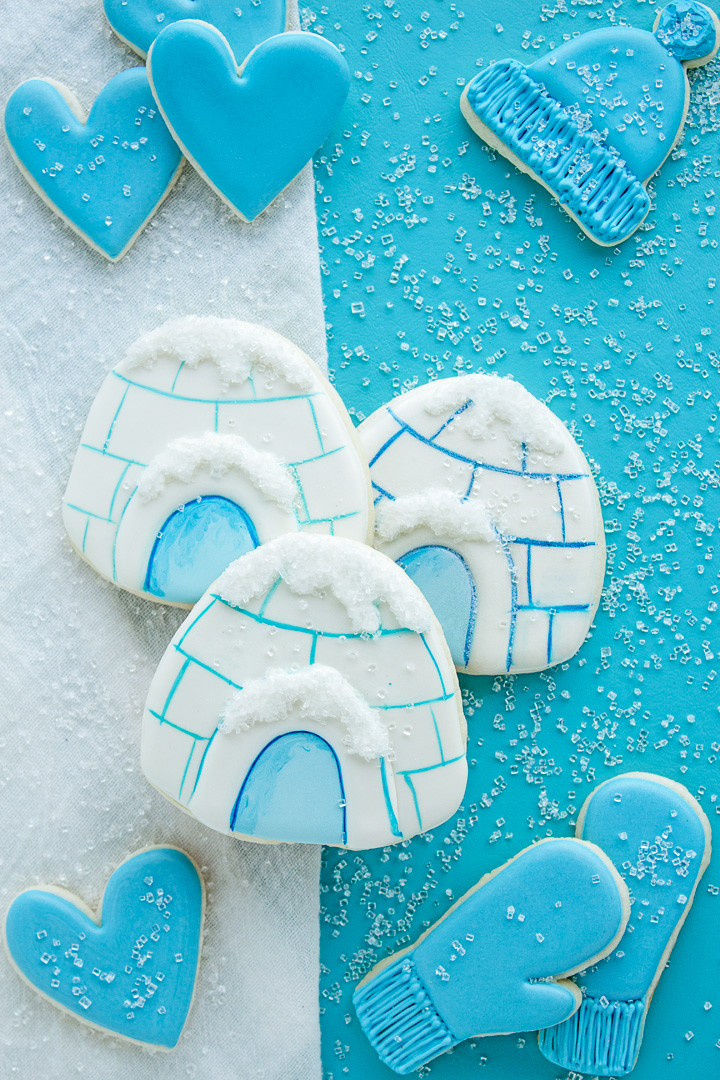
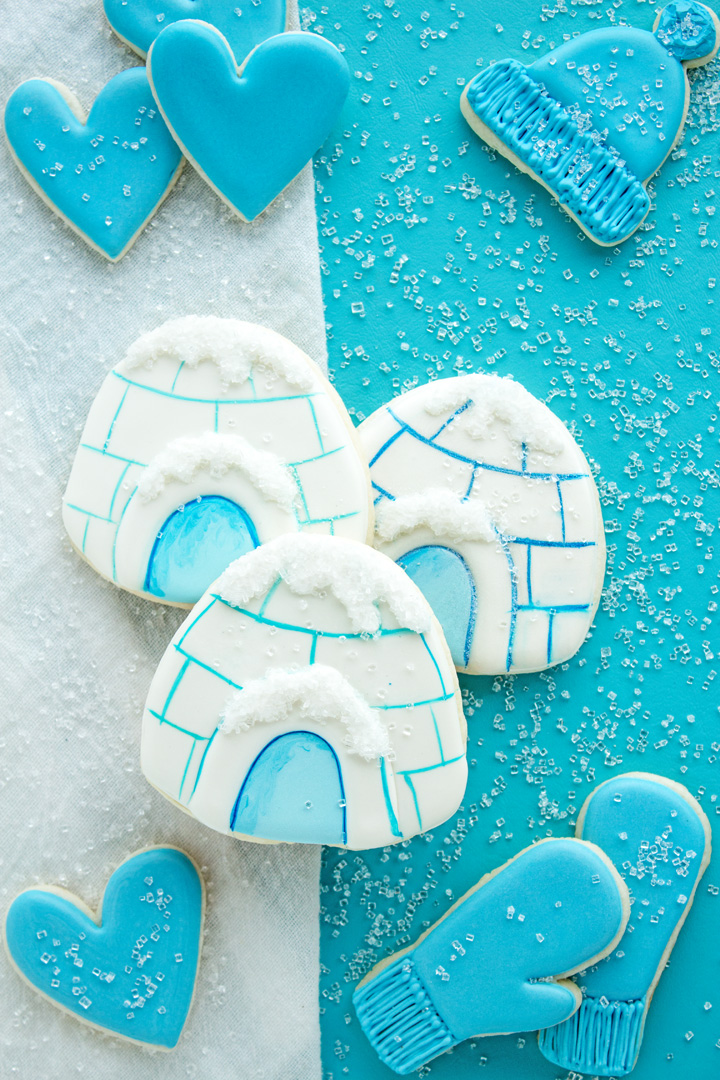
The great thing about Sweet Sugarbelle’s Winter Shape Shifters Cookie Cutter Stencil Set is it includes a stencil that will help you make all the igloo cookies the same way. Now, if you notice in the image with the three finished cookies you’ll see that one was lined with a darker shade of Sky Blue and two were outlined with a lighter blue. I prefer the lighter blue so I mixed a little white food gel color with the Sky Blue until I got the shade I wanted.
Also, just because you have a stencil doesn’t mean you will get every line perfect. Look at the igloo cookie on the top. Look at the right side of the door. See how the line is off? I didn’t use the stencil the way I should so I messed it up. But you know what? It’s a cookie. I’m not going to stress. It tastes the same and looks good enough.
Put the pattern on the cookie:
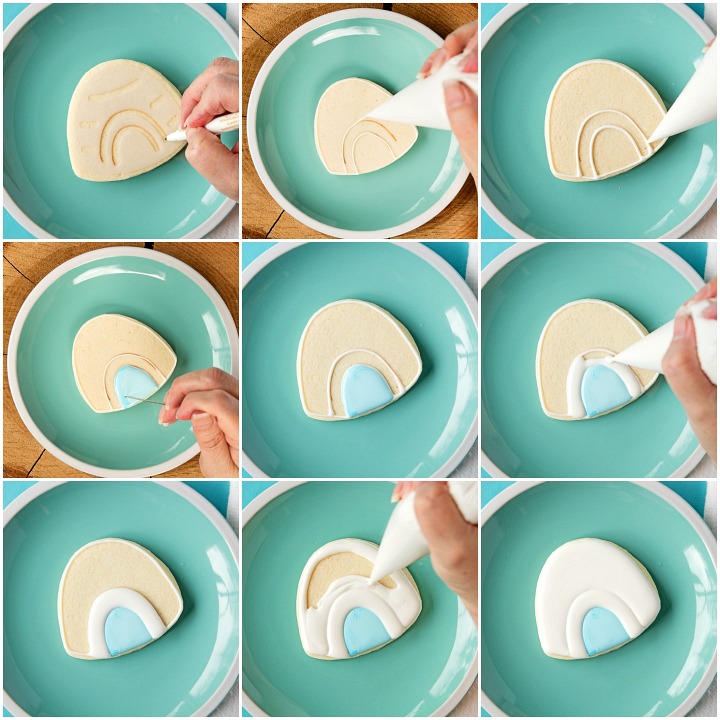
- The igloo cookies in the pictures above will show you how to make them without a lot of explanation.
- Use the stencil and the food-safe marker to trace the pattern on the cookie.
- Next, outline the igloo cookie with white royal icing.
- Flood the door area with the blue royal icing.
- While the icing is wet, add a little darker blue to the door area.
- Use the turkey lacer to blend the colors.
- Let the icing dry before you add the white.
Now for the snow on the igloo:
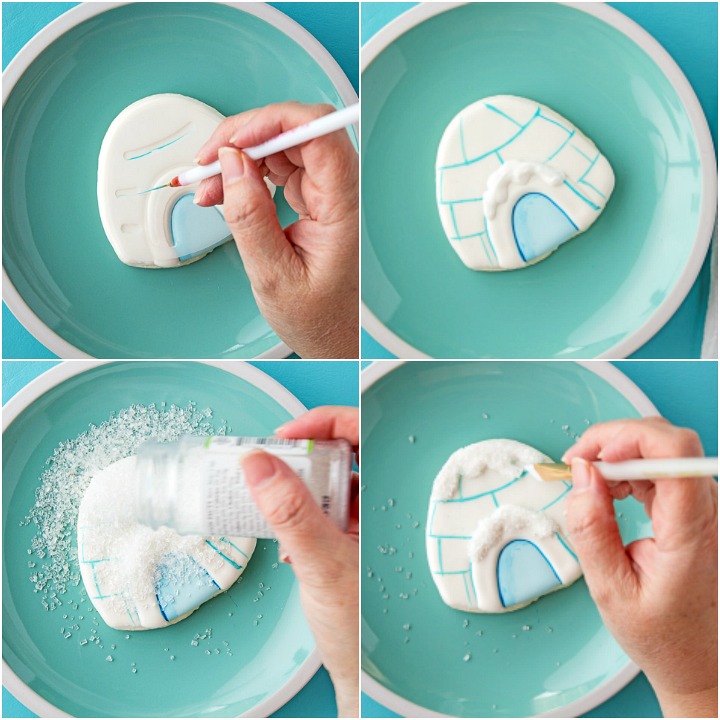
- Outline the area above the door with the white royal icing.
- Let it dry for about 10 minutes until it crusts over.
- Then, flood the top of the igloo and let it dry completely.
Paint the lines:
Now for the fun part!
- Use the template to place the lines on the cookie. You can use a food-safe marker or a paintbrush. I prefer the paintbrush but it has been a while since I’ve detailed small lines and I was a bit rusty.
- Next pipe a little white royal icing over the door and at the top of the igloo and sprinkle them with coarse sugar.
- Shake off the excess.
- Let the cookie dry completely.
If I ever get my own igloo I’ll be sure to invite you over so we can eat cookies and drink some hot cocoa. I can’t wait!
Bear hugs,







Cute!
Polar bears are extremely cute! How many seconds is your icing for the flooding.
Hi Janine,
I normally use 15-second icing unless I state otherwise. 😉
Just pull a knife through the thinned icing and start counting one-Mississippi, two-Mississippi until you get to 15-Mississippi. If the line disappears at 15-Mississippi then you have 15-second icing. 😉
Love them!!
So simple- and so cute! Thank you for a great tutorial! Easy to understand, very detailed, and easy to follow!