How to Make a Little Gnome Cookie
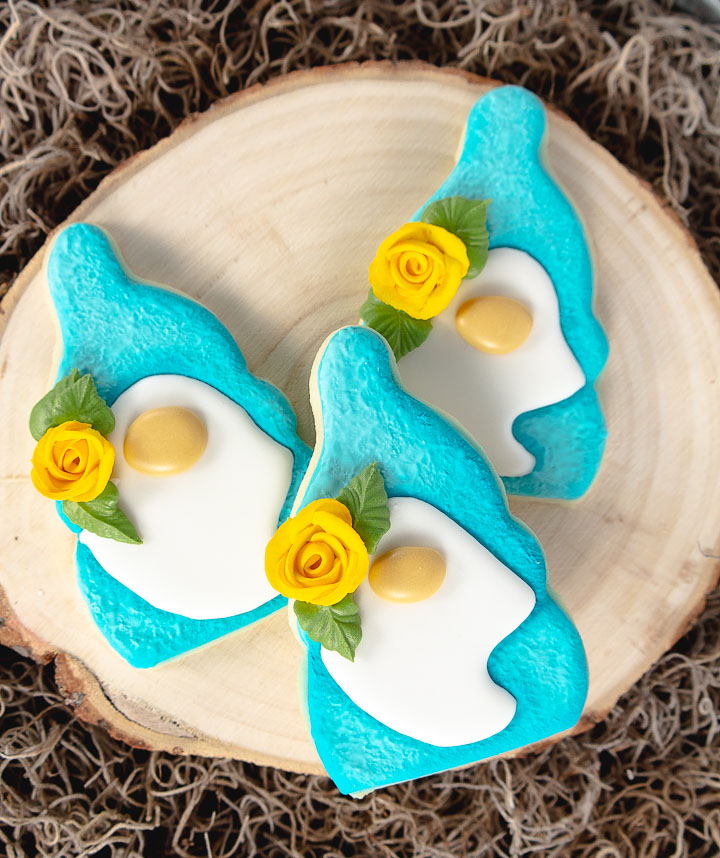
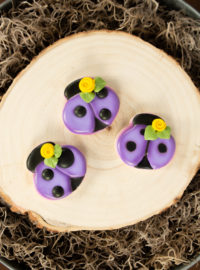
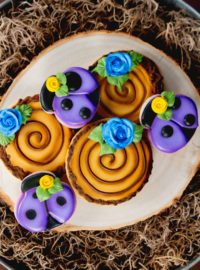
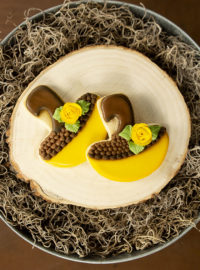
Remember when I told you about the cookies I saw in my dream? You’ve seen the acorn, flower, woodland log, and the purple ladybugs. All that is missing is a little gnome cookie. How about three gnome cookies instead of just one?
I’ve seen gnome cookies all over the web for quite some time, but this set is about more than one cookie. I’m going to share the entire set with you soon and I hope you like them as much as I like them. Because when you dream about it, you need to make it. So let’s decorate the gnomes and then I’ll share the set a little later.
How to Make a Little Gnome Cookie Supply List:
(may contain affiliate links)
Recipes:
Cookie Cutters:
- Christmas Gnome Cookie Cutter from Truly Mad Plastics– I love this cookie cutter. You can also use a Santa face cookie cutter if you trim off the bottom of the beard.
Royal Icing Colors:
- Beachy Blue Gel Icing Color- The Cookie Countess– Gnome clothes
- White- Beard
- Green- The Cookie Countess Gourmet Green– Rose leaves
- Fleshtone is AmeriColor Ivory– Gnome nose
Royal Icing Roses:
- Royal Icing Rose Tutorial– Make these ahead of time so they’ll be dry when you want to add them to the gnome cookies.
Tools:
- Turkey Lacer
- Tipless decorating bags from Flour Box Bakery, or The Cookie Countess
- PME #2 Decorating tip or you can use the tipless bag without a decorating tip. It’s your choice.
- #352 Leaf tip
- Paintbrush
Optional:
- Food-safe marker
- Cookie Turntable Swivel for Cookies and the Mini Mat
- Fan to dry your cookies
Airbrush System:
Airbrush Colors:
How to Make a Little Gnome Cookie Video:
I’m not sure about you, but that blue is one of my new favorite colors. Thanks, Cookie Countess for giving us Beachy Blue!
Outline and Flood the Gnome Cookies:
Cookie Dough & Baking Your Gnome Cookies
- Every sugar cookie begins with a good sugar cookie recipe and if you’re looking for one, here is a link to my Sugar Cookie Recipe. I love the way it bakes and how the cookies hold their shapes without spreading all over your baking sheet. So if you’re looking you might want to try it.
- These little gnome cookies were cut out with a Christmas Gnome Cookie Cutter from Truly Mad Plastics. However, I trimmed off the bottom of the beard so my gnome would look he has a little short and round body.
- Next, bake the cookies and let them dry completely before you begin to decorate so the royal icing doesn’t fall off the sides of the warm cookies. Trust me, that’s not fun! Been there, done that and should have bought a t-shirt!
Royal Icing:
- When do you make your royal icing? Do you make it the night before or the morning you decorate your cookies? I’ll be honest with you, I do both. I find it’s usually better to let your royal icing rest a bit before you mix your colors so the air bubbles have a chance to rise to the surface. You can pop them with a toothpick, turkey lacer, knife, or the back of a spoon. (Poor air bubbles don’t stand a chance with cookie decorators!)
- I guess you can say I’m old school these days because I love tipless decorating bags, but I’m adding my favorite PME tips to help me achieve nice round outlines. So for these little gnome cookies, I used a #2 PME tip.
- Another old school thing is to mix two royal icing consistencies for decorating. They are outline consistency (thick) and flood consistency (thinner) because it allows me to have a nice clean outline and a flat smooth filling for each section.
- When I make my royal icing it’s pretty thick when I turn the mixer off because it seems to sit well until I’m ready to use it. Thinner icing wants to separate as it sits and waits. I guess it gets bored and tired of the water we’ve added so thick works best for me.
- When mixing the outline icing I add a little water to it because I want it thick, but I also want it to flow out of the bag without making my hand and wrist hurt as I try to squeeze the bag. The outline icing used here was a bit on the thick side so I should have stopped and thinned it down a little, but I didn’t. Sigh.
- The flood consistency should have been a 15-Second Royal Icing Consistency for me, but I chose to try something a little different and it didn’t work. The consistency was 10-Second Royal Icing and it didn’t work because of the humidity here in Tennessee. I knew better, but more on that later.
Colors & Consistencies:
- The blue gnome color is Beachy Blue Gel Icing Color by The Cookie Countess and I think it’s my new favorite color. The great thing is she also has the Beachy Blue Airbrush Color so you don’t have to guess what color you need to use when you airbrush. She’s so smart!
- The white royal icing is flood consistency only.
- The flesh tone is Americolor Ivory and you’ll need an outline and thick 15- 20-second flood consistency to make the nose super puffy.
- The green that was used for the leaves is The Cookie Countess Gourmet Green and you’ll need an outline consistency to make them hold their shape and make the little wiggly waves.
Time to Decorate:
Now that we’ve covered the recipes, consistencies, and colors, this part will go pretty fast so hold on tight!
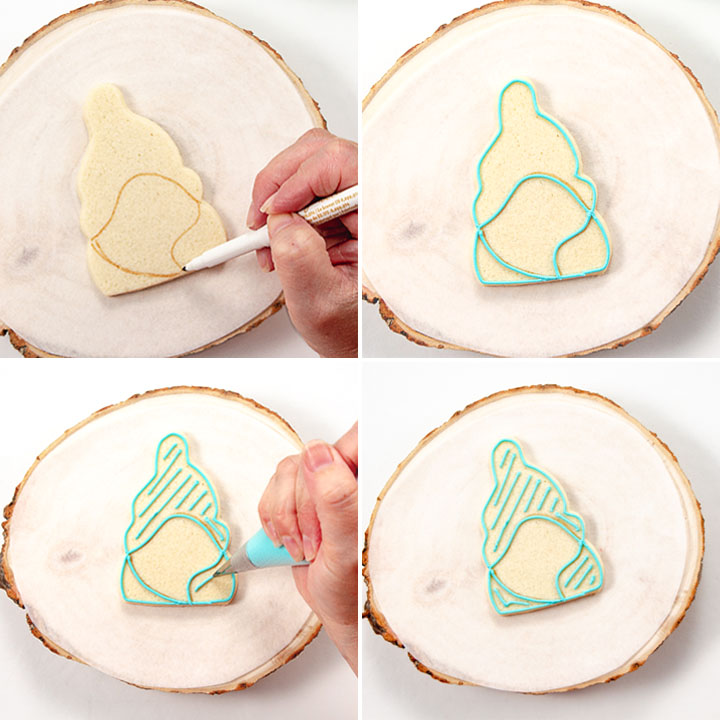
- Draw the gnome’s beard and hat on the cookie with a food-safe marker.
- Outline the cookie with the outline royal icing consistency.
- If you have issues with your royal icing sinking as it dries you can help prevent it by piping a few lines on the cookie where you’ll flood. The lines act as a support and will hold your icing in place most of the time. More on that in a minute.
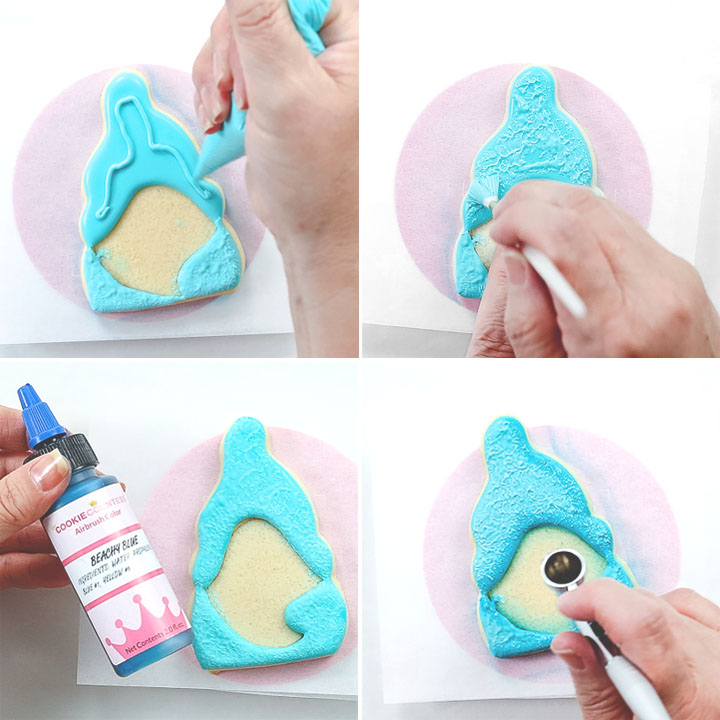
- After you add the lines, flood the hat and body with the blue royal icing. Look at the third picture in this collage. Do you see how my royal icing sank? I had the support lines and it decided to sink anyway! UGH! I know what I did wrong. Do you know? I let the support lines dry for quite some time before I started adding the flood royal icing. I’m not a scientist or anything, but what I think happened was the outline royal icing was thirsty because it was dry so it tried to drink the water from the flood icing. The poor flood icing wasn’t a match for that kind of thirst so it let the outline have the water. And it was exhausted from the battle and crashed! Or as we call it, the icing sank. So don’t wait too long before you flood on your support lines. Do it fast so both consistencies have water and they’ll play nice together. If not you need to come up with a plan on how to fix that sinking royal icing.
- My idea of fixing these cookies consisted of adding some flood icing to the flooded areas and using a paintbrush to stipple the icing so the cookie looked like it had texture instead of big old ugly sinkholes. It worked! Keep this in mind if you ever need to cover up a royal icing sinkhole in your cookies. The texture is a beautiful thing, my friend!
Stippling and Airbrushing:
- One of the good things about adding a stippled texture to a sugar cookie is adding an airbrush color right away. You don’t have to wait around for it to dry completely before you begin.
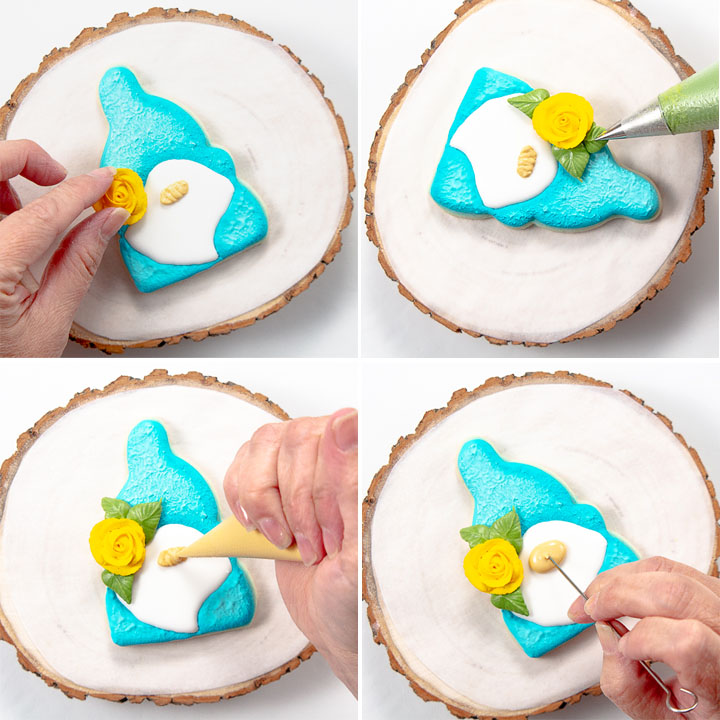
- Imagine the sun is shining at the top left of the last image in the collage. If the sun is shining down on the gnome cookie, you don’t need to airbrush that side of the hat because the sun would make it nice and bright. Everything else will be airbrushed.
- Watch the video to see how the airbrush color is added. You don’t spray a dark line all at once. You can spray a thin line and then repeat in a few minutes so the airbrush color won’t gather up and run down the side of your cookies. Light layers work best.
Gnome’s Beard:
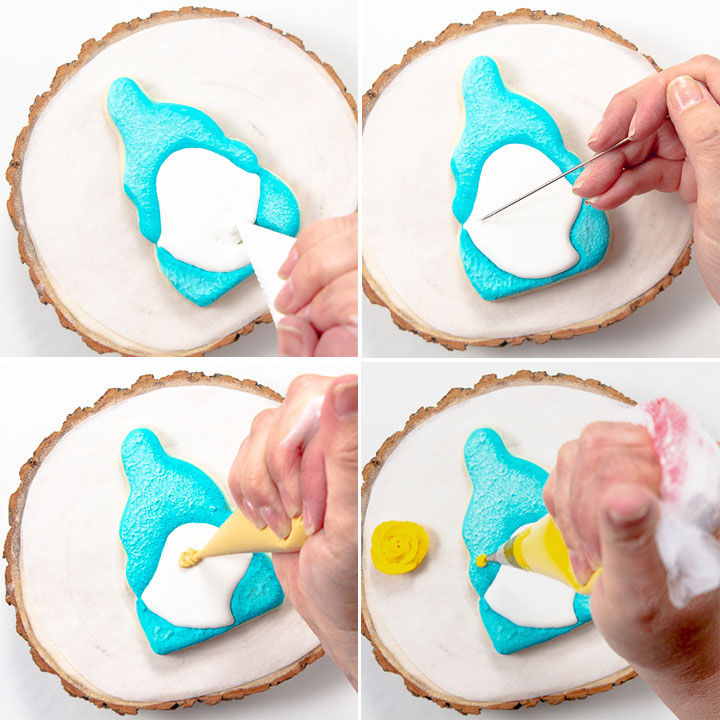
- Add the gnome’s beard with the 15-Second flood royal icing. Use a turkey lacer and gently move it in place.
- Add a yellow dot of icing where you want to add the rose. The reason you can’t add the rose when the flood royal icing is because it will mess up when you airbrush him.
- Pipe a thick zig-zag line for the nose and then pipe the flesh tone flood royal icing.
- Pipe the green leaves with #352 tip. You can add two or three leaves depending on what you like.
- Now pipe the thin flesh tone royal icing over the thick zig-zag line so the nose will be nice and puffy and use a turkey lacer to smooth it out.
Now we know how to make a little gnome cookie and add a few friends so he doesn’t get lonely. Next up I’ll share the entire set with you. Using The Cookie Countess gel colors and airbrush colors make life easy. I just ordered her new Wedding Set Colors and I can’t wait for them to arrive!
Anyway, stay tuned for the full “Dream Set” photos tomorrow! I think you might like them!
Bear hugs,






Delicious!! will have to try it out