How to Make Marshmallow Cookies that are on Fire
I’ve missed you all this week! It may seem like I haven’t been working on cookies, but things aren’t what they seem because I’ve been working like crazy on a project and I can’t wait to share it with you. Since I’ve been missing you so much I thought we could build a cookie campfire and make some marshmallow cookies that are on fire.
Are you good at roasting marshmallows over a fire? I’ve been roasting them for years and somehow they always end up with a big ole flame turning those cute little marshmallows into scared-toasted goodies. Since I always catch them on fire why should our cookies be any different? I think the flame is really cute and their big scared eyes and face definitely get my attention.
Since we can’t share a warm toasty campfire this fall let’s share some warm toasty marshmallow cookies that are on fire and pretend we’re together laughing and sharing awesome cookie stories.
Supply List for Marshmallow Cookies that are on Fire:
(may contain affiliate links)
Recipes:
Cookie Cutters:
- Birthday Cookie Cutter Stencil Set by Sweet Sugarbelle or you can get it at Country Kitchen Sweetart,
Royal Icing Colors:
- White
- Red
- Orange
- Yellow
Tools:
- Turkey Lacer
- Tipless decorating bags from Truly Mad Plastic or Flour Box Bakery
- Brown Food Safe Template Marker by Sweet Sugarbelle or Sweet Sugarbelle’s Tan Template Markers
- Black Edible Art Edible Paint
- 0/10 Script Liner Paintbrush– Use any detail brush you have or if you’re looking for one this is a great set for details.
Royal Icing Transfers:
(Use any size eyes you want and make them about a week before you decorate the cookies so they’ll have time to dry.)
Airbrush System and Airbrush Colors:
The Cookie Countess Airbrush Colors:
- Cookie Turntable Swivel for Cookies and the Minimat
- Fan to dry your cookies
- Edible Art Edible Paint – Brush Pen
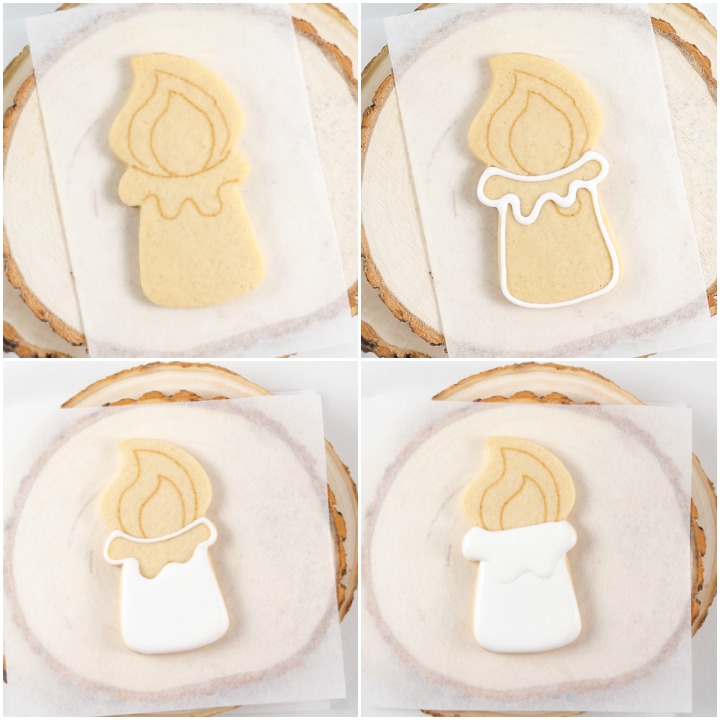
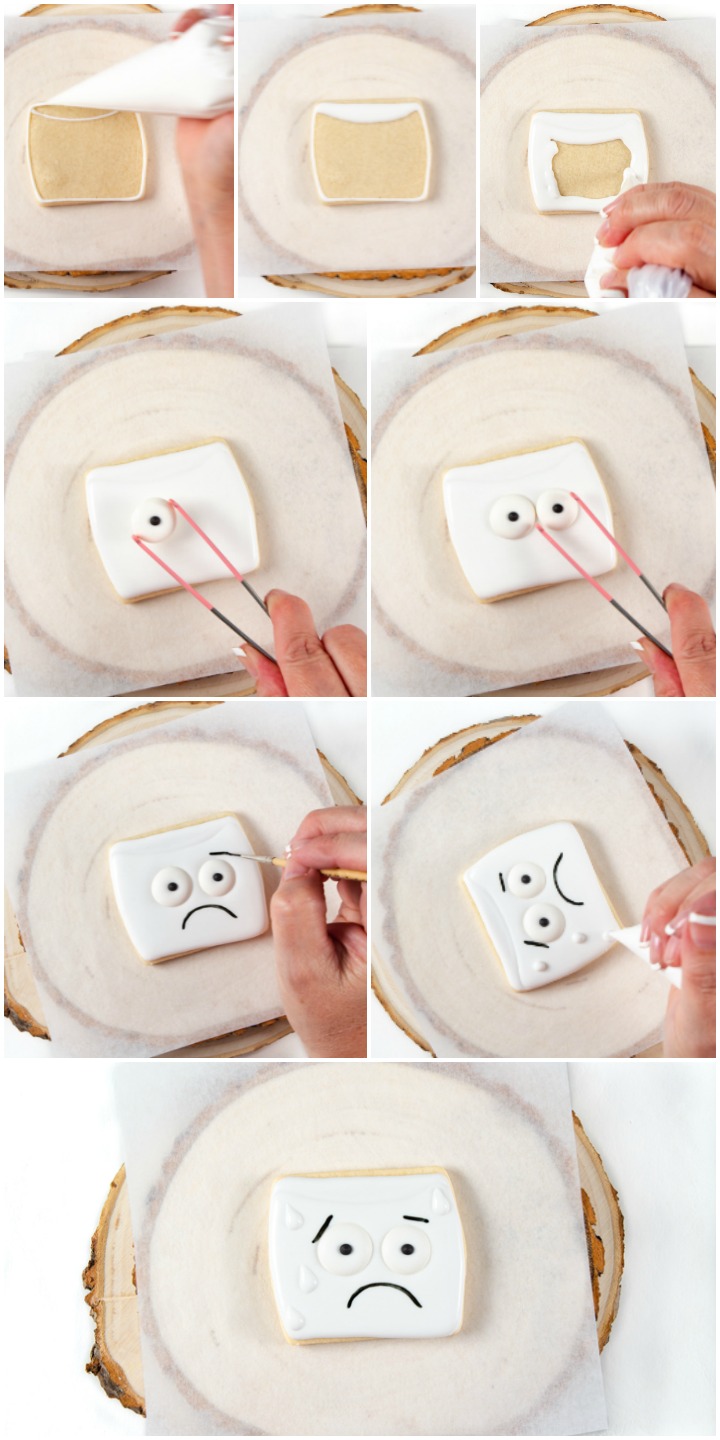
- Begin by drawing the pattern on the cookie with a food-safe marker.
- Outline the marshmallow with the white royal icing. You can outline the melting part and marshmallow as one or do it separately. I did it both ways and each way worked well.
- Let the outline dry for about ten minutes.
- Then, flood the marshmallow with the white royal icing.
- If you outlined the melting part and the body separately, flood the body and let it dry for about twenty minutes or so and then flood the melted part of the marshmallow.
- Let the cookie dry completely or overnight.
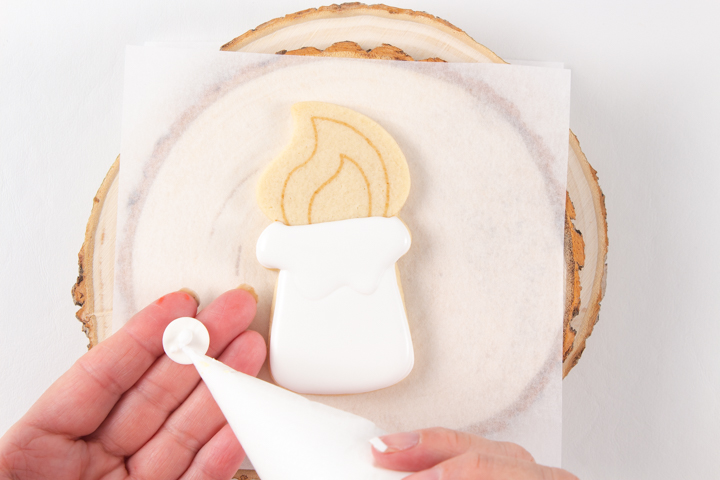
- Once the icing is dry it’s time to add the royal icing transfer eyes. There are three different sizes listed in the supply list and you can use any size you want. I like to mix them up so the marshmallows will look like they’re really scared.
- Make the royal icing eyes about a week ahead of time so they’ll have time to dry completely before you add them to your cookies. I’ll have to admit, I love making and using candy eyes on my cookies. They’re fun, make life simple and when they’re placed on cookies they stay the size I want without spreading or worrying about the cookie colors bleeding into them. I’m not saying the colors will never bleed, but adding dry candy eyes really helps prevent bleeding.
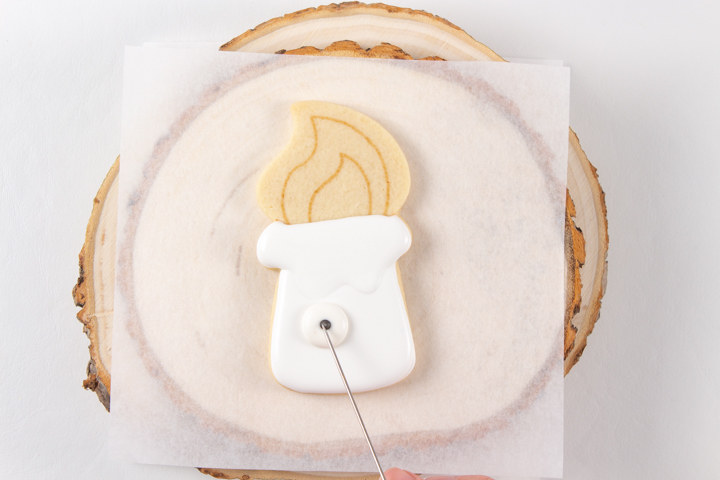
- Okay, enough about my love for royal icing eyes. Once you place the drop of icing on the back of the eye place it on the cookie and use the turkey lacer to push it in place.
- Repeat with the second eye.
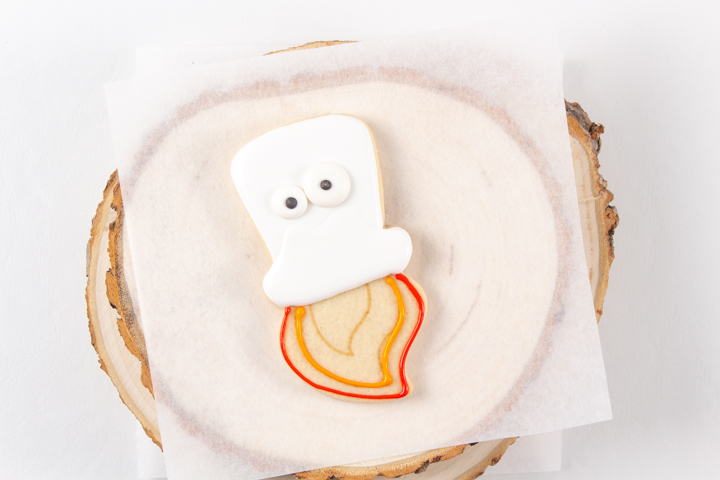
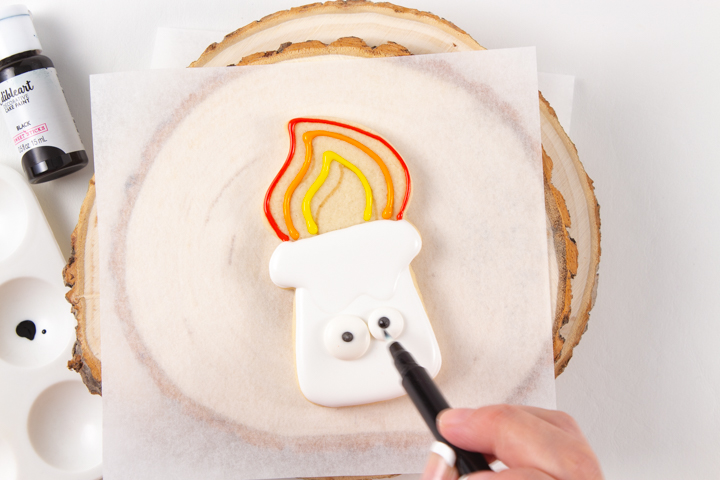
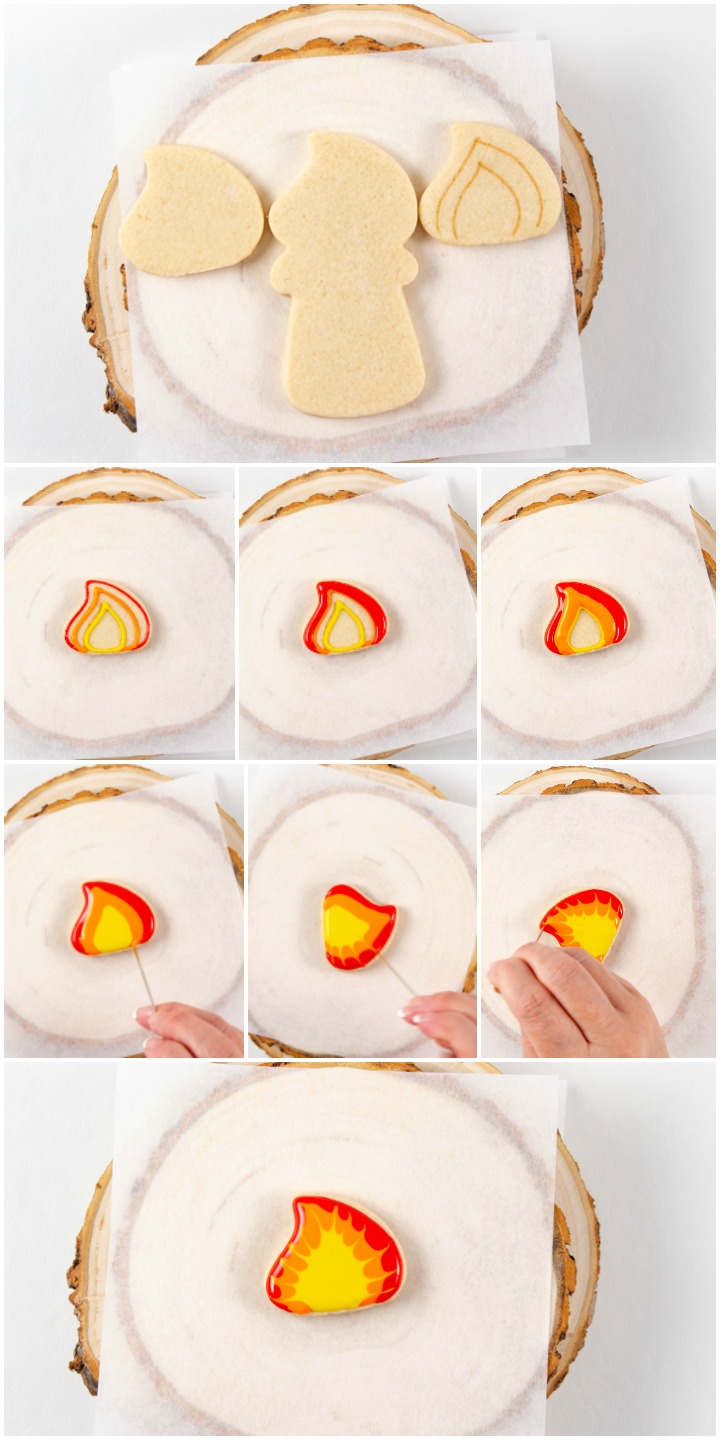
- Outline the flame with the red, orange, and yellow royal icing.
- Here’s a little tip I’d like to share on how to make your royal icing transfer eyes look bright and happy. I make a ton of these things and store them in an airtight jar and sometimes the 4mm black edible dragees lose their shine or they look a little beat up. The dragees are great and sometimes they need a little layer of paint to make them look new because we don’t want non-sparkly eyes. The Black Edible Art Edible Paint and the Edible Art Edible Paint – Brush Pen are great tools to use to bring them back to life. All you need to do is paint one thin coat on them and let them dry. The eyes look new again.
- Now, let’s set this little marshmallow on fire!
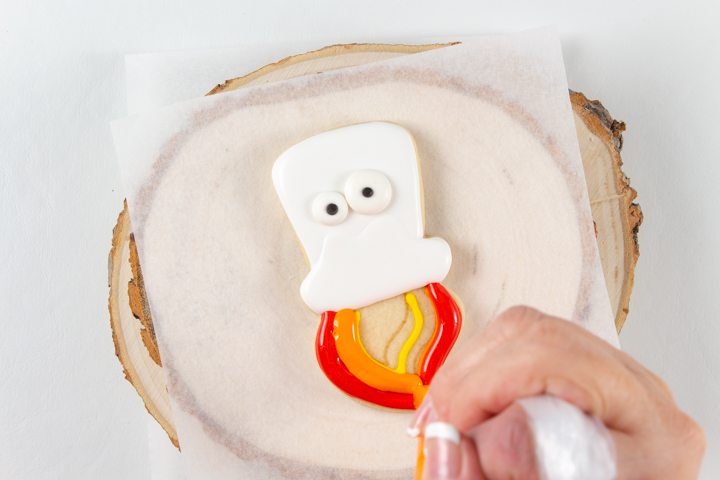
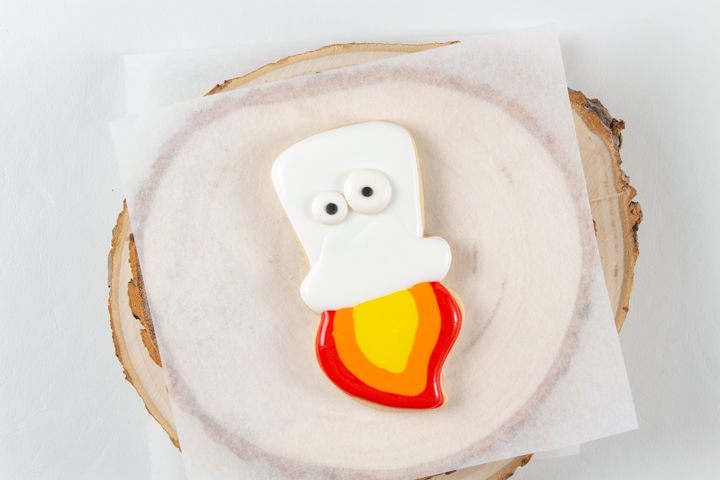
- Flood the outer section of the flame with the red royal icing.
- Next, flood the middle section of the flame with the orange royal icing.
- Flood the center of the flame with the yellow royal icing.
- Use the turkey lacer to push the icing into place.
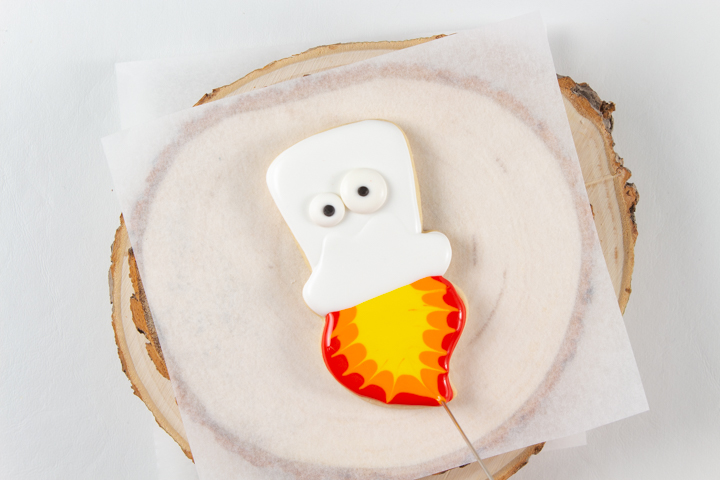
- While the icing is wet, place the turkey lacer on the edge of the yellow royal icing and pull it out through the orange and red icing. Wipe the turkey lacer on a paper towel each time you pull it through the icing so the yellow flame will stay clean.
- Repeat this all the way around the flame.
- If your yellow does get a little orange and red royal icing in it just pipe a little yellow on it before the icing dries and smooth it with the turkey lacer.
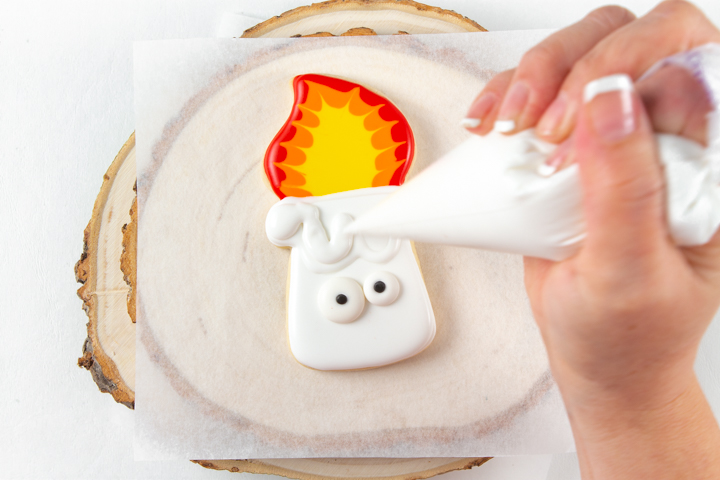
- Outline the melted part of the marshmallow with the white royal icing and let it dry for about ten minutes.
- Flood the melting part.
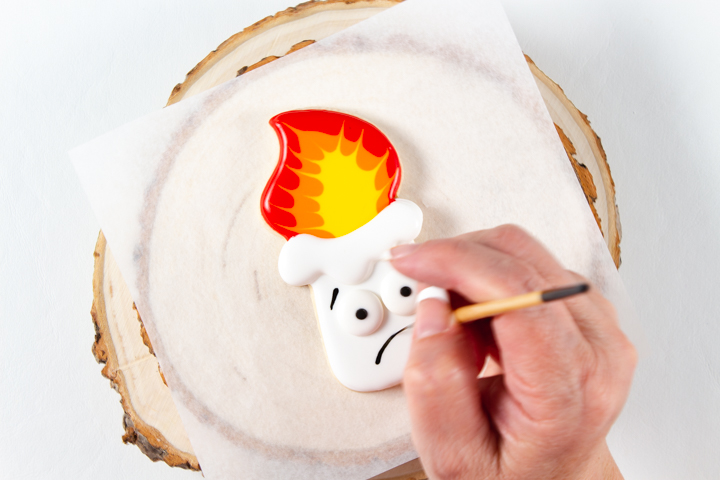
- Next, paint the mouth and eyebrows with the 10/0 Script Liner and the Black Edible Art Edible Paint.
- Add a couple of white teardrops to the marshmallow so it looks like he’s really melting. Poor guy!
- You can stop here or you can airbrush them to give them the really toasty look because we all love toasted marshmallows.
Flame Cookies:
- Make a few flame cookies to go with the marshmallow cookies that are on fire because it will really set off your set.
- All you need to do is cut the flame off of the top of the candle cookie before you bake it because it makes a perfect flame cookie. If you look at the part you cut off it will make a great top hat cookie because Sugarbelle’s cookie cutters are amazing!
- Okay, when you decorate the flame it’s the same steps you used on the firey marshmallow. Draw the pattern on the cookie with the food-safe marker.
- Outline the edge of the cookie with the red royal icing, the inner line with the orange royal icing, and the line in the center with the yellow royal icing.
- Pull the turkey lacer through the icing to make the flames.
- Let the royal icing dry completely.
Marshmallow Cookies:
- Outline the marshmallow with the white royal icing.
- Flood the top section and let it dry for about ten to twenty minutes.
- Flood the body of the marshmallows and add the eyes.
- Let the cookie dry completely and paint the eyebrows and the mouth like you did on the marshmallow cookies that are on fire.
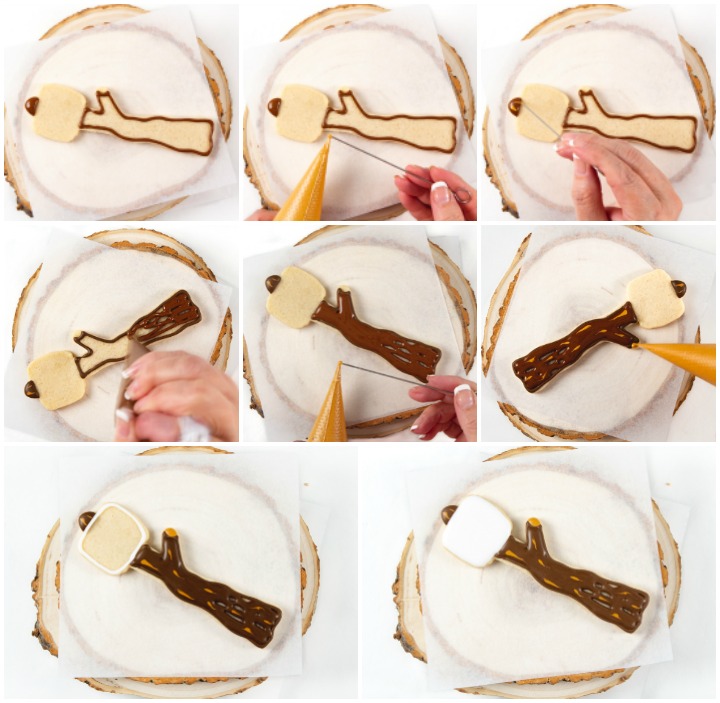
Marshmallow on a Stick Cookie:
- Outline and flood the stick with the brown royal icing and you don’t have to pipe it nice and smooth because you want it to look rough like a stick.
- While the brown icing is wet add a few tan lines with a turkey lacer.
- Let the brown dry completely and then, outline and flood the marshmallow with the white royal icing.
- Let the cookie dry completely.
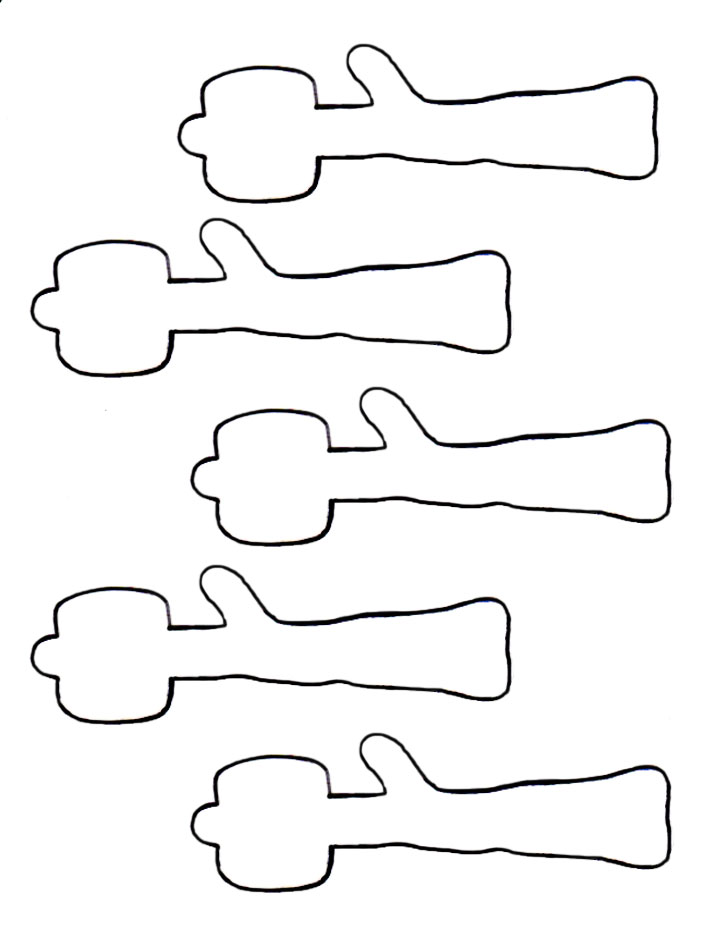
I hand-cut this cookie because I didn’t have a marshmallow on a stick cookie cutter. Click here to print the Free Marshmallow on a Stick Cookie Pattern I drew if you want to use it. Make it any size you want and cut it out of cold cookie dough. If you freeze the rolled-out dough for about fifteen minutes it’ll make the cutting process easier. If the dough gets warm while you’re cutting them out place it back in the freezer for a few minutes to get the dough cold so you can cut out more.
Free Marshmallow on a Stick Cookie Pattern:
Stick Cookies:
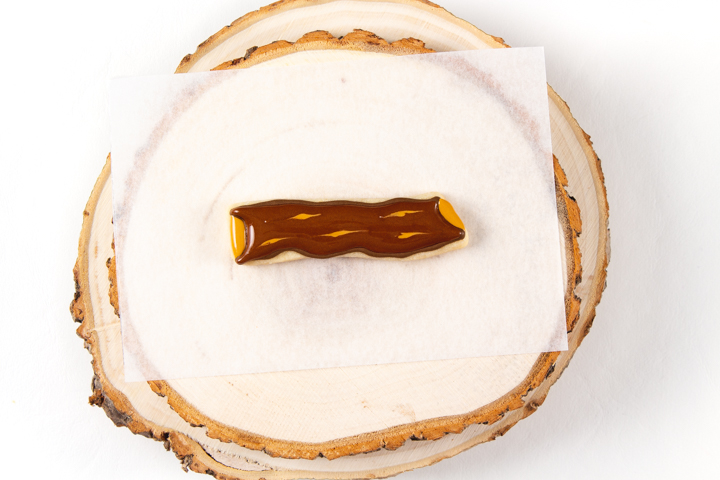
- If you want to make stick cookies you can use scrap dough to make them because scraps make great sticks! All you have to do is cut them into different sizes and bake them according to your recipe directions.
- Outline the sticks with brown royal icing and leave room on each end for tan royal icing so it will look more like a real stick.
- Flood the cookies with the brown royal icing and add a little tan royal icing to the brown so it’ll look more realistic.
- Let the cookies dry completely so they won’t smudge when you package them.
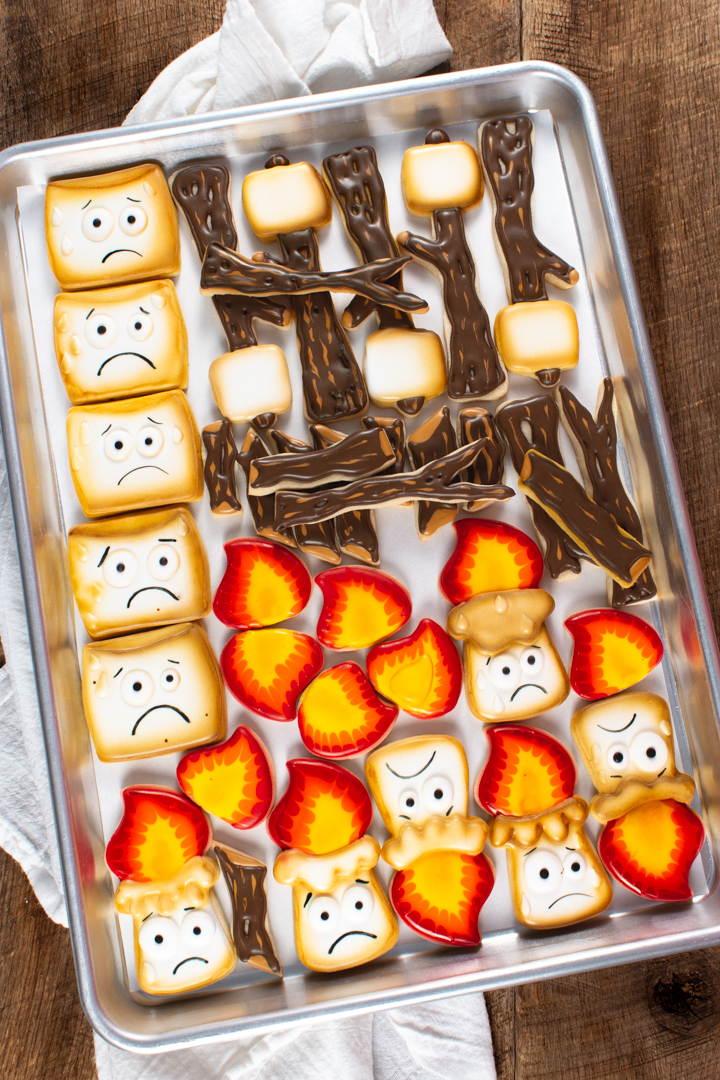
- I don’t know about you but this picture makes me want to build a campfire and roast some marshmallows. I wish you were here so we could laugh, talk cookies, and eat a few marshmallow cookies that are on fire!
How to Make Marshmallow Cookies that are on Fire Video:
If you want to see how to airbrush the melting marshmallow cookies that are on fire you should watch the video so you can see it in action. It was airbrushed twice, once with a mixture of The Cookie Countess Golden Yellow and a tiny amount of Totally Brown, and the second time the edges were airbrushed with Totally Brown to make it look a little more toasted.
Does it feel like Fall in your area because we’re experiencing a heatwave here with record highs over ninety degrees? I think it’s going to feel like fall soon and I can’t wait. As soon as it cools off we’ll build a campfire and enjoy some marshmallow cookies.
I can’t wait to share my super fun project with you because I’m having so much fun decorating. I’ll share it with you soon!
Bear hugs,









Love it! Thanks for the laugh!
Was it the eyes or the frown that made you laugh? Or was it the fire? Hahahahaha
Absolutely adorable!
Thank you, Jimena!
Sweet Sugarbelle is brilliant at making cookie cutters we can transform into different things. I’m so glad we get to decorate with them!