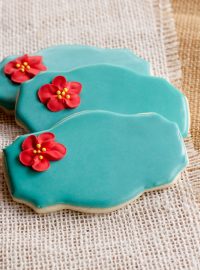
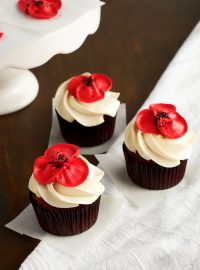
Icing Daisy Tutorial with Video
Do you have a favorite flower? My favorite flowers are daisies and sunflowers. I think I like sunflowers a little more but, for the sake of this post let’s say daisies are my favorite flower. I can’t think of a better way to celebrate than to make an icing daisy.
 Before we get started, I want you to know I am totally self-taught. If you are looking for the Wilton daisy, you aren’t going to see it here because I don’t know the Wilton way. I am sure I could learn it but, I like my little way of making daisies. One day, I wanted to make them so I picked up a piping bag and played and practiced until I make some I liked. Once I did, that became the way I made them and it works for me. I hope it works for you as well.
Supplies for Icing Daisy:
Thick icing
Flower Nail Template
Piping bag fitted with a #104 decorating tip
Sanding Sugar
Parchment Paper Squares
15 Second Icing for the center
First things first. You should watch the video and then read the rest of the tutorial below for a few simple tips that will get you as addicted to making them as I am.

When making an icing daisy, you will need a piping bag fitted with a #104 piping tip and thick icing. The icing consistency is very important when making flowers. If it is too thick, like in the picture above, you will not be able to get the icing to come out of the piping tip. If it is too thin, it will not hold the shape of the petals so it will end up looking like a shapeless flower. I prefer the icing to be a little thicker than outline icing. You might have to play around with it and make some icing and pipe a few flowers until you get it the way you want it.
Make each daisy on a flower nail with the template taped on top. Then, place a parchment paper square on the template with a piece of double-sided tape. You can use a small amount of icing to hold the parchment paper in place but it makes little messy crumbs when you remove the flower. I like the double-sided tape because it is nice and clean and holds the parchment paper in place.

- Once you make the daisy petals, let them dry completely.

- If you want, you can spray the center of each icing daisy with your airbrush gun. I like to airbrush a few and leave some plain.

You can also use different sprinkles to make the centers. Nonpareils, sprinkles, sanding sugar and Jimmies all look great so have fun and make a variety of daisies that will work on any project you have.
If you are looking for the free printable flower nail, click here.
More Royal Icing Flowers:
Edible Apple Blossom
Icing Pansy Decorations
Royal Icing Daffodils
Royal Icing Primroses
Bear hugs,


I love these. I LOVE daisies. These are so adorable and perfect!
Thank you so much Sarah! I can’t wait to decorate with them.
They are absolutely perfect!! Thank you for showing us!
You are very welcome Amy!
I love these…I’m going to try some today…I have an upcoming order that they would be perfect for. You rock! Thanks for showing us these!!! Friendly little daisies!!!! 🙂
I hope you have as much fun making these “friendly little flowers” as I did. -Hugs!
Adorable daisies and I love the video! It helps so much to see exactly how you move your hand, flow through the flower, etc. Tx for sharing your daisies!
Thanks so much Michelle. I love the cakes you have been making. You have inspired me want to make a rainbow daisy! 😉
Love your daisies, and really enjoy all of your videos!!!
Thank you Tricia. I like making videos for tutorials. They are fun!
I think I could watch you pipe all day! They are so pretty!
Awe. Thanks Georganne. I think I could make flowers all day.
PS- Your mermaid cookies are so CUTE!!
Would you believe my wedding flowers were daisies? And I remember watching my mom pipe royal icing daisies for hours, making them for my wedding cake. She sure would have loved to have you around during that time – Love your daisies!
Ok, these are way easier than what I was trying to do last time I made daisies. I can’t wait to give it a try! Thanks!!
Hi, I am in the UK – what brand of icing tip do you use – there are some variations on the makes. I am doing an evening course at my local college, so still very much a beginner.
Love your website.
Carole
Hi Carole,
My favorite tips are PME tips. They are more expensive but they last a long time. Here is a link: http://www.globalsugarart.com/pme-decorating-tips-c-641_737.html
My next favorite is Ateco and you can find them here: http://www.globalsugarart.com/search.php?q=ATECO+TIP#/?_=1&page=3
Hope this helps!
ohhh … great … that’s ones the teacher recommends.
I didn’t realise there was so much difference till I went in my local craft shop – several different makes – same numbers – but different styles !!! so confusing.
Carole
What is the thick icing recipe used to make these flower petals?
The thick icing needs to be thick enough to hold its shape which means once you pipe it, it doesn’t change it’s shape.
can you give a little more clarification on the drying process? how long and just on the counter top?? also, how did you make them to appear 3d/ slightly curved
Hi Michelle,
I place my cookies in front of fan after I add the royal icing. This will help the icing form a crust on the surface and it will help them dry with a shine.
As far as the 3D look, I just added royal icing until the section looked nice and full.