Halloween Rice Krispie Treats
Rice Krispie Treats have come a long way in the past few years. When I was a kid you could only get them in one shape, square. Thank goodness times have changed and we can make them into any shape we want. Don’t get me wrong, a square is a good shape and so is a triangle especially when they are decorated to look like Halloween Rice Krispie Treats!

Supplies for Halloween Rice Krispie Treats:
To see how to make the candy corn, follow the decorating directions for these Candy Corn Cookie Pops.
Rice Krispie Treats- Make your own following the directions on the Rice Krispies Cereal Box or you can buy the Pre-made Rice Krispie Treats and trim them into a triangle shape. If you buy the pre-made treats you won’t have to wash that stick marshmallow bowl!
For the Mummy Treats you will need:
White Buttercream Frosting
Black Buttercream Frosting
2 Candy Eyes
Rose tip #102, #103 or #104 depending on how wide you want the lines for your mummy wrap. My treats were small so I used a #102 rose tip.
Decorating bags- 200 count, 50 count, or 10 count
Coupler
Butter Knife or offset spatula
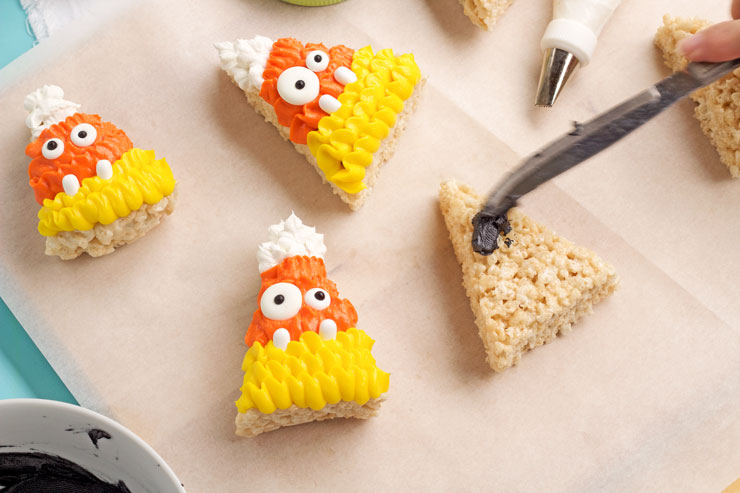
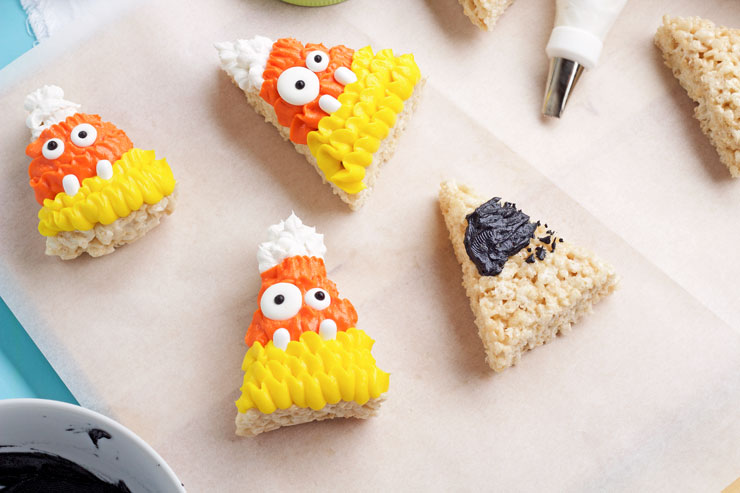
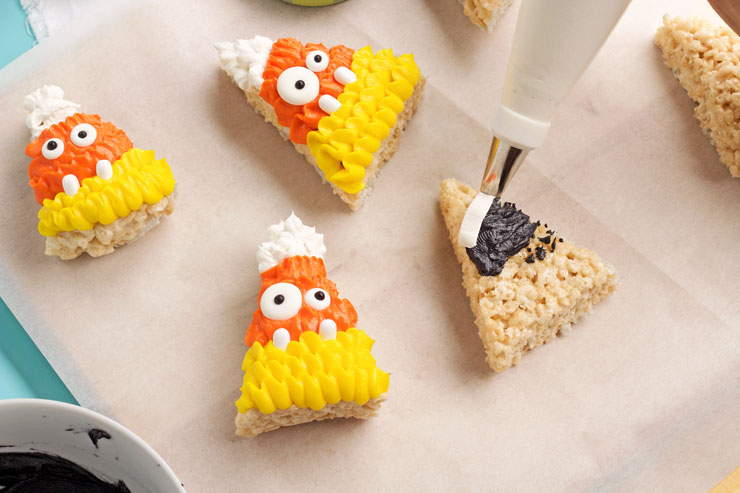
Once you have the triangles for the mummy treats, use a knife or offset spatula to add some black buttercream frosting to the eye area. Black can sometimes taste a little bitter so you might want to use a thin layer of frosting.
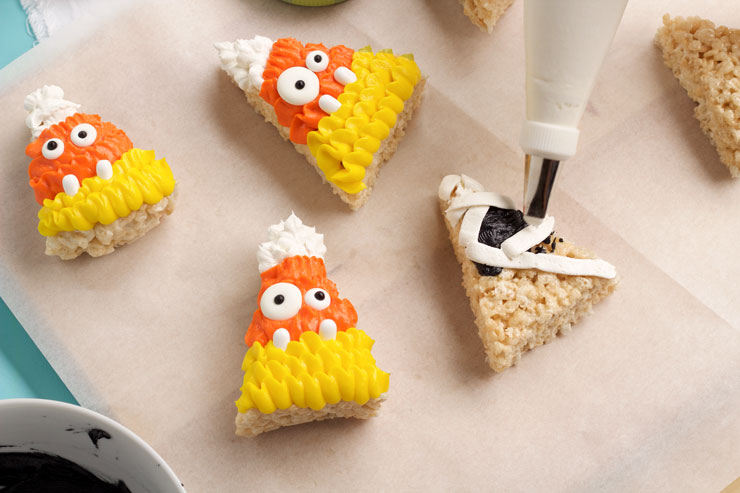
- Next, with the white icing in a decorating bag fitted with the #102 rose tip, make the mummy’s bandages.
- Hold the bag so the narrow end of the rose tip is closer to you then the wider end.
- Start on the left side of the treat and gently squeeze the bag as you move it across to the right side of the mummy.
- When you get to the other side, release pressure on the bag and end with a quick little tug to break the line of frosting.
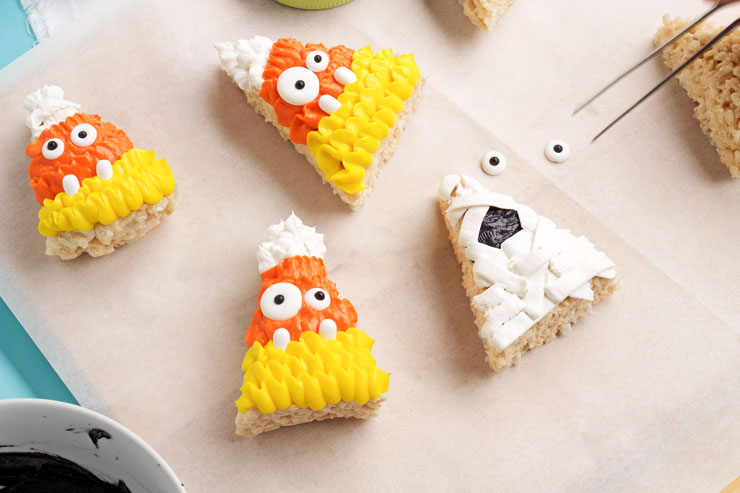
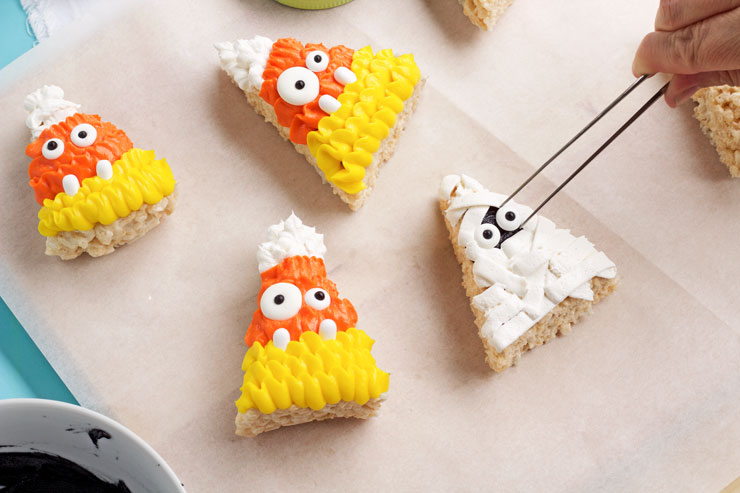
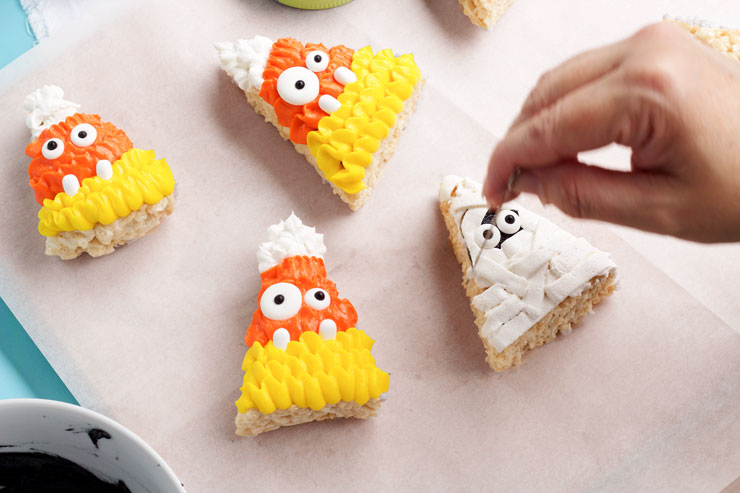

Go wild and get creative. Email me a picture of your creation because I can’t wait to see what you make!
Bear hugs,







Hi Lisa,
The offset tweezers link is broken. I went to Amazon and poked around, but there are too many different sizes and types to choose from! I do need a pair of offset tweezers for cake/cookie decorating and would like to know what you recommend. (I checked in both your shop and tips section, but didn’t see the answer there.)
I love the mummy krispie treat and have added this project to my Halloween plans!
Many thanks!
Hi Donna!
I fixed the link to the Offset Tweezers. Sorry it was broken. My son and daughter-in-law gave them to me as a Christmas present and I use them all the time. Hope you like them as much as I do. 🙂
I love both of these adorble treats. Those candy corn faces are just too cute.
When we were kids our Mom would make a rice krispie treats Christmas tree!
Btw..your cake is really lovely! 🙂