How to Paint a Cookie Video
I made a “How to Paint a Cookie” video a few months back and haven’t had time to post it until now. They were from the Happy Birthday Dr. Seuss set I made a few months ago.
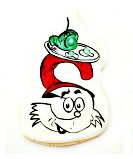
Some of those cookies were made with icing and some of them were painted. I did however use my Kopykake projector for the entire set. I made a how-to “KopyKake Tutorial Video” and thought I would share how I made the rest of the cookies.
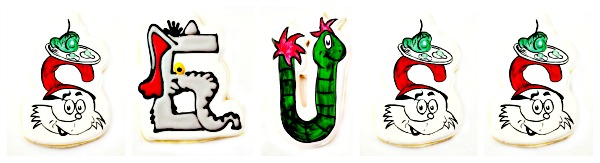
The elephant is made with royal icing and the others are painted. If you notice, the worm doesn’t look all that wonderful. I could have made another one but, I wanted to show you you need to paint in thin layers. If you use to many colors without adding water, that is what will happen.
Supplies for How to Paint a Cookie Video:
Paintbrushes (this set and, this set)
AmeriColor Gel Colors
Water
Paper towel
A Dry Iced Cookie
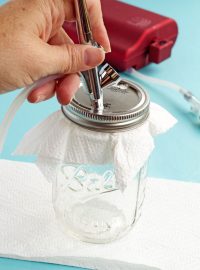
This 10 “-Well Rounded Plastic Palette for my colors is great for painting. It is easy to wash and it has several wells for your colors so add a tiny amount of AmeriColor and a little water on the tip of my brush and begin painting.
I was a decorative painter for years but, that was many, many moons ago. I always wanted to paint on cookies but, didn’t really get brave enough to do it until I saw Arty McGoo at Cookie Con and she was amazing. She did an awesome presentation that blew us away and ended with this video. She inspired me to grab my paintbrush again and it feels awesome! Thanks, Liz! You are incredible!
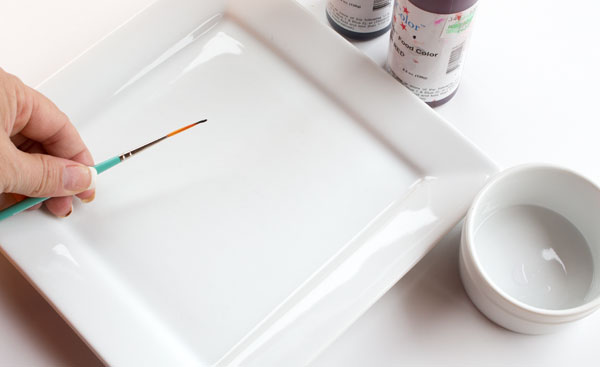
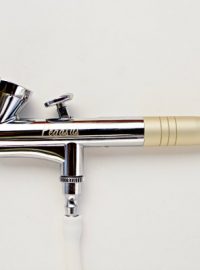
In the video, I use a script liner brush to make the lines. It is a brush with long bristles that allows a lot of control. To load the brush (put the color on it) there is no need to dip the entire brush. Just us a small amount on the tip. I first dip the tip into a drop of water and then, touch it to a paper towel to remove the excess water before I dip it into the color I want to paint with.
When you paint a cookie be careful not to add a lot of water because it will break down the icing. It only takes a little water for painting.

If the bristles on the tip look wide and are not a fine point, place the tip of the brush on your palette or a plate and twist as you pull the brush towards you slightly. This will make a nice point for detailing and writing.
I plan on making more painted cookies in the near future and I will share everything with you and answer questions you might have. Are you ready for the video? I used a KopyKake Projector to project the image onto the cookie and you can see a tutorial on it here.
How to paint a cookie video:
I hope you liked the video and feel brave enough to paint a cookie now. I look forward to more tutorials I can’t wait to paint a cookie for every holiday. The colors dry fast and you don’t have to wait overnight for your icing to dry. I can’t wait to see what you paint.
Bear hugs,


Lisa, for this “visual” learner, that was tremendously helpful. I will see how “painting” works on my MPButtercream icing. Thanks so much! Blessings, Donna B.
I am a visual learner also Donna. I am also a “Get in there and fall on your face and then figure it out learner!” Hahaha I need to see it, do it usually by messing up, and then find a way that works.
I am not sure about painting on buttercream icing. If you try it, let me know how you like it. 🙂
Thank you for the awesome video, Lisa! I’ve only painted on cookies a couple times…I could definitely use the practice 🙂
I can’t wait to see what you do Jennifer. I know you will come up with something AMAZING!!!
These are the cutest things ever…I am sure it was not quite as easy as you made it look, but I still can’t wait to give it a try! I was amazed at how much “paint” you were able to get out of each dip of the brush…it seemed to go a long way! LOVE the Dr. Seuss letters…so stinkin’ cute! TFS!!
Painting on cookies is really easy Terri. The smooth surface of the icing allows the brushstrokes to glide across the cookie. I suggest the next time you make cookies that you make a few extra and base them white. Then you can play with them when you have time.
You will be awesome at it 🙂
Aww, Lisa you are amazing, inspiring and just FANTASTIC…love your video!
You are amazing Kim!! I am glad you like the video and now, I want to see you paint! You have so much creativity it makes my head spin thinking about what you will do 🙂
Great video, Lisa! I was finally brave enough to try painting on my first cookie last week. It turned out to be a lot of fun but I definitely need more practice. 🙂
Thanks Mike! If your cookie painting skills are like your airbrush skills….let’s just say I am giddy to see what you do!!!!
Ahhhh, you are brilliant. Love the cookies, love the tutorial, love your cooking making skills!
I am far from brilliant my friend!! LOL I am glad you like the video and I am still waiting to see your cookies 🙂
Wow! Great video and beautiful work! I can absolutely tell that you’ve got experience painting as your movements look so fluid in the video. I’m fairly certain I’d be a shaky mess at first, but you make it sound like an approachable challenge. Loving your videos Lisa! Please keep ’em coming 🙂
Thanks Michelle! You wouldn’t shake when you paint! Hahah You would be so excited about the fun you’re having that you would have the steadiest hand in the land!! You need to try it! YOU WILL LOVE IT!!!!
Dang, Dang, Dang. A new technique I haven’t tried before. Now I going to have to rush home and bake some cookies so I can paint on them. 🙂
Everytime I log on to your blog I get motivated to push the envelope on my cookie decorating. Thanks Lisa for your guidance and encouragement.
amazing! I’ve tried painting on cookies before and it all seemed great until i tried to bag them! When the plastic touched the painted parts on the cookie it would smear and it all just became a huge mess. I haven’t really tried painting cookies since then… Have you had this problem? I used Wilton food colors if that makes a difference…. i noticed that no matter how long i left them to dry the ‘paint’ would remain sticky 🙁
I haven’t had this problem. I use the AmeriColor Gel but, at Cookie Con, Arty McGoo said she dusts her painted cookies LIGHTLY with flour. She said powdered sugar didn’t work as well. Hope this helps! 🙂
My painting skills are, let’s just say, not like yours, lol. Would it be easier for someone with no experience painting to paint the color then outline with black….or for other designs, paint the lightest colors first then darker outline? Thanks! I’ve learned so much from you and plan to tackle airbrushing soon with the help of your tutorials!
Hi Donna,
I was a painter before I started making cookies and I learned to start with the back color first and work forward. For example, if I were painting a landscape, I would start with the sky and then the mountains and finally the grass.
The best advice I can give you is to make some cookies and practice painting on them. Do it when you have time and aren’t rushed. I think you will learn a lot just by doing it and seeing how the paint reacts to what you do.
Ooh, ok. That makes sense. It’s just like with layering your icing to make dimension.
Thanks Lisa! but how did you transfer the design on the cookie?
Hi Priscila,
There are many ways to transfer a design on a cookie. You can cut the design out of paper and use a food safe marker to make the outline, you can use a copy cake. Klickitat Street shows how to transfer it with an ipad here: http://www.klickitatstreet.com/2013/03/how-to-draw-on-cookie-with-ipad.html
Thank you so much!!
Stupid question but does the food coloring used to paint make the cookie taste bitter? How do you avoid that bitter, food color taste when painting with food gel?
Hi Sally,
If you use a lot of black, red or purple it could cause a bitter taste just like the food gel colors do. If you paint by mixing the food gel colors with water or vodka, you won’t add enough to alter the taste of the cookie.
Hope this helps! 🙂