How to Assemble This Amazing Sugarbelle Stencil Snap
Do you have a Sugarbelle Stencil Snap? I’ve got one and it’s super helpful to use when you’re stenciling cookies. The great thing about it is you can make it different sizes to use with smaller and larger stencils. I’ve even tilted a stencil sideways to make it fit on the cookie so I could get the image in the center of the cookie. This is a nice tool that I’ve had for a while and I’m just now getting a chance to use it. I’m sad I didn’t get to use it before because it’s a really great tool that helps you get control over the stencils and how you place them.

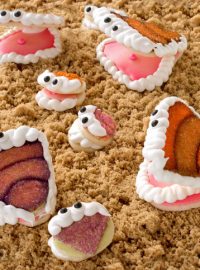
Isn’t this stencil and stencil holder cute? I think it’s adorable!
Supply List for The Sugarbelle Stencil Snap:
(may contain affiliate links)
Sugarbelle Stencil Snap or you can get it at Amazon Sweet Sugarbelle’s Stencil Snap
Recipes in case you need them:
Sugar Cookie Recipe
Royal Icing Recipe
Let’s assemble this cute stencil holder.

- When you open the box you’ll see that there are two different colors of the magnetic stencil frames. There is a light color and a dark color. Separate the colors for assembly.
- The darker color is thicker so you can use it for thicker cookies if you place it on the bottom, add the stencil, and place the lighter frame on the top. If you make thinner cookies place the lighter color on the bottom, add the stencil, and then place the darker frame on the top.
- Lay out the pieces and match the numbers that are on the back of each piece. Then, snap the pieces together and make a frame.
- When you put the pieces together make sure the tabs are facing out.

- Remember to separate the colors of the magnetic frame cookies.
- Match the numbers on the back and then snap the pieces together.
- Remember to face the tabs out and not in.
- Snap the pieces together.
- Snap all the pieces into place.
- Make a frame.
- Make both colors of the frame match.
- Place the frames together.
- Remove the top and place the stencil in the center. Place the top back on and your stencil snap is ready to use.
But wait! There’s more!

- Make the stencil snap smaller.
- The stencil snap will hold your stencil in place while you airbrush your design or you can pull the royal icing over the image. The Sugarbelle Stencil Snap will have your back! And your stencil!
- If you have round small stencils, this holder will keep them in place while you do your work.
- If you have a big stencil the Sugarbelle Stencil Snap will hold those just like it holds the smaller stencils.
Sugarbelle Stencil Snap Video:
I like this stencil holder because it’ll do a lot of different things since it’s adjustable. You can use it on large stencils or small stencils and it’ll help you get a nice clean image on your cookies. This is a great cookie tool.
Do you have a Sugarbelle Stencil Snap? Did you figure out how to assemble it as soon as you got it? It took me a few minutes, but once you understand how to put it together and adjust it, you’ll love using it with your stencils.
If you’ve used it will you share a link with us so we can see what you’ve made with it? We’d love to see your beautiful work!
Bear hugs.


I do have this! Thank you for the instructions. Maybe I’ll try it for sure!❤️❤️
Thank you for this post – I never really figured out how to put it together so I never used it. Now I will!