How to Make a Cute Skull Cookie with Fun Eyes
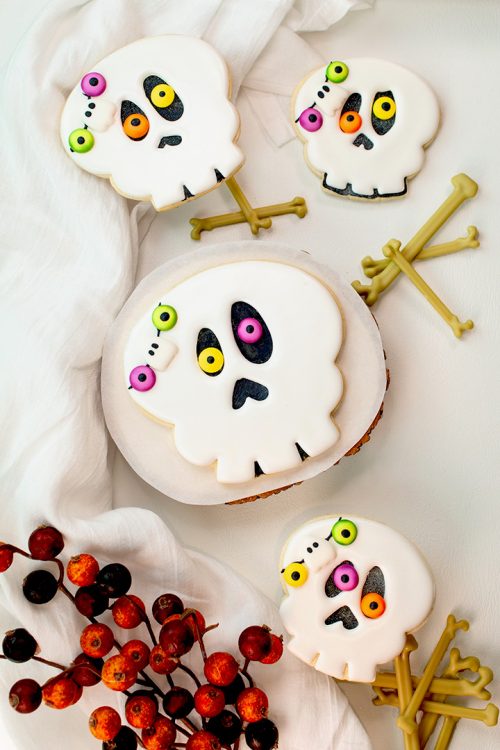
I’m back with my first Halloween cookie for the year. I thought a cute skull cookie with fun eyes should help us start the season off right. Adding the ghost and the eyes on the head was a last-minute thought and I hope you like it. If you don’t like the ghost you could add a spider web with cute creepy 3D spiders. Or you don’t have to add anything.
Don’t you love the freedom you have with decorating cookies? The sky is the limit!
Supply List:
(may contain affiliate links)
Recipes:
Cookie Cutter:
- Skull Cookie Cutter by Bearfoot Baker or here are others from Killer Zebras, KalidaCuts Halloween Skull Cookie Cutter or her Skeleton Eye Cutouts Cookie Cutter, The Flour Box Bakery, Country Kitchen Sweetart, or The Cookie Countess They aren’t exactly like mine. but they all make cute skull cookies..
I love these cookie-cutter ladies and highly recommend them to all my cookie friends! I’ve used them for years!
Royal Icing Colors:
I like using outline and flood consistency icing but you can use one consistency if you’d like. Just use what you’re comfortable with.
Tools:
- Turkey Lacer and or you can use a Scribe tool
- Paintbrush– This isn’t the brush I used but I do like the way it looks. If you have a food-safe brush you can use the one you have.
- Black Fine Tip Food-Safe Marker
- Piping Bags
- Optional- #1.5 PME Piping Tip
Royal Icing Transfers:
Here are your royal icing patterns. Use any color of royal icing you want to make a cute skull cookie.
How to Make a Cute Skull Cookie with Fun Eyes Video:
Before we begin I want to make sure you saw my announcement in the supply list under the cookie-cutter links. I’m opening a cookie cutter shop soon and this is the first cookie cutter I’m sharing. I’m still working on the site, but am super excited to start sharing my designs with you all. So get ready to have some cookie-cutter fun and stay tuned for some cookie-cutter giveaways. I have my first set in mind for a few lucky winners!
Let’s Make a Cute Skull Cookie:
- Begin by baking your cookies and making your icing. The only colors you will need for the skull head are black and white royal icing.
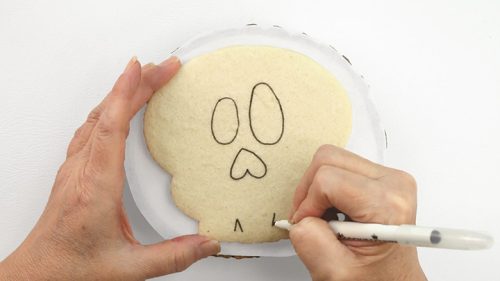
- Next, draw the eyes, nose, and space between the teeth with a food-safe marker.
If you want to add some fun color royal icing eye transfers you will need to make them ahead of time.
Here is a link for the templates and a tutorial that will show you how to make them: Candy Eyes.
- Outline the eyes and nose with the black royal icing. I used the outline consistency so I’d have control over where it went. If I had used flood icing, it would have spread all over my cute skull cookie. It wouldn’t have been so cute after that happened.
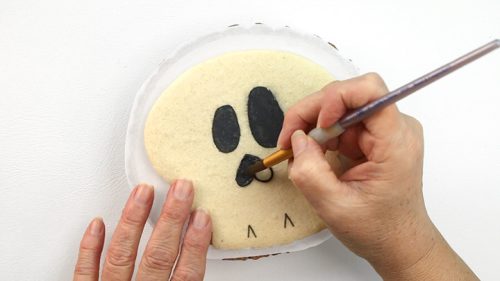
- Dampen your paintbrush with a very small amount of water and spread the black icing inside the eyes and nose. It will feel like you’re painting it and that’s pretty cool if you ask me.
- If you want to add a little sparkle you can use some Flash Dust Natural Glitter – Original Silver
- And if you need a spray bottle for disco dust, The Cookie Countess has you covered!
- If you want to get your edible glitter in a spray bottle without mixing it you can get Pearl Edible Glitter Spray from Country Kitchen Sweetart.
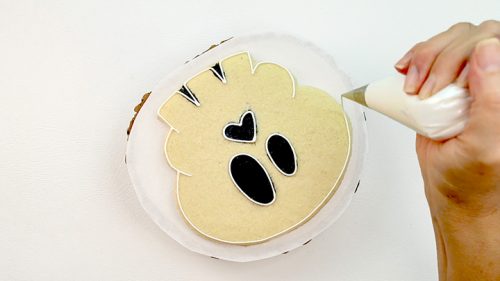
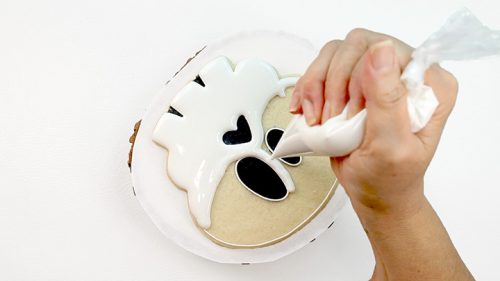
- Now that the black royal icing has been painted on your cute skull cookie, outline them with the white royal icing. And while you’re at it outline the entire skull. Be sure to make the gaps in between the teeth.
- Flood the skull with the white royal icing.
- Let everything dry completely before you move to the cute eyes and ghost decoration.
Tip:
I place my cookies in front of a fan as they dry so they will have a nice sheen. If I don’t my cookies look a little on the dull side. Royal icing has a mind of its own and I live in a place that can have high humidity so a fan really helps my icing look good.
Time for the Royal Icing Transfer Decorations:
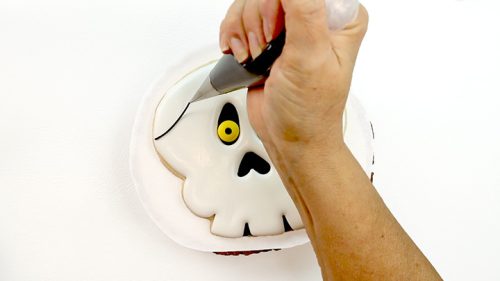
- I didn’t do anything special for the decorations. I used what I had on hand. Use a little royal icing to place the eyes on the black icing you painted earlier.
- Next, add a black piped line on the head.
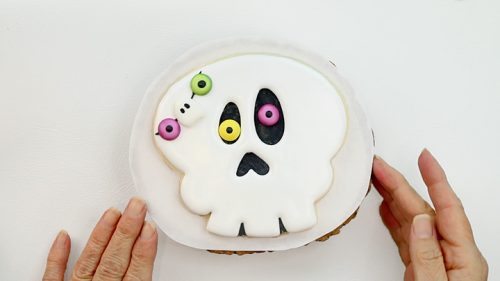
- Add a few royal icing eyes and a ghost or a spider for cute decorations.
Now step back and look what a good job you did! This is a very simple cookie to make and a great one to decorate with kids.
I decorated them a little differently so you can decide which one you like best. The one at the bottom has glitter sprayed in the eyes and in his nose. If you want to do that you’ll need to do it while the black icing is wet and before you add the white royal icing. I like that look and hope you do as well. Have fun decorating and be on the lookout for a few cookie-cutter giveaways.
Bear hugs,

