How to Make Fun Monster Sugar Cookies with Royal Icing
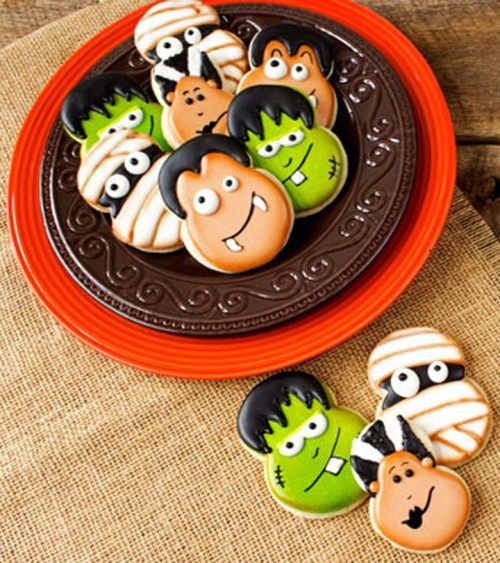
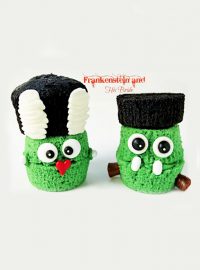
Do you know how to make fun monster sugar cookies with royal icing? Halloween is approaching fast so let me show you how. These cookies are all made with the same cookie cutter so cutting out your shapes is a simple process. And look at those cute little monster faces! They’ll definitely put everyone in the Halloween spirit.
Let’s do this!
Supply List:
(may contain affiliate links:)
Recipes:
Royal Icing Colors and Consistency:
15-Second Consistency Royal Icing Consistency
- White- AmeriColor Bright White Or The Cookie Countess Food-Gel Color Whipped White
- Black- AmeriColor Super Black Or The Cookie Countess Tuxedo Black Food-Gel Color
- Flesh Tone- AmeriColor Ivory
- Green- AmeriColor Electric Green Food-Gel Color Or The Cookie Countess Glowing Green Food-Gel Color
Cookie Cutter:
Airbrush Supplies:
Airbrush Colors:
- Green- The Cookie Countess – Glowing Green Edible Airbrush Color Or AmeriColor AmeriMist Leaf Green Airbrush Food Color
- Brown- The Cookie Countess Totally Brown Edible Airbrush Color Or AmeriColor AmeriMist Warm Brown Airbrush Food Color
Tools:
- Turkey Lacer
- Paintbrush if you don’t have an airbrush system
If you don’t have an airbrush system you can use food-safe gel markers:
- Chefmaster – Food Decorating Pens – Edible Markers – 10 Pack – Dual-Tipped Pens, Fade-Resistant Color, Easily Decorate Desserts – Made in the USA– These are great to use for shading if you don’t have an airbrush system.
- Just use the maker on the cookie where you want to add shading then, use a damp paintbrush (not wet, just damp) and lightly paint over the marker.
- You can add shade and shadows by simply painting with a damp brush.
- Be patient and practice until you get comfortable enough to add it to your cookies. Remember, you can do it! Here is an example of how I did this a long time ago, Sweet Sugarbelle Bus Cookie Cutter into a Truck Cookie.
Some of you may have noticed I’ve posted this tutorial before. This version is updated with new links to products I’d use today. Some of the products in the old post are no longer available so I thought this would be a good way to share how you can get the supplies. I hope you make some of these cookies and I’d love for you to share your photos with me on Instagram or Facebook.
Let’s get started:
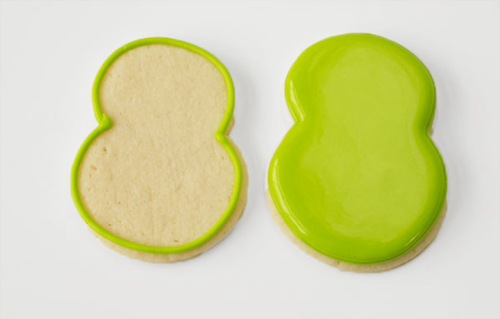
- Begin by outlining and flooding a number 8 cookie cutter with green royal icing.
- Let it dry until the surface gets firm. This could take a few hours but it’s important because you can crack or damage the flood with the air from the airbrush gun.
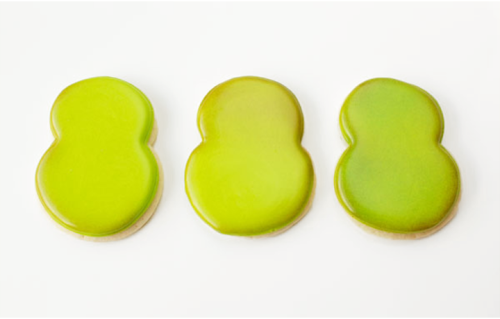
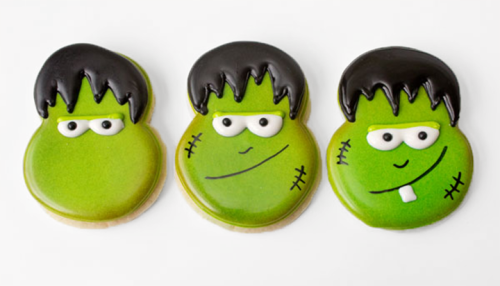
- Next, airbrush the outside edge of the cookie with the green food-safe airbrush color. Use as much or as little as you’d like. If you look at the finished Frankenstein cookies below you can see how I made them different. Just play around with it until you find what you like.
- Here is a cool tip for you. If you want to add more character to your Frankenstein cookie, airbrush with a little brown food-safe gel color. This will make him look a little more creepy and aged.
- Here are three examples for you. You can add a little on one side, some at the top (remember we will add some hair shortly so be sure to go below the hairline), or you can airbrush all the way around the edges. It’s up to you so have fun with it!
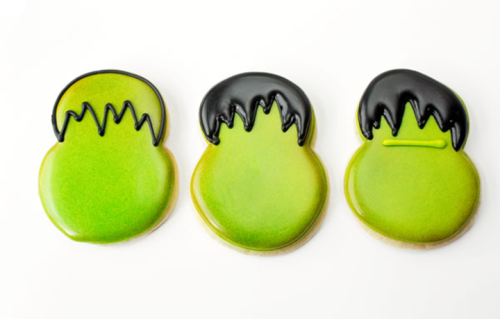
- Next, grab the black royal icing and outline his hair.
- Don’t forget to pip a straight green line across his forehead so we can add the eyes to it.
It’s time for the fun part.
- Add two eyes with the white royal icing and immediately add two black dots for the pupils.
Now you have a choice to make. You can add the nose, mouth, and stitches with black royal icing or you can use a food-safe marker. I like icing but the food-safe marker is easier to draw with.
- Now add the tooth with some white royal icing.
Frankenstein is all done! You did it! Congratulations! His wasn’t that hard to make was he?
Now It’s Time for The Bride of Frankenstein Sugar Cookies:
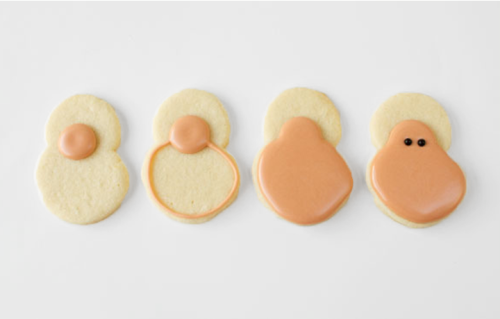
- Outline and flood the head of The Bride of Frankenstein with the flesh-colored royal icing.
- Let her dry for a few minutes and add two black dots for the eyes. If you want, you can use Wilton Black Sugar Pearls for the pupils. Drop them in place while the flesh-colored royal icing is wet. If you wait until the royal icing forms a crust on the surface the sugar pearls won’t stick.
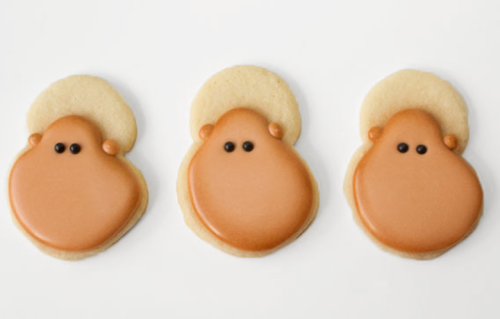
- Add two flesh-tone dots for the ears and let them dry before you airbrush.
- Airbrush the edges with the warm brown edible airbrush color.
- Again, use as little or as much airbrush color as you want.
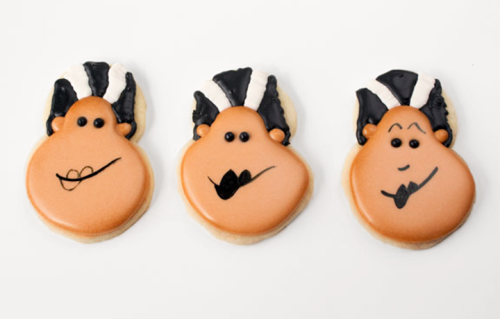
- Pipe some black and white sections for the hair.
- You can use black royal icing or a black food-safe pen to add the eyebrows, nose, and mouth with lips.
You’re all done with the bride! Isn’t she cute?
I hope you enjoyed making these with me. I’ll be back in a few days to make the Mummy and Dracula with you. They’re just as simple as Frankenstein and his bride!
Bear hugs,





I would love Holiday.Cookies for all of them . New Year’s Eve And Day. Valentine’s Day, St Patrick’s Day, 4 th of July, Mother’s Day, Easter, Father’s Day, Halloween, Thanksgiving And Christmas. Thanks! Jackie From
Rancho Cucamonga, CA, 45 Miles East Of LA.