Paint Your Own Cookie for Thanksgiving
Cookie decorating has come a long way since I first began decorating and I love it! When I was a kid I was never allowed to play with my food, but now there is a thing called “Paint Your Own Cookie” which means you can play with your food all you want. Actually you are encouraged to play with your food! That’s the whole point. Decorate it the way you want it and then gobble it up. How awesome is that!
The first time I saw this technique was way back in 2010 or 2011 at Cookie Camp. Several decorators came to the camp where I live and we had a blast talking and decorating cookies. We learned techniques from each other and decorated a lot of cookies. It was unique because none of us had ever met in person before. We were all friends on Flikr because we shared out cookie photos there.
Someone suggest that we should have a girls weekend but didn’t know where we could find a place with a kitchen and housing that would hold all of us. I spoke up and told them that I live at a camp with a large dining hall and we could gather here. Everything fell into place and we had the time of our lives laughing, decorating and getting to know each other. The time we spent together was priceless because we made some life long friendships. I will cherish those memories forever.
Well, I told you all of that to tell you about the first time I saw a paint or decorate your own cookie. I met an amazing woman named Jen at cookie camp and she owns Posh Pastries. She is a super smart and super talented lady. I really enjoyed hanging out with her. She showed me some cookies she made to take to an event and I was mind blown. She made pumpkin shaped cookies and placed them in a cookie box, added a few food color markers so the kids could make jack-o-lanterns and color their own designs. She blew my mind! What a brilliant idea! We all want to decorate cookies and she found a simple way to play with the kids without having to mix a million bags of icing. See, I told you she was smart!
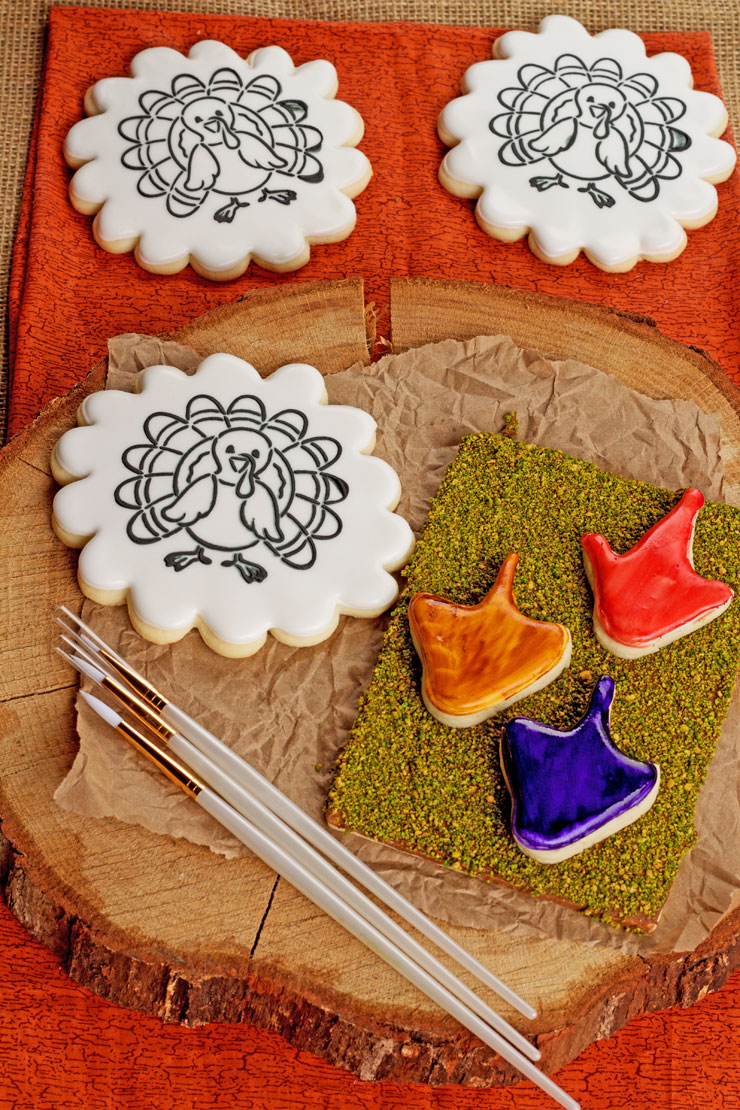
Now fast forward to 2015. We now have stencils to help us with the outlines so the kids (or adults) can paint the colors themselves. I love this idea. So since Thanksgiving is next week I thought we would make a turkey cookie so the kids can play with their food without getting in trouble.
Supplies for Paint Your Own Cookie:
Recipes:
Sugar Cookie Recipe, Chocolate Roll Out Cookie Recipe or Gingerbread Cookie Recipe
Royal Icing Recipe
A Cookie Outlined and Flooded with White Icing-Here is a video on How to Decorate A Cookie with Royal Icing
Black Icing
Tools:
Paint Your Own Cookie-Turkey PYO Stencil
Magnets or a Stencil Genie
Stiff Spatula or a Stencil Scraper
Food Gel Colors to use as the paint
Paint Brushes to give with the cookies (what good is a paint your own cookie if you don’t have a paintbrush to paint it with? LOL)
There are a ton of Paint Your Own Cookie Stencils to choose from. Chicks, dinosaurs, sand castles, bunnies and so many more.
- Begin by making some cookies large or small enough for your stencil design.
- Outline and flood them and let them dry completely.
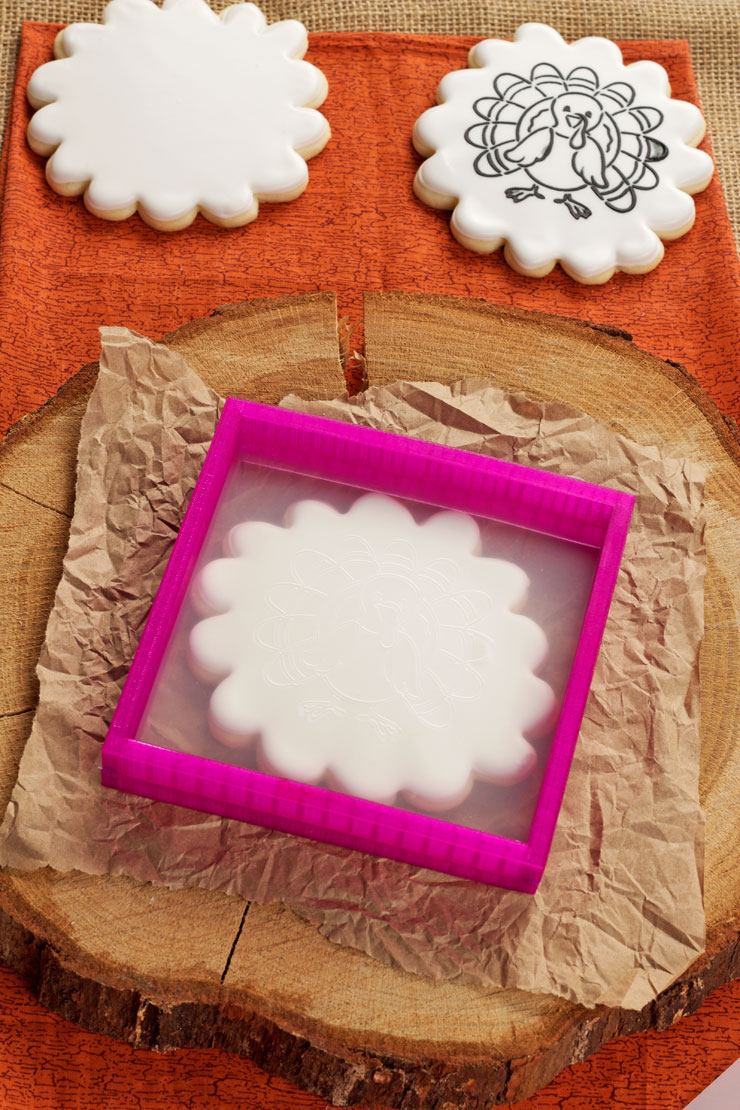
- Secure your stencil with magnets or The Stencil Genie.
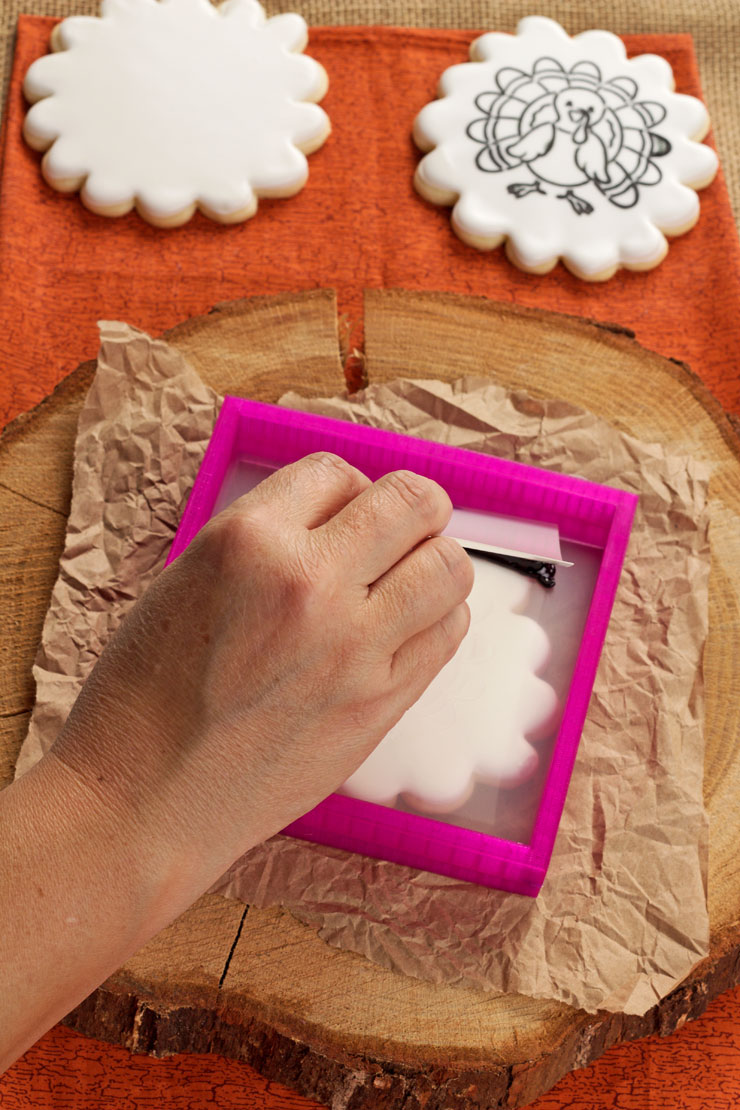
- Place the stencil on your cookie. The stencil should touch the surface of the cookie for a clean design.
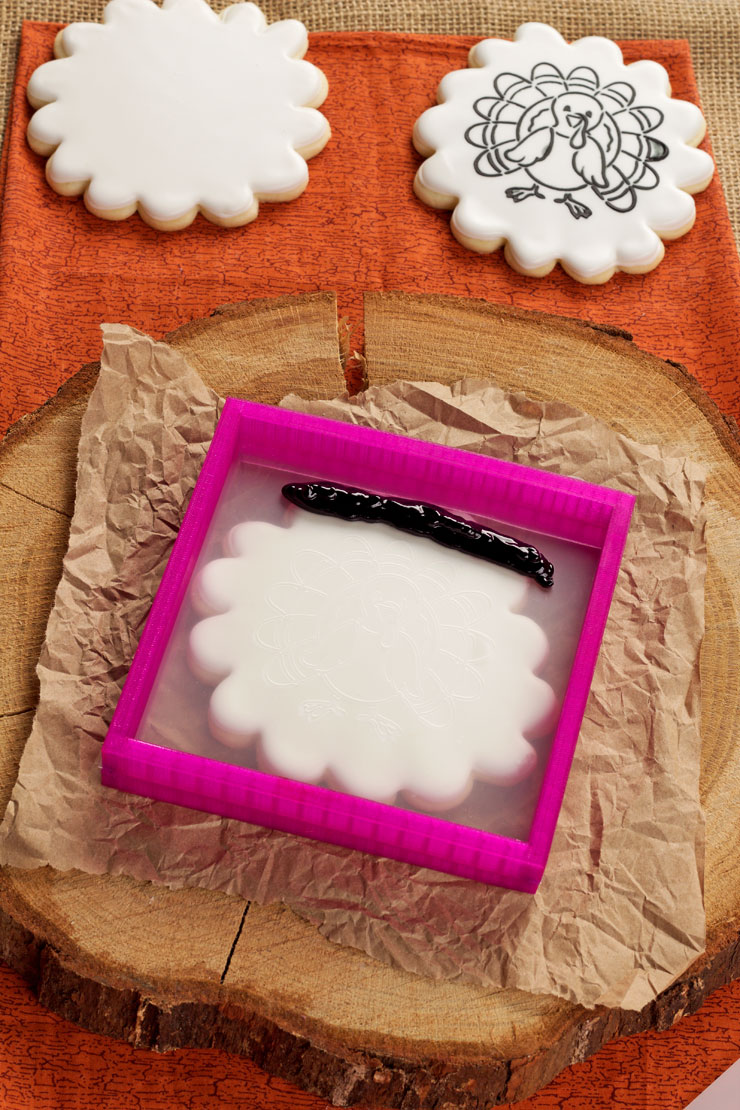
- Add some black royal icing to the top of the stencil. I piped mine on because I already had it in a decorating bag for another project. You can always add it with a spatula so you don’t have to place the icing in a bag.
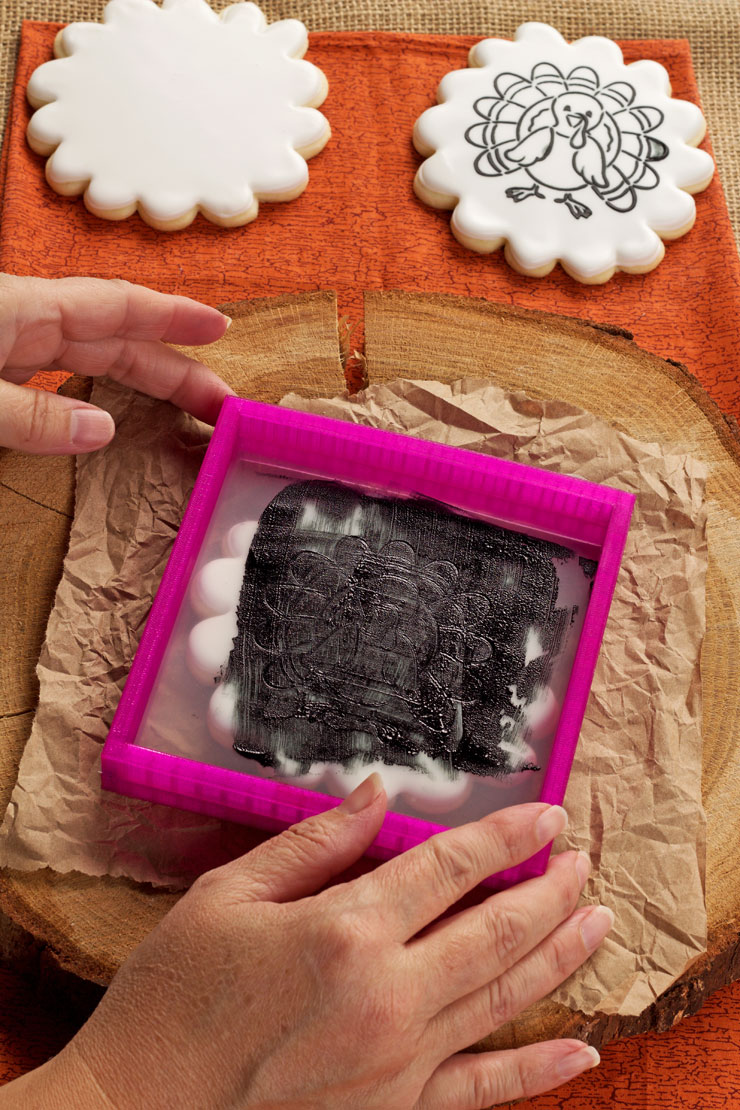
- Use the stencil scraper or a stiff spatula to pull the icing across the stencil making sure icing is spread evenly and has fill the entire stencil.
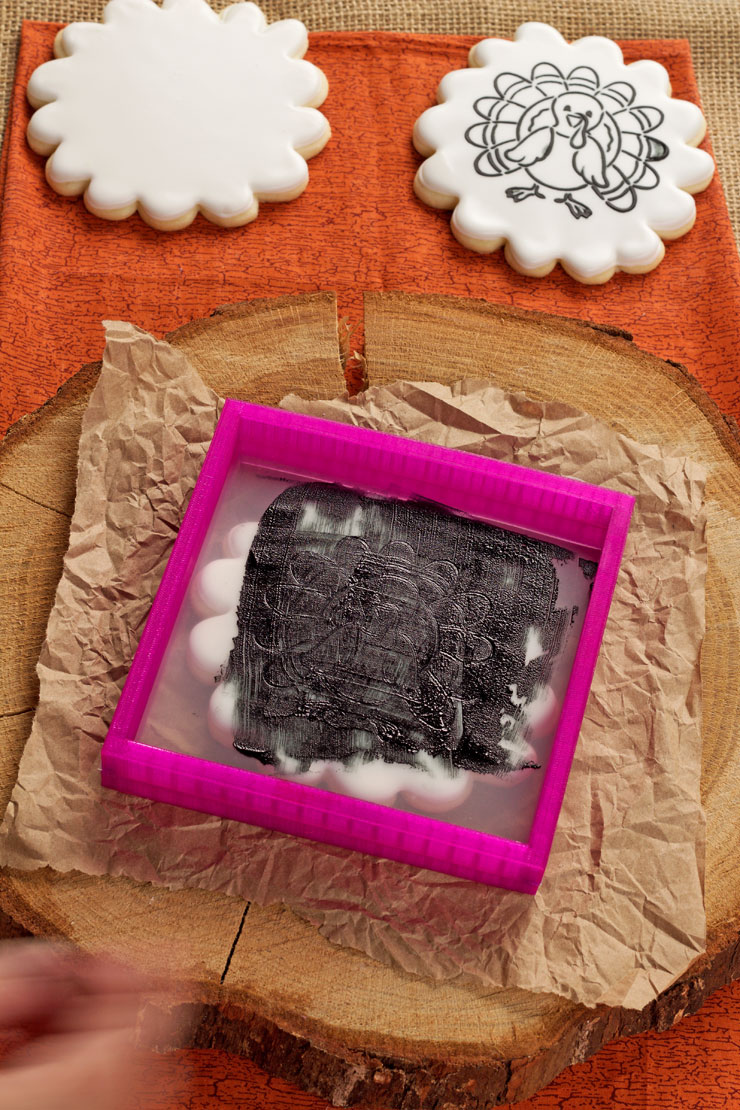
- Next, take the stencil off of the cookie by lifting it straight up. If you don’t take it straight up, it could smudge your design.
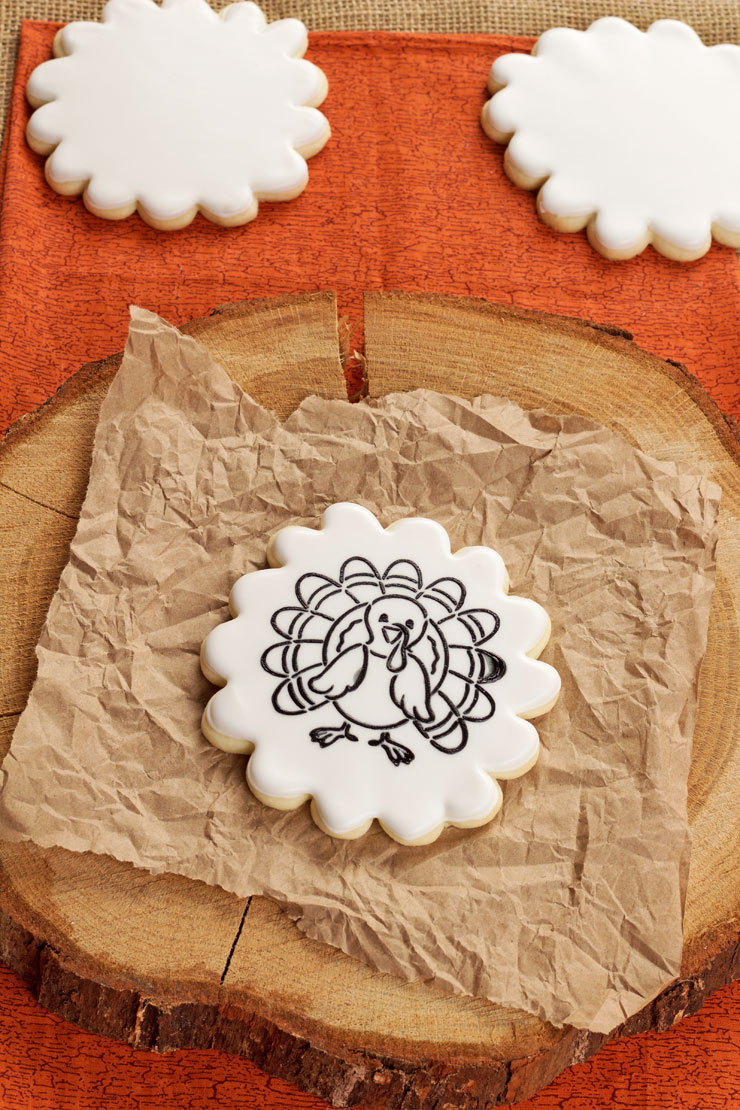
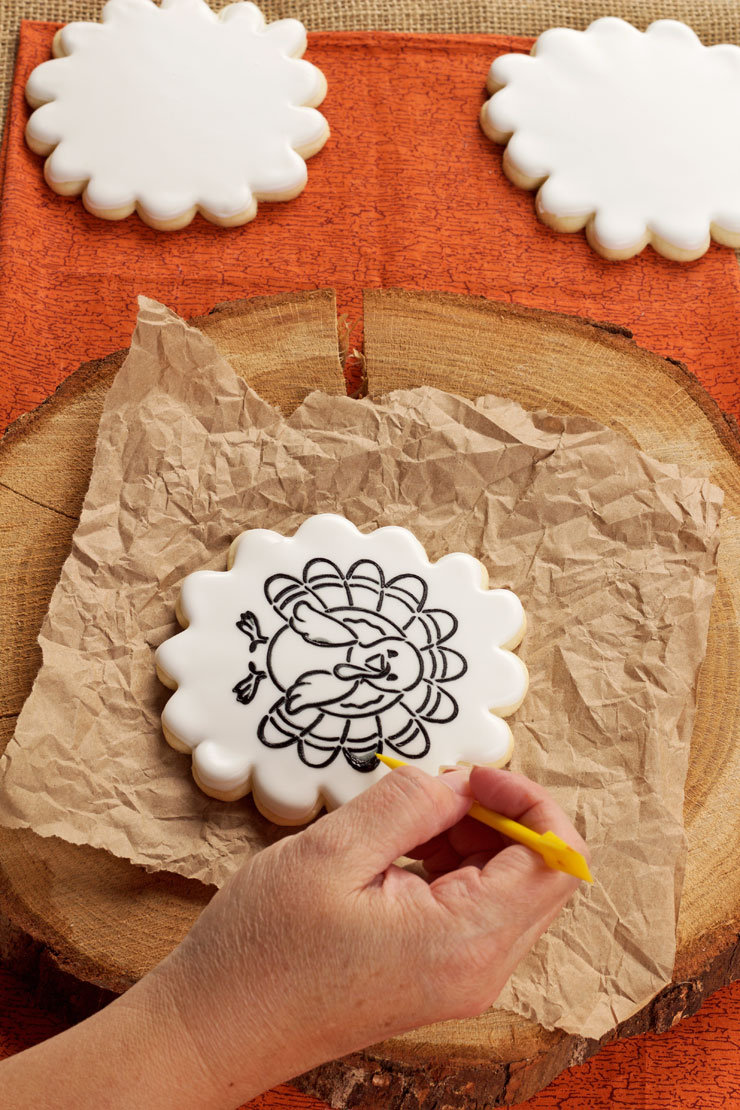
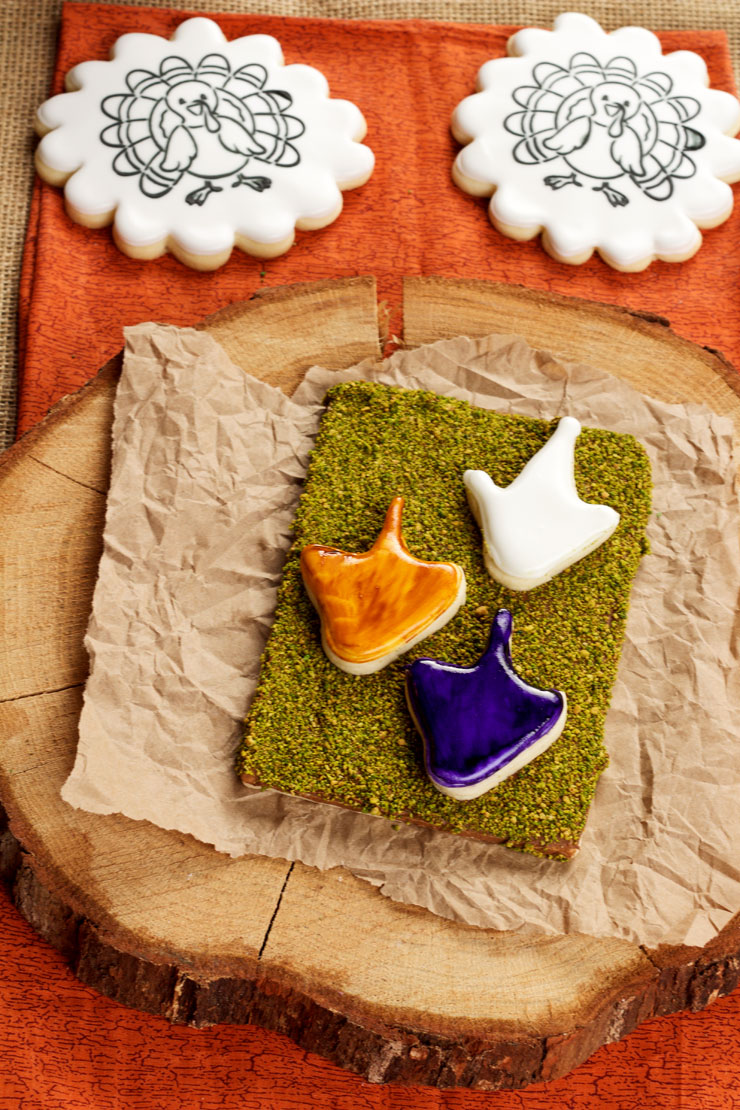
Here is another tip for you. You might need to rinse the stencil off in between each use when working with royal icing. If any icing gets on the backside of the stencil it will end up on your cookie. After you wash it off, dry it completely or you will get a smeared water spot like the one on his wing. I didn’t do that on purpose. I am a messy decorator but that is a good thing for you. You can learn from my mistakes.
- If you do end up with a black glob of royal icing somewhere on your cookie, use a booboo stick or a dry clean paint brush to remove as much of it as you can. Then, let it go. It is a cookie that is going to be painted. No big deal. If you are selling them at a craft show, use the one you messed up as an example cookie. People will paint it and then buy your cookies because it is so much fun they will want their family to try it.
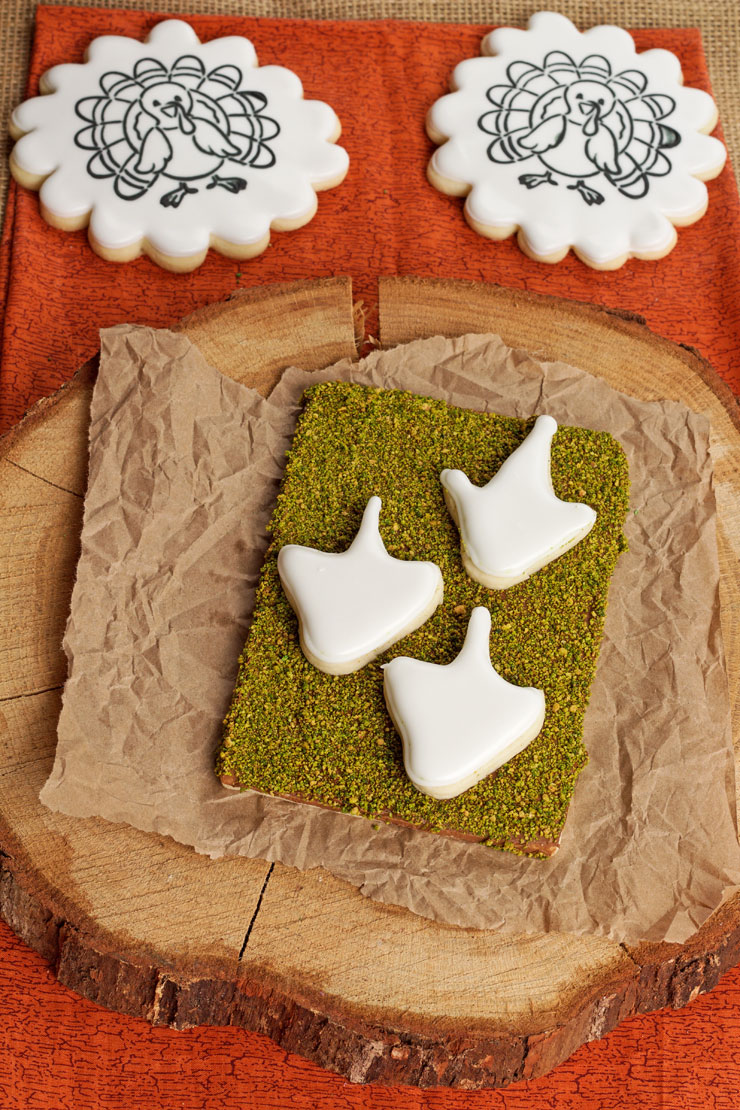
- Follow Sweet Sugar Belle’s Dinosaur footprint tutorial to make the feet.
- Outline and flood them with white icing.
- Let them dry completely.
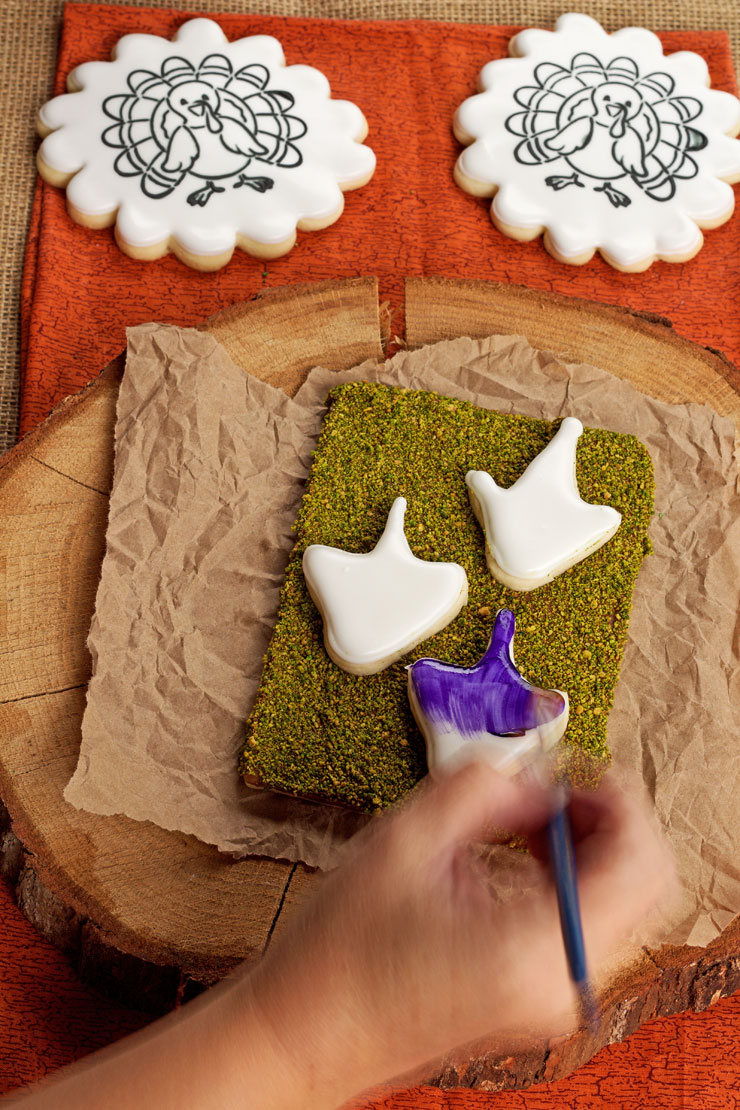
- Find a cookie large enough to hold a few turkey feet. Outline and flood it with whatever color you have on hand and add the turkey feet while the icing is wet.
- Immediately cover them with graham cracker crumbs tinted with greed food gel. You can see a tutorial on How to Make Moss Covered Bunny Cookies that will show you exactly how to cover a cookie with tinted graham cracker crumbs.
- Let it dry for a few minutes.
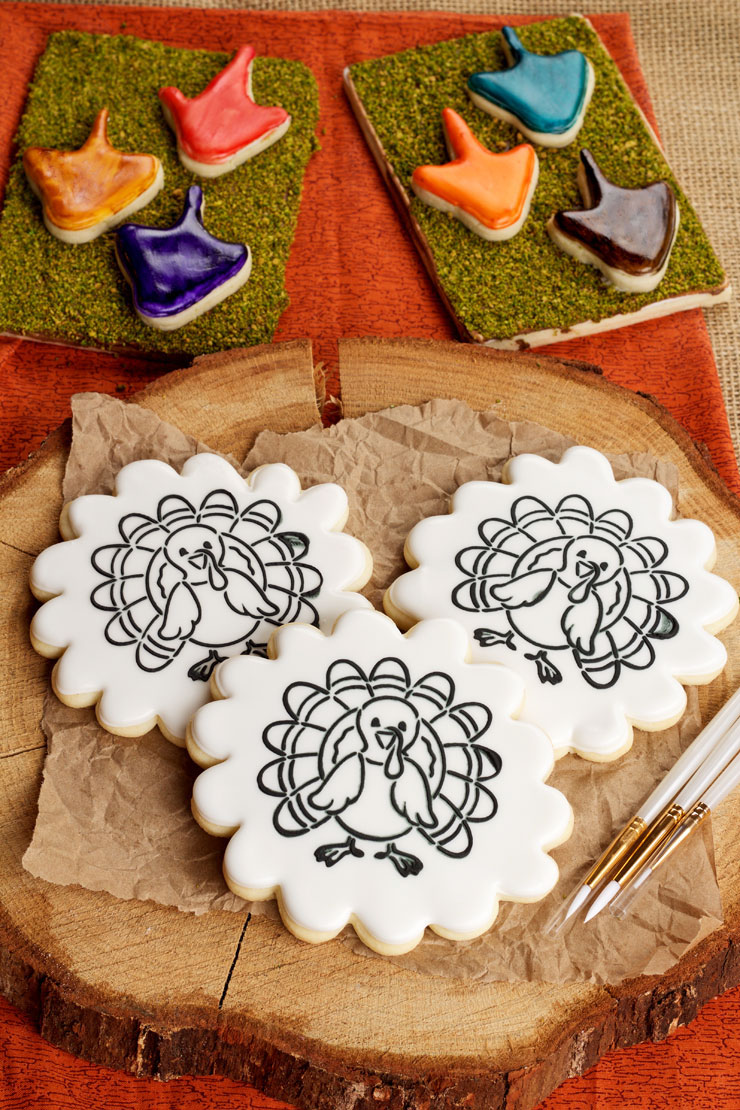
- Paint the turkey feet with food gel colors mixed with a little water.
- Pick whatever colors you want to offer the kiddos to paint with.
I choose the following colors:
- Wilton Violet
- Americolor Gold, Super Red, Warm Brown, Royal Blue, Orange
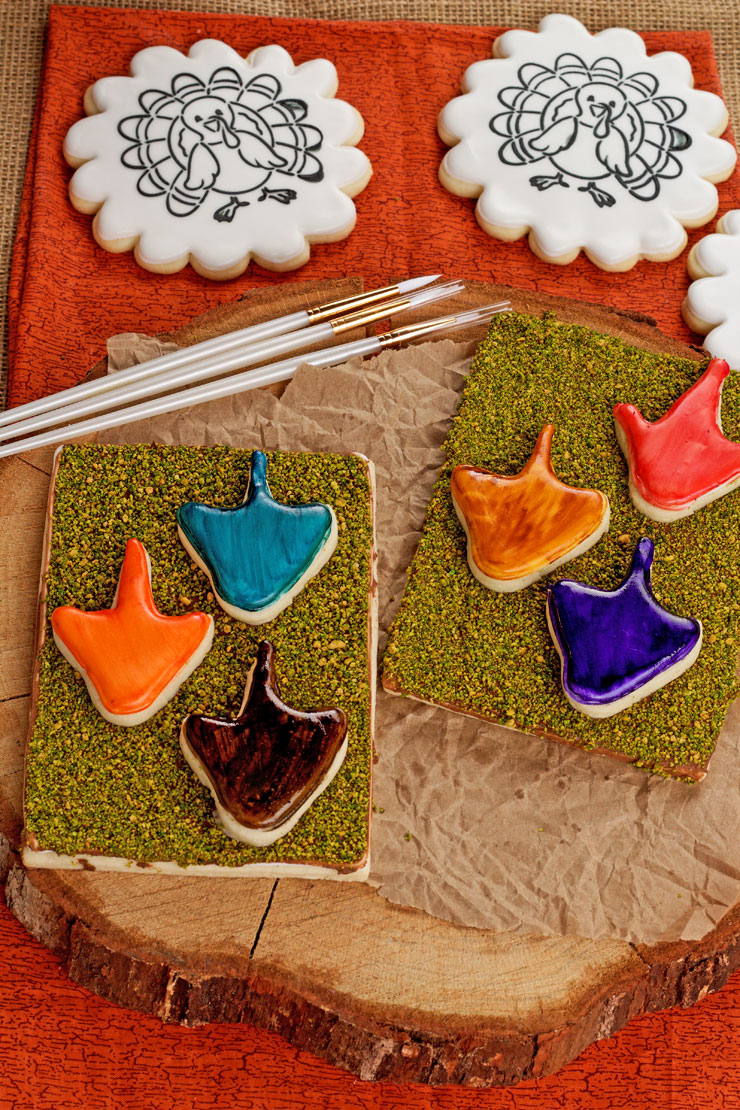
There are a ton of ways to offer the paint colors to the kids. Try to think of something fun. If you are going to sell these, you could use a round sponge to add different colors all around the edge of the cookie.
The feet work well if you have more than one person sitting at a table working together but not os much for individual decorating. Be creative so your cookies will be unique and irresistible.
Bear hugs,






Great idea to keep the little kiddos occupied so the parents can chat and relax this Thanksgiving. Thanks!
Thanks so much for this tutorial! I never knew how to present the “paint.” This was so helpful!! I love everything you do. You are so generous to share all your cookie talent and wisdom! ?
You are so welcome Nancy. I am going to show another way to present the paint soon on some Christmas cookies. 😉
I have yet to make a PYO cookie, with your help, I’m sure I can do it! What a fun idea for your Thanksgiving table!
Happy Thanksgiving!
HI thank you great idea! But how is the “Paint” used once dry? Id love to do this with the family soon, make ahead of time and by the time i see them, the paint will be dry, so do they add water to the “paint”?
Hy Mayra,
Just place some food gel color on a cookie so everyone can use it as the “paint.’ If they dip the paintbrush into a small amount of water, then brush it across the “paint” it will brush on the cookies just like paint. A thin layer of paint but that’s all there is to it! 😉
I’m going to try my hand at some PYO cookies this week. Thanks for the tutorial 🙂 2 questions: does the black icing from the outline shmear when the kiddies paint the cookie? Also, would it work to airbrush the stencil on in black? Or would that shmear when water gets on it? Just trying to work out the details. Thanks for your help!
Hi Malka,
Your gonna love watching the kids paint the cookies. They’ll have so much fun!
Yes the black does smear into the painted colors if they use a lot of water. I give my grandson a paper towel so he take off some of the water before he paints the cookie.
I honestly thing the airbrush black would be very messy. You can try it but I personally wouldn’t do it because the airbrush colors look wonderful but won’t hold up against water.
To be 100% honest the cookies don’t last that long around here. As soon as everyone is done painting them, the eat them! 😉
Has anyone else out there tried PYO Cookie Stencils with with airbrush color instead of royal icing?
If you still have questions, you can contact Hillary at The Cookie Countess and ask her. She’s amazing! http://www.thecookiecountess.com/pages/about-us
Hi! These are so cool!!! I am going to be making paint your own cookies soon and I was wondering what type of paintbrushes you used to give to the kids? Thanks
Hi Tessa,
I usually pick the paintbrushes up at Wal-Mart or at a local craft store. You can find them in pack or buy them individually. I prefer to give them decent brushes so they feel like they are little cookie artists.
Here is the kind I like and you can find them at your craft stores: http://amzn.to/2mq8ofB but please look around and find something YOU like!
Bear hugs,
Lisa