How to Make Cute Lemon and Lime Royal Icing Transfers
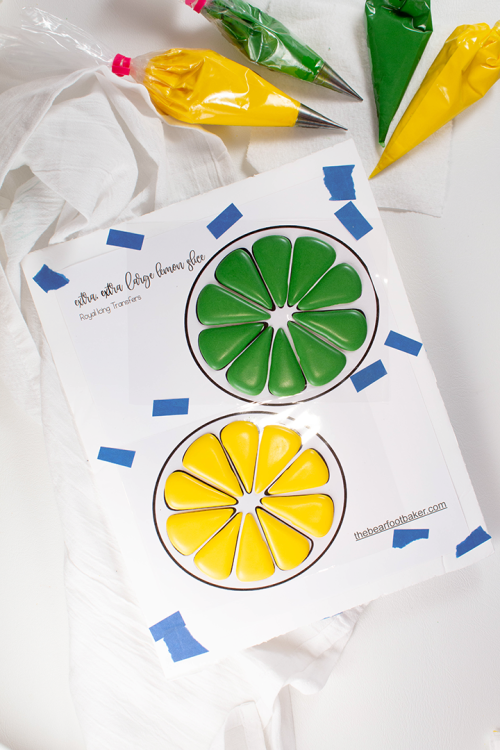
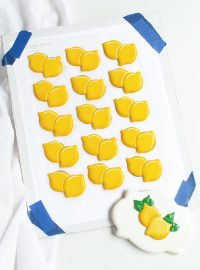
I know the name of this tutorial is “How to Make Cute Lemon and Lime Royal Icing Transfers” and that is what we’re going to do. Instead of making them like a real lemon and lime slice I wanted to make the wedges. If we make the wedges we outline and flood a circle cookie and drop the wedges into place. The great thing about this process is you can make the wedges ahead of time and store them in an airtight container. There are several different sizes of the free royal icing transfers so download them all. It’ll help speed up the time you spend decorating your cookies.
Then, bake some circle sugar cookies, outline and flood them with royal icing, and drop the wedges in place while the icing is wet. It’s so simple and in the end, you’ll have super cute circle lemon and lime cookies.
If you look closely at these cookies you’ll see I only added green and yellow royal icing. I liked these, but I wanted them to look like natural lemon and lime slices so I used some food gel color to make them look real. It doesn’t take much but it’ll make a huge difference in the look of the sugar cookies. Come on and I’ll show you want I mean.
Supply List:
(may contain affiliate links)
Recipe:
Royal Icing Colors:
- Ivory AmeriColor Ivory Soft Gel Paste™ Food Color
- Green- Cookie Countess Gel Food Color Glowing Green, Cookie Countess Gel Food Color 2oz – Succulent Green, and Cookie Countess Gel Food Color 2oz – Forest Green
FREE Lemon and Lime Royal Icing Trangers:
- Extra Extra Large Lemon and Lime Royal Icing Transfers
- Extra Large Lemon and Lime Royal Icing Transfers
- Large Lemon and Lime Royal Icing Transfers
- Medium Lemon and Lime Royal Icing Transfers
- Small Lemon and Lime Royal Icing Transfers
- Extra Small Lemon and Lime Royal Icing Transfers
Tools:
- Paintbrush- I used a fan brush on these and it worked very well. You can get a brush at Country Kitchen Sweetart or at The Cookie Countess.
- Turkey Lacer
- Cookie Bags- In the past, I used wax paper to place over my royal icing transfer images and it worked well. On Instagram, I saw Maddie at Maddies Marcum @MaddiesCookieCo and said she used cookie bags. I found them at Truly Mad Plastic Super Clear Cello Bags. They’re very affordable and you can wash them and use them over, and over, and over, again.
- Painters Tape– You can find this at your local stores. I wanted to add a link just to show you what I use. Just be careful when you tape down the cello bags because you don’t want the royal icing to touch the tape.
- Foam board to tape your transfer patterns on.
- Cello Bags– These are the bags I cut and tape over the printed pattern on the foam boards. Once you pipe the royal icing shapes and let them dry they’re easy to remove and store for later use. There are several different sizes to choose from.
How to Make Lemon and Lime Royal Icing Transfers Video:
Hope you enjoy the video!
Let’s make some lemons and limes:
- Begin by downloading your free royal icing transfer patterns in the supply list. You might want to check the size of the circle cookies you’re going to use to make sure the transfers will fit on the cookies. If it seems as if the transfers will be a tight fit you can make them a little smaller when you pipe them. It’ll be sad if you make the cookies only to find out the transfers are too large so just check it out before you begin piping.
- Mix your royal icing colors.
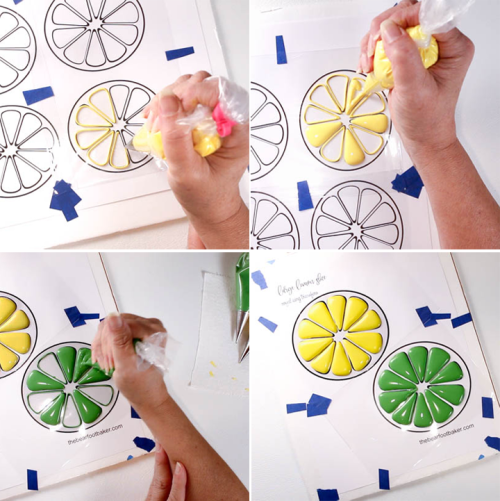
- Outline the wedges and flood them. They’re close together so I outlined and flooded every other one so they wouldn’t flow together. Once they dry a little go back and outline and flood the remaining wedges. Individual slices are what you’re after here.
- Place them in front of a fan and let them dry completely.
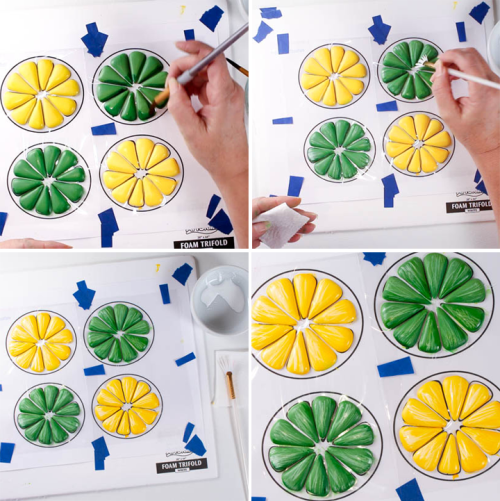
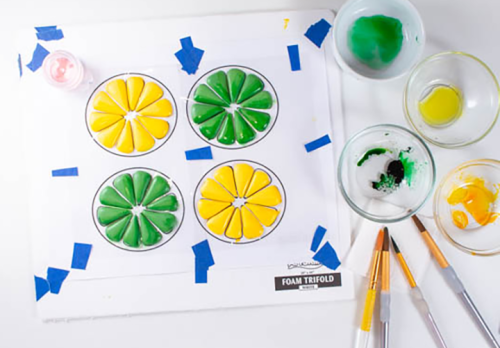
- Once the royal icing transfers are dry you can paint them if you’d like. I like adding a little shadow with the food gel color I used to make the royal icing. Just place a little in a bowl and add some water.
- Use a brush to paint a little of that color on the wedges.
How to know where to add the shadows:
If you look at the image below you will see a little container of pink dust. I placed it on my pattern to represent the sun. If the sun is shining from the top left corner then the shadows will appear at the bottom right of the wedges. The pink container is a good visual to help know where the shadows should be.
- Once you add the shadows let them dry for about 20-30 minutes.
- Next, mix a little water with your white food gel color. Grab a brush such as a fan brush and lightly make some white streaks on each wedge. Start at the outside of the wedge and pull it towards the center. This will help the wedges look more like an actual lemon and lime slice.
- Let everything dry completely.
- Gently remove them from your cookie sheet.
- Store them in an airtight container away from the sun until you’re ready to use them.
Don’t forget to download all the different sizes of your free lemon and lime royal icing transfers. You can use them for oranges and grapefruit cookies also. I love these patterns and I plan on making some cookie tutorials for you soon.
Bear hugs,








I absolutely ADORE your writing and your work. We now have SIX grandchildren, some in Ohio, others in California, one here in downtown New York. At Christmas we send cookie cutters, which are always a big hit. Now all the kids make cookies and decorate them…some pretty weird. The older children actually make and bake the cookies….Thanks you so much.
Kathleen
Thank you for the wonderful post and site! How do you transfer them to the cookies?
Once the royal icing designs on the cello bags dry, you can carefully remove them. You can attach them to your wet icing or let the icing dry and add them with a small amount of royal icing.
Royal icing transfers are a game changer for me. You can make them ahead of time so you can easily add them to your flood icing.
Here are a few tutorials that will show you all my patterns so far and how easy they are to remove them from the cello bags or wax paper:
Candy Eyes- https://thebearfootbaker.com/candy-eyes/
Royal Icing Transfers- https://thebearfootbaker.com/royal-icing-transfers/
https://thebearfootbaker.com/easy-witch-hat-sugar-cookies-for-halloween/
https://thebearfootbaker.com/fun-royal-icing-acorn-transfers-for-your-sugar-cookies/