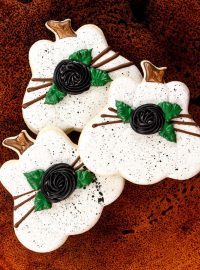
How to Make Adorable Pumpkin Cookies with a Bunny Cutter
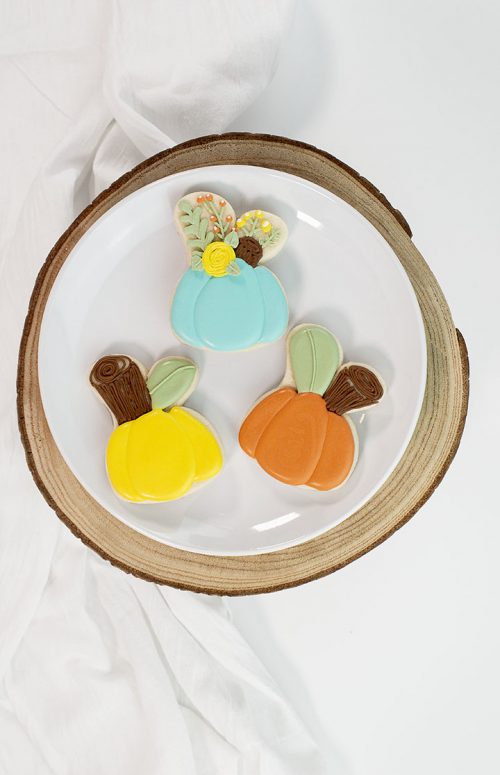
Do you know how to Make Adorable Pumpkin Cookies with a bunny cutter? When you look at the picture below can you see the bunny head shape? This is a great way to make a few rabbits and pumpkin cookies with one cookie cutter. Shapeshifting is great because it seems the possibilities are endless.
Let’s make a few pumpkin cookies with the bunny cutter.
Supply List
(may contain affiliate links)
Recipes
- Sugar Cookie Recipe
- Royal Icing Recipe
Cutters
- Bunny Cookie Cutter-I used this bunny face cutter from Sweet Design Shoppe. If you’re wondering what size I used for my little pumpkins it’s 3″ x 2 1/4.” Check to see if you have a bunny head cookie cutter because almost any bunny head with ears will work.
Royal Icing
- Orange- Outrageouly Orange with a tiny amount of Totally Brown and both colors are from The Cookie Countess.
- Yellow- Sunshine Yellow from The Cookie Countess
- Blue- Turquoise from Americolor
- Green- Avocado from Americolor
- Brown- Tulip Brown from The Cookie Countess– SOOTM (Straight Out Of The Mixer icing consistency) this needs to be a thick icing consistency for the stems of the pumpkins.
I use an outline and flood consistency royal icing these days. I also love 15-Second Consistency Royal Icing so you need to use what works well for you, but you will need thick consistencies of:
- Yellow royal icing for the flower on the blue pumpkin.
- Green royal icing to make the leaves.
Tools
How to Make a Pumpkin Cookie with a Bunny Cutter Video:
Enjoy the video!
Let’s get started!
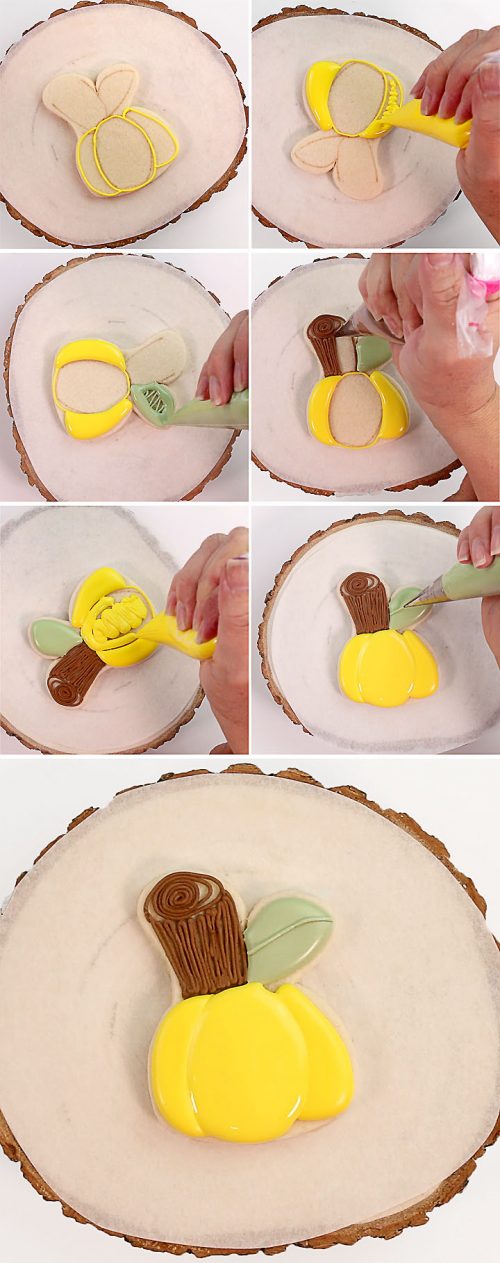
This tutorial is really simple so I put all the images together. If you like videos there is one above that will show you exactly how to make each of these cookies so go enjoy it.
The Pumpkin:
- Draw your pattern on the bunny head cookie with a food-safe marker. I really enjoy this part because you can make the stem tall, fat, short, thin, or any way you can imagine. This is what will give your cookie character.
- Outline the sections of the pumpkin with the orange royal icing.
- Pipe a few lines in the sections before you flood them. Sometimes people ask why we do this and there is a simple answer. It’s it to help prevent your flood royal icing from sinking as it dries. If you pipe a few support lines and let it crust over and flood it’ll help support the flood icing. If you wait a long time after you pipe those support lines it could have a different reaction than your anticipating. It could pull the water out of the flood icing you add and cause it to sink. So timing is important. Don’t wait a very long time before you flood. I try to do it within ten to twenty minutes. Now that I have said all that I don’t always do it that way. I make the support lines with a thicker outline consistency so I don’t have to wait for it to crust over. It’s a little faster and I like fast.
- After you pipe the support lines and let them crust over, flood the two outer sections and let them dry until they crust over.
- Then, pipe the support line in the center section of the pumpkin. Let it crust over, and then flood it.
The Stem:
- Let the pumpkin body crust over before you add the stem.
- Use a thick or outline consistency to pipe the stem. I really did enjoy not outlining and flooding the section before I added the stem details. It was fast and simple and that kind of works when you have a lot of cookies to decorate.
The Leaf:
- If you are careful you can outline and flood the leaf as soon as you finish the stem. Just be careful and don’t let the two colors touch each other. The orange should already have a crust so you can complete this step right away. Use the green royal icing to outline and flood the leaf. It’s that simple!
The Yellow Pumpkin Cookies with a Bunny Cutter:
Basically follow the same instructions for the orange pumpkin. The only difference is the placement and size of the stem and leaf.
The Blue Pumpkin Cookies with a Bunny Cutter:
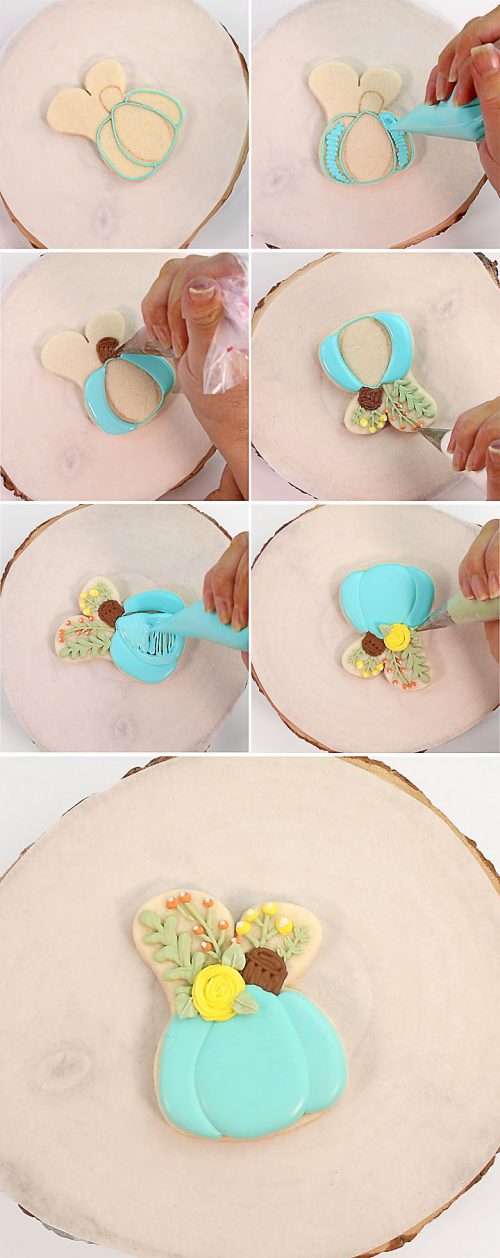
The blue pumpkin is made a little different than we made the orange and yellow pumpkins because it has some flowers and leaves. Don’t stress because it is super simple!
- Draw your pumpkin cookie pattern on the bunny with a food-safe marker.
- Outline the sections of the pumpkin with the blue royal icing.
- Pipe a few lines in the sections before you flood them.
- After you pipe the support lines and let them crust over, flood the sections and let them dry until they form a crust.
- Then, pipe the support line in the center section of the pumpkin and let it crust over before you add the flood icing.
The Leaves and Flower:
- Let the pumpkin body crust over before you add the stems.
- Use a thick or outline consistency green royal icing to pipe the stems and lines and you can watch the video to see how simple it is.
- Now add orange and yellow dots to the stems.
- Make a yellow swirl circle at the base of the stems and the top of the pumpkin.
- Add a few leaves with the tick green icing.
You’re all done with your Pumpkin Cookies with a Bunny Cutter!
Who knew a bunny head cutter could make cute little pumpkin cookies because I didn’t until I started playing with my cookie cutters, pencil, and paper. Doodling is pretty cool when you end up giving the final results to your friends as a simple, “I’m thinking of you!” gift. Click here if you’re looking for more fall and pumpkin cookies.
Stay tuned because I have a lot of fall cookies coming up soon.
Bear hugs,

