Simple Halloween Cookies made with Fun Stencils
Halloween is one of my favorite holidays. If you look at the Halloween Tab under the Cookies Category you will see several Halloween cookies that I have made since I started this blog. There are more ideas floating around in my head that I didn’t have time to make this year. That’s alright because I will share them with you next year but, I couldn’t wait until next year to share these simple Halloween cookies.
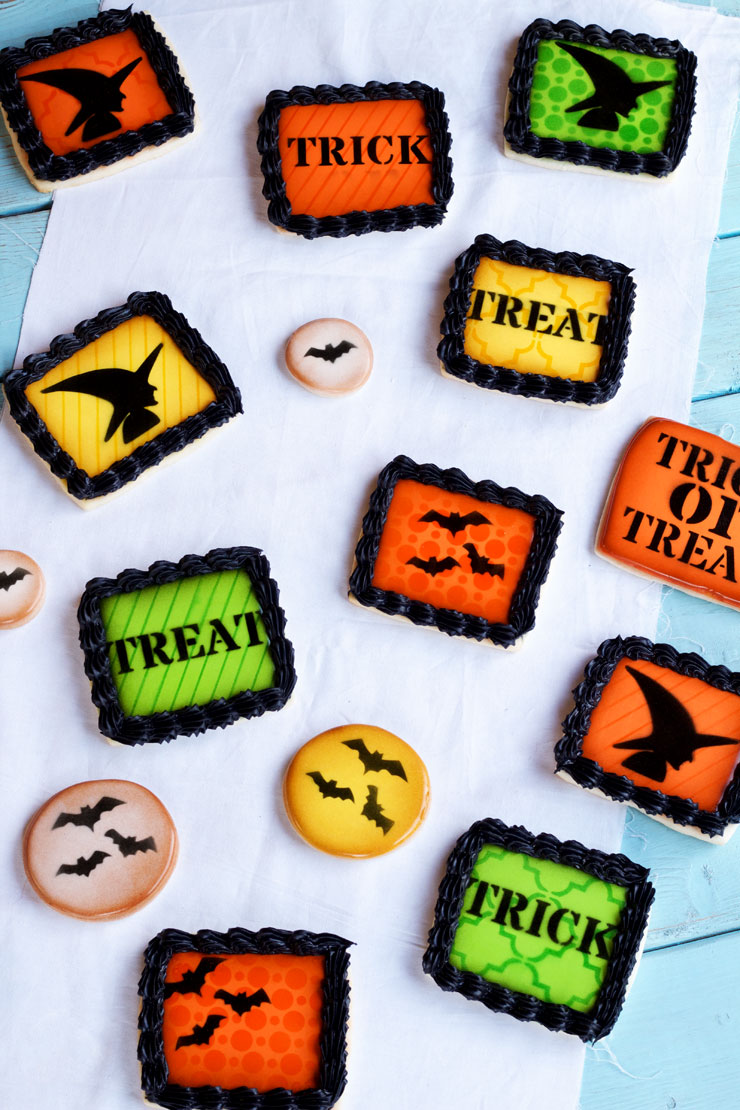 These cookies may look complicated but trust me, they are easy to make because most of the work is done with stencils and an airbrush gun. Layering stencils can create an interesting design that will give your simple Halloween cookies a very unique look. No one will ever have to know how easy were to make.
Supplies for Simple Halloween Cookies:
15 Second Royal Icing in piping bags fitted with a #2 tip in the following colors:
Orange
White
Yellow
Green
Thick black icing in a piping bag fitted with a star tip.
Airbrush Gun with the following airbrush colors:
Brown
Black
Green
Orange
Yellow
Diagonal Thin Strip Stencil
Witch Silhouette Stencil
Large Quatrefoil Stencil
Spooky Scenes Stencil
Bubble Circle Stencil
Trick or Treat Stencil
There are a few stencils I think every cookie decorator must have because they help create the perfect canvas for your cookie art. I like to call them “background stencils.” They are stencils like the Diagonal Thin Strip Stencil, Large Quatrefoil Stencil, and the Bubble Circle Stencil. I found them at The Cookie Countess Shop along with a few more I will add to my collection. You don’t have to use these exact stencils but you get the idea. It is a simple way to take your cookies to the next level.
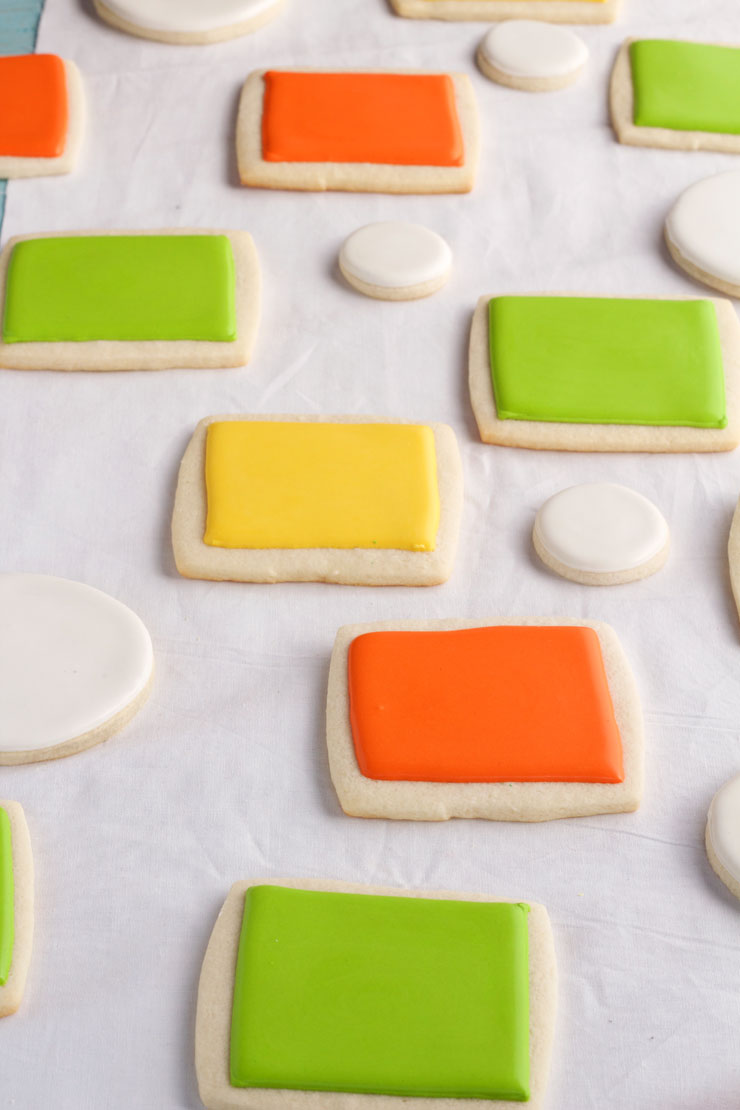 Begin by baking cookies. I used rectangle and round cookies for this set.
Then, outline and flood each cookie with the green, yellow or orange icing. Don’t take the outline all the way to the edge of the cookie. Leave some room for the border you will add later.
Let them dry completely.
Outline the circle cookies with the white or yellow icing and let them dry completely.
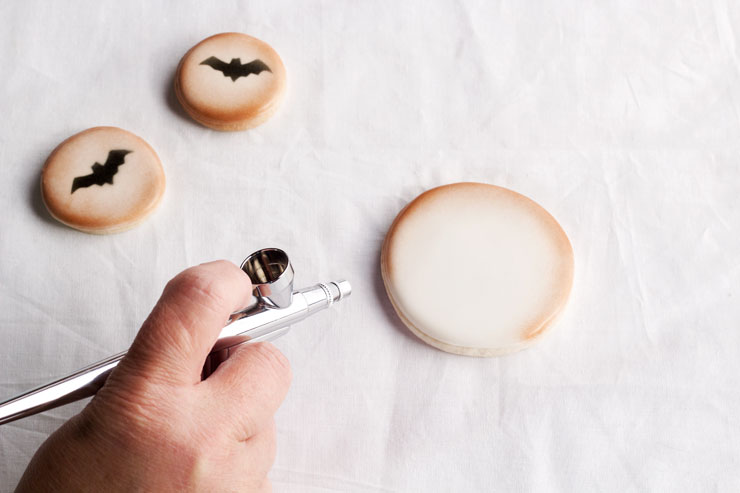 Next, airbrush the edge of the white and yellow circles with the brown airbrush color. For more information on how to airbrush cookies, click here.
Then, lightly spray the center with the brown while holding the gun a few inches away from the cookie. The farther away the gun is from the cookie, the lighter the spray will be.
Next, place the bat stencil on a cookie, and airbrush with the black airbrush color. If there is more than one bat on the stencil, cover the ones you don’t want to show on the cookie with plastic wrap so you will only spray the one you want on your cookie.
 I didn’t take a picture of myself airbrushing the border of the rectangle cookies so I will just tell you what colors I used. The edges of the orange cookies were airbrushed with the brown airbrush color.
The edges of the green cookies were airbrushed with the black airbrush color.
We talked about he Stencil Genie last week but, it is worth mentioning again. I love this thing!! It makes life so much easier. If you don’t have one, ask Santa to bring you one. It is amazing!
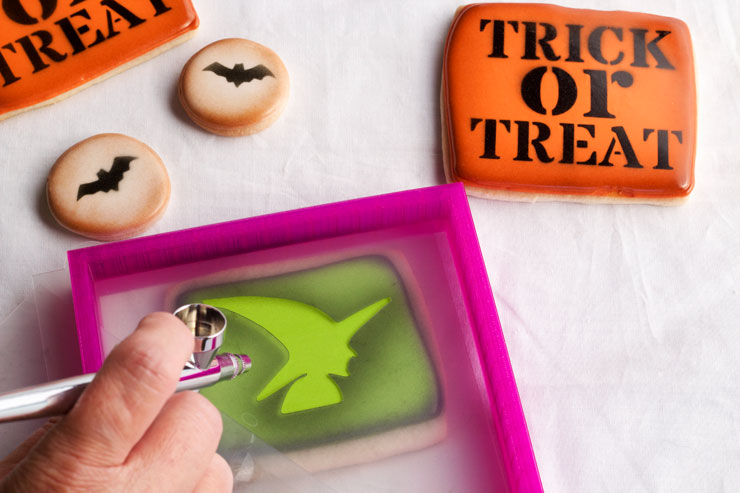
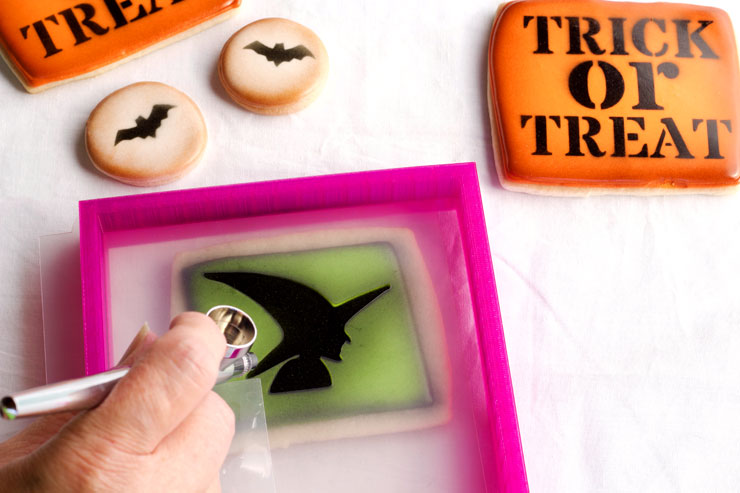 Once the borders are airbrushed, place your stencil in the Stencil Genie and lay it on top of the cookie. Airbrush your design.
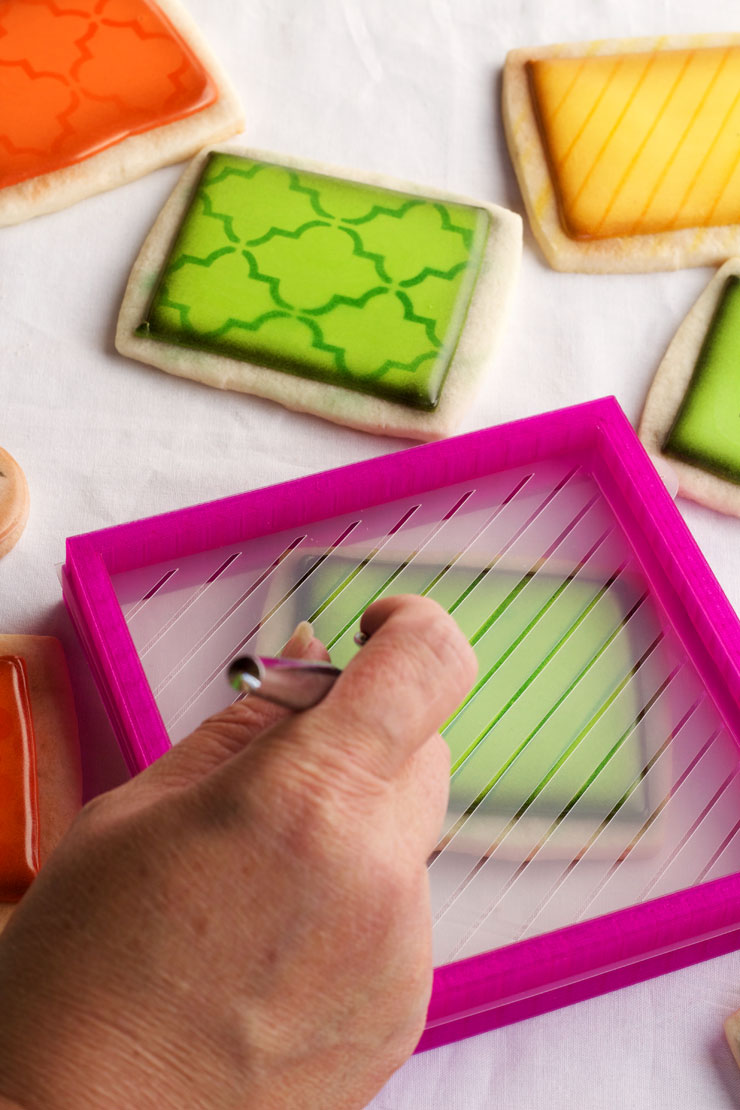 To make cookies using the layered look, airbrush some of the cookies with the Diagonal Thin Strip Stencil, Large Quatrefoil Stencil and the Bubble Circle Stencil. If you outlined and flooded your cookie green, then use the green airbrush color, if your icing is yellow, then use the yellow airbrush color, if your icing is orange, then use the orange airbrush color.

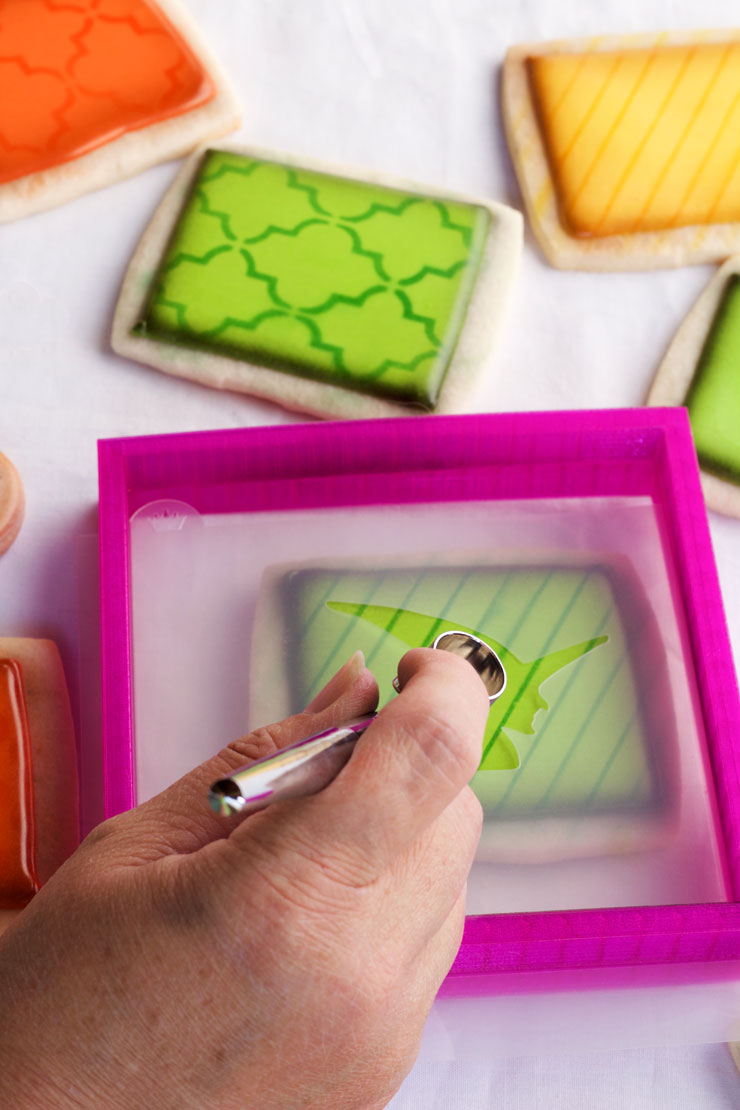 Then, use the witch, trick or treat or bat stencils and airbrush the pattern on top of the design with the black airbrush color. Hold the airbrush gun straight up and down to prevent the color form getting under the stencil. I didn’t show that very well here as I was trying to take the picture. If you hold it at an angle like this, your stencil won’t have nice clean lines. I will make a video for you soon so you can see the difference.
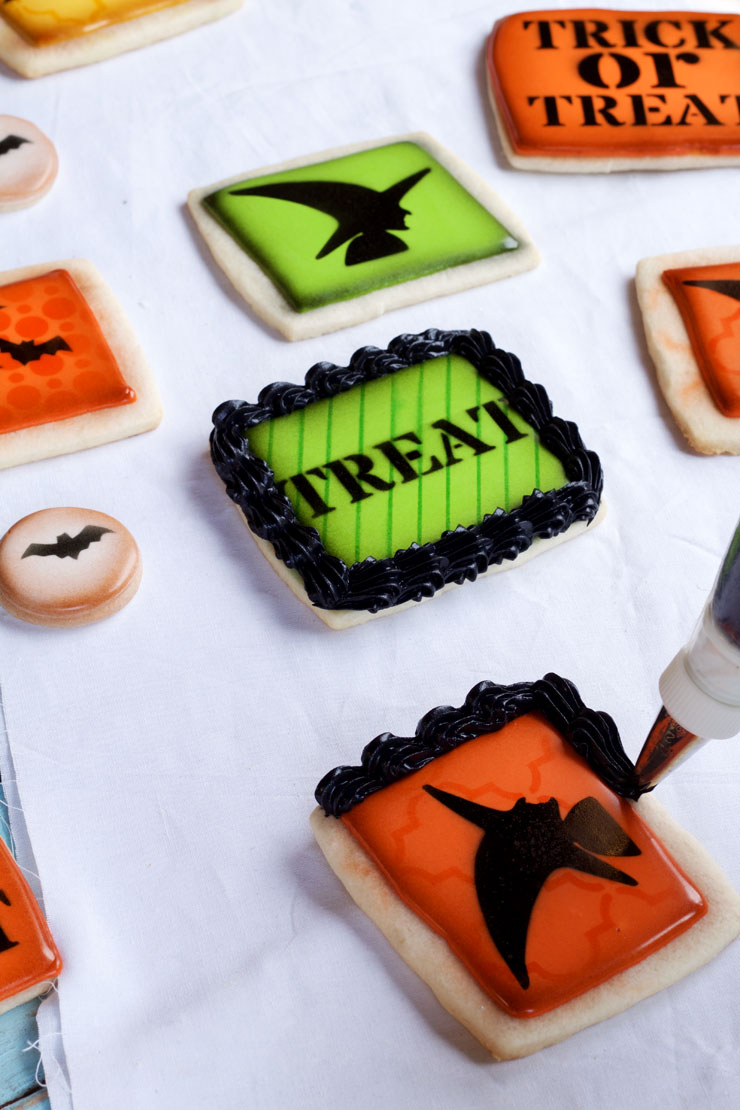 Finish the cookies by piping a black border with the star tip around the edges of the rectangle cookies. Let them dry overnight.
You don’t have to use the stencils in the center of the cookies only. Place the bats to the left side of the cookies before you airbrush them. It will add interest. Also, if a stencil says “Trick or Treat,” split the words up and use them on separate cookies. If there is three bats on a stencil, you can use one or two bats by covering the others with plastic wrap. Be creative and think outside of the stencils to make your own simple Halloween cookies.
More Simple Halloween Cookies and Treats:
Girly Bat Cookies
Frankenstein Cookies
Pumpkin Patch Cupcake Poppers
Candy Buttons
Spider Cookies
Popcorn Ball Pumpkin Patch
Bear hugs,


I just love the layered stencil look – I need to practice more with stenciling, so I can get a crisp look. You know, just like YOUR cookies!! 🙂
You can do it Kim! The Stencil Genie REALLY helps hold the stencil in place. LOVE IT!!
Your cookies are so elegant. I’ve only used an airbrush once in my life and that was many years ago. I really need to give it another try soon.
Drag it out and set it up BETH! You are an amazing artist and you will make sweet art that needs to be framed!
Lisa….if those aren’t just the cutest! And the background stencils just make them so “elegant” looking! This is a good one for NEXT year…..since this year is done! Oh, these could have made life easier this past week! Ha!
Blessings, Donna B.
I am sorry I was late with them Donna! I will let you in on a little secret, I will use the background stencils for Thanksgivng and Christmas and will show the tutorial for them! 😉
You call them simple … I call them beautiful! You have convinced me that I need an airbrush … and personal lessons 😉 Can’t wait to see the Thanksgiving and Christmas versions!
I am so ready to make Thanksgiving and Christmas Cookies. I can tell I am going to lose a lot of sleep this holiday season! You should come over and decorate with me! LOL