Little Monster Cookies (Part 1 Frank & His Bride)
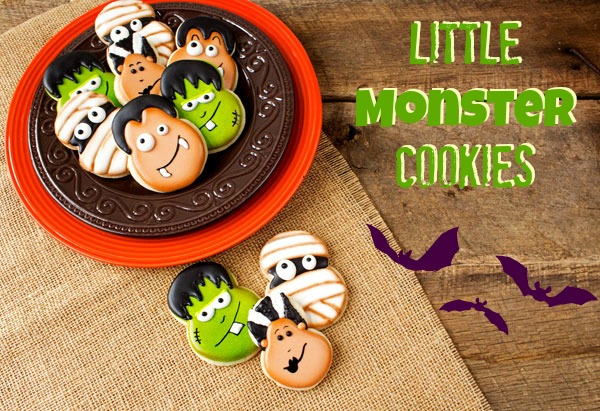
I have a friend who makes amazing cookies and she once told me to buy several number 8 cookie cutters. She said you can use them for almost anything. Taking her advice to heart, I bought three of them. I didn’t think about using them until I decided to make these little monster cookies. She was right, it worked perfectly for each character I wanted to make.
My number eight cutter was a little skinny, so I stretched it out until I liked the shape. Now that I have made these little monster cookies with my new favorite cutter, I can think of several other projects I want to use it for.
Supplies for Frankenstein Little Monster Cookies:
Green 15 Second Icing
Black 15-Second Icing
White 15-Second Icing
Black bead for the eyes
Black AmeriColor Gel Color
Detail Paint brush or a black food-safe marker
Optional Supplies:
Airbrush gun
Brown Airbrush AmeriColor Color
Green Airbrush AmeriColor Color
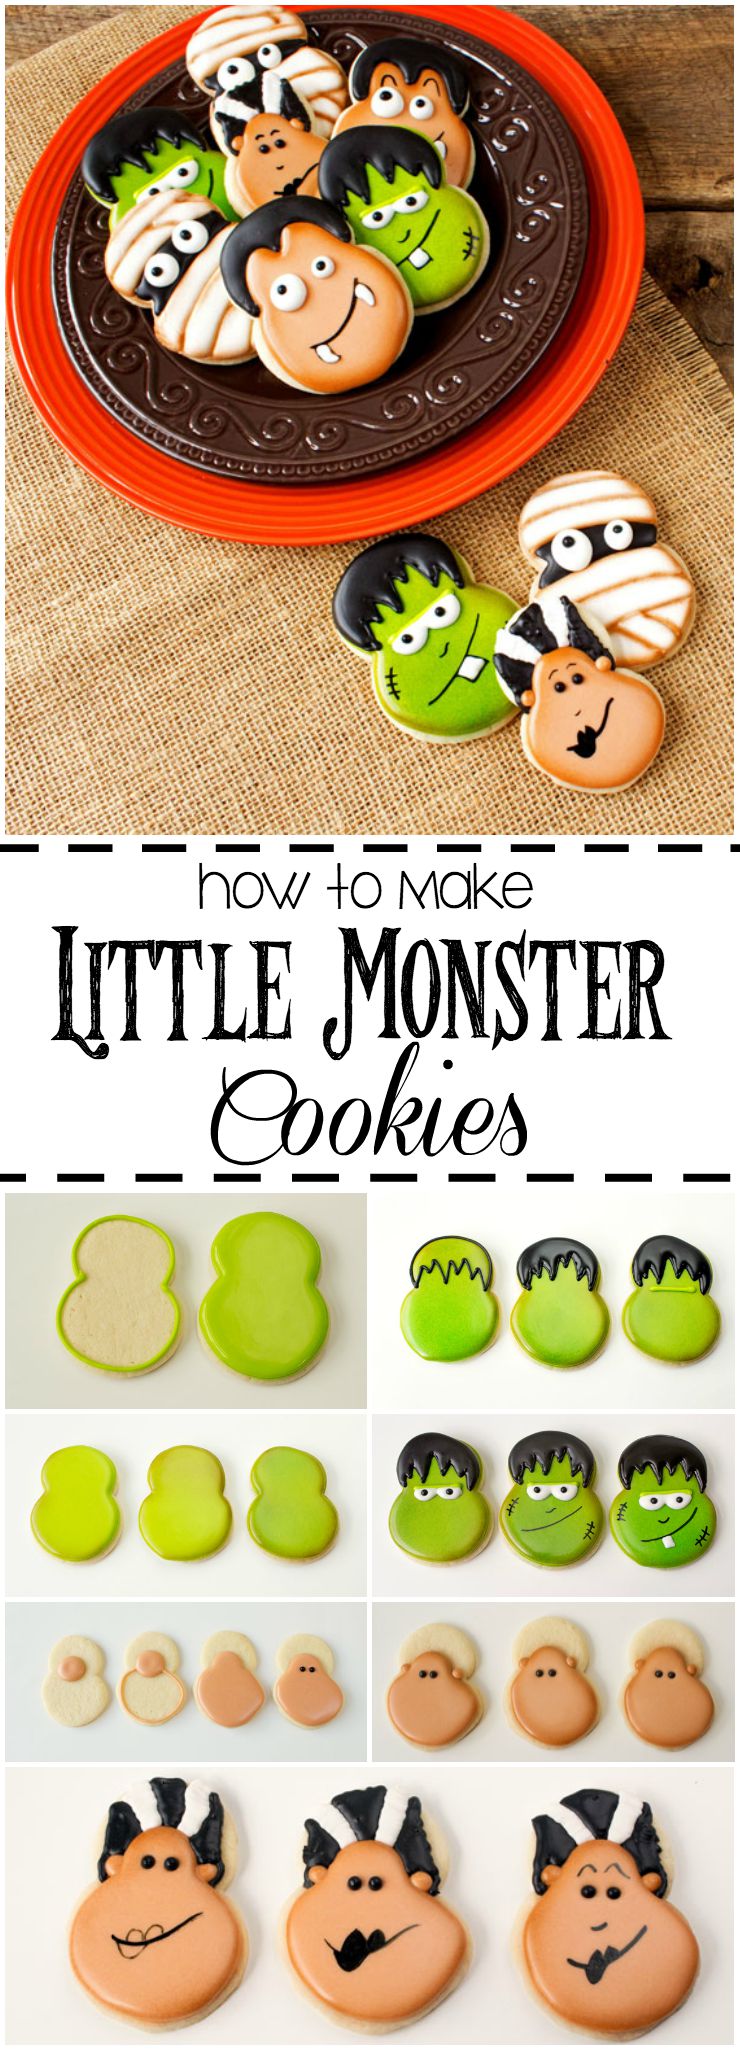
Begin by outlining the cookie with the green icing and a #2 piping tip.
Then, with the green icing #2 piping tip, flood the cookie and let it dry for about 30 minutes.
I wanted to airbrush my little monster cookies but, you don’t have to if you don’t want to. If you don’t have an airbrush gun, you can shade the edges with an edible food pin like I did on these truck cookies.
I didn’t add a lot of airbrushing color and it added a little personality to Frank. For information on how to use an airbrush gun, follow this tutorial on airbrushing.
- Hold the airbrush gun about a half inch from the edge of the cookie and spray with warm brown AmeriColor airbrush color.
- Then, hold the gun about an inch and a half away from the cookie’s surface and spray lightly with warm brown AmeriColor airbrush color.
- Then, hold the gun about an inch and a half away from the cookie’s surface and spray lightly with leaf green AmeriColor airbrush color.
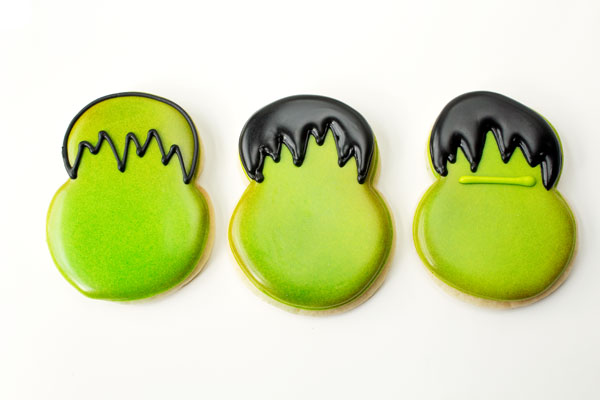
Now it is time to add some hair unless you like Frank a little on the bald side. With the black royal icing and a #2 piping tip, outline the hair and then flood it. If you are making several cookies you could make a template so they all look the same. Or you can do like I did and throw caution to the wind and have fun with it.
- Add a line under the hairline with the green icing. Allow it to dry for about 20 minutes.
- Pipe the eyes and tooth with the white icing and #2 piping tip. Add a 4 mm black bead to each eye.
- With the paintbrush or food-safe marker, make the line for the mouth, nose, and the stitches on his face.
- Let it dry overnight.
Supplies for Bride of Frankenstein Little Monster Cookies:
Flesh Colored 15 Second Icing (mix a touch of ivory with a touch of chocolate brown)
Black 15-Second Icing
White 15 Second Icing
Royal Icing Eye Transfers
Black AmeriColor Gel Color
Thin Paintbrush
Optional Supplies:
Airbrush gun
Brown Airbrush AmeriColor Color
Green Airbrush AmeriColor Color
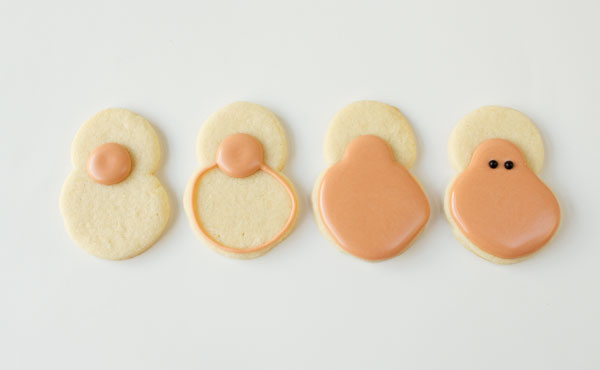
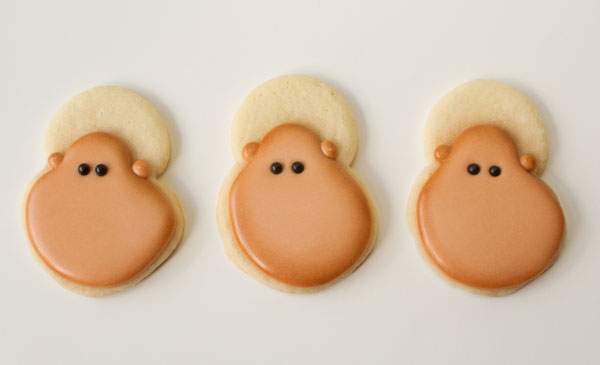
- For the Bride of Frankenstein, make a circle with the flesh-colored icing and #2 piping tip. While the circle is wet, outline the rest of the face and flood.
- Then, add two beads for the eyes and let it dry for about 20 minutes.
- Add two dots for the ears and let it dry for about 20 minutes.
Then, airbrush around the edge of the head with the warm brown AmeriColor airbrush color.
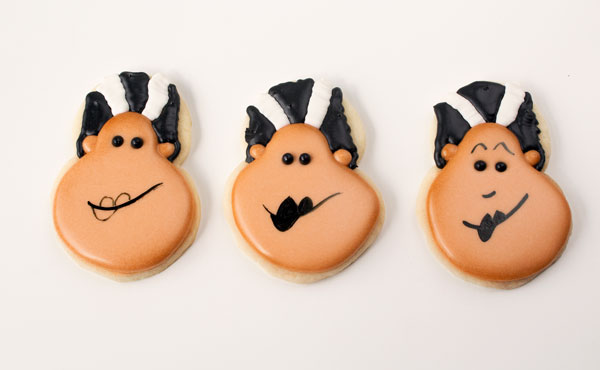
- Next, with the white icing and #2 piping tip, add two streaks for the hair and let it dry.
- With the black icing, make a zig-zag line for the edges of the hair and flood it.
- Once the face is dry, paint the mouth and eyebrows with the black food gel color.
So my advice to you is always to listen to your cookie friends. If they tell you to buy a bunch of number eight cookie cutters, do it. You never know when you might need one to make your own little monsters or something else cool with them.
Want to see how to make the Mummy and Dracula? Click here for the step-by-step tutorial.
Here are more Frankenstein Treats:
Simple Frankenstein Cookies
Frankenstein Face Cookies
Frankenstein and Bride of Frankenstein Cupcakes
Little Monster Cookies
Frankenstein S’Mores
Bear hugs,









These are SO adorable, Lisa!
Awe! Thanks Gail!
Seriously…these are too stinkin’ cute! Love that you used the number “8”, way to think outside the box!
Speaking of airbrushes…I am so sad that my nozzle is plugged and I can’t use it! I have tried everything to get it to work and nothing, it really bums me out when I see cookies that are airbrushed! Dare I say this is my SECOND nozzle that I have managed to mess up1
Thanks Terri,
I really hate to hear you have had problems with your airbrush gun. If you bought it from Karen’s Cookies, shoot me an email and maybe I can help.
These monster cookies are so cute! Great job!
Thanks Nicol. I had a lot of fun making them.
Too cute
Thanks Michelle!!
Lisa, these are too cool!! Love the Mrs. the most, but Frank and the Mummy are definitely on the “to-do” list with her!! Thanks for sharing. You are so creative!!
Thanks Sharon! I am glad you like them and hope you share a picute when you make them 🙂
These brought a huge smile to my face:) CUTE beyond words! Love them! Now I know what to do with my #8 cutter besides the obvious:)
Thanks Sue! I know your awesome brain will come up with great things for our little old number 8 cutter. Can’t wait to see what you do with it.
Lisa , these are so unbelievably cute!! I think I’ll pull out my #8 and give them a try!
Please do TriciaZ! I know you will have fun making them! And I would love to see a picture of yours 🙂
All of them are adorable and I wouldn’t have thought of the #8! I should pick up some if ever I see them. Also, the B of Frankie is my fave!
You chould get a few Michelle! I know you will blow our minds with your creations!!
Great use of the “8” cutter. Your designs are wonderful. Pinning.
Thanks Beth! And thank you so much for pinning!!
These are among the absolute cutest Halloween cookies I’ve ever seen! My favorite is the Bride of Frankenstein. Her expression is perfect! What a creative use of the number eight. I can’t wait to see how you made Dracula and the mummy!
Thanks Aida! Once I picked up the number 8 cutter, I thought of about 8 more things to make with it! LOL It really is perfect for several designs.
Wow… I can’t believe what a difference the shaded edges make! I love the adorable lips on the Bride!
Thanks Janine! They are cute without airbrushing but, I have a new motto, “If it doesn’t move, airbrush it!” LOL
Adorable, Lisa! I need to stock up on number 8 cutters– I have no idea they were so universal! I’m looking forward to Part 2. 🙂
Thanks Mike! I can only imagine what you will do with a number eight cutter! Can’t wait to see!
These are so, so, so darn cute! How clever to use the “8”. When I first saw them I thought for sure you had used a snowman cutter. Now I know you’re gonna think I’m really losing it (or just been dieting too long… lol) but another thought that passed my mind when I saw these was how cute it would be to make pudgy, smiling peanuts with this cutter too. Crazy I know, but the that thought made me smile too. Big Hug my dear, sweet friend.
Thanks D.J! I agree totally! The number 8 cutter would be perfect for a peanut!! You are so cleaver.
Eight eight, that’s so great! I love what you did, they are sooooo perfect! and did I mention so much detail in a tiny cookie???
I love the way you think, you have awesome idea’s ❤️ I’m so glad you love to share this with us. When I getting anyone asking me about airbrushing, I always send them to you. Because I learn by watching you , and I want to thank you ❤️
These are all wonderful! I love how the airbrush added so much “character” to the cookies 😉
Love it! Frank is nice, but I’m digging his wife! 😉 She has great hair!
Do you dream about cookies? Your imagination must be working overtime! Love them 🙂