Little Monster Cookies (Part 2) Mummy and Dracula
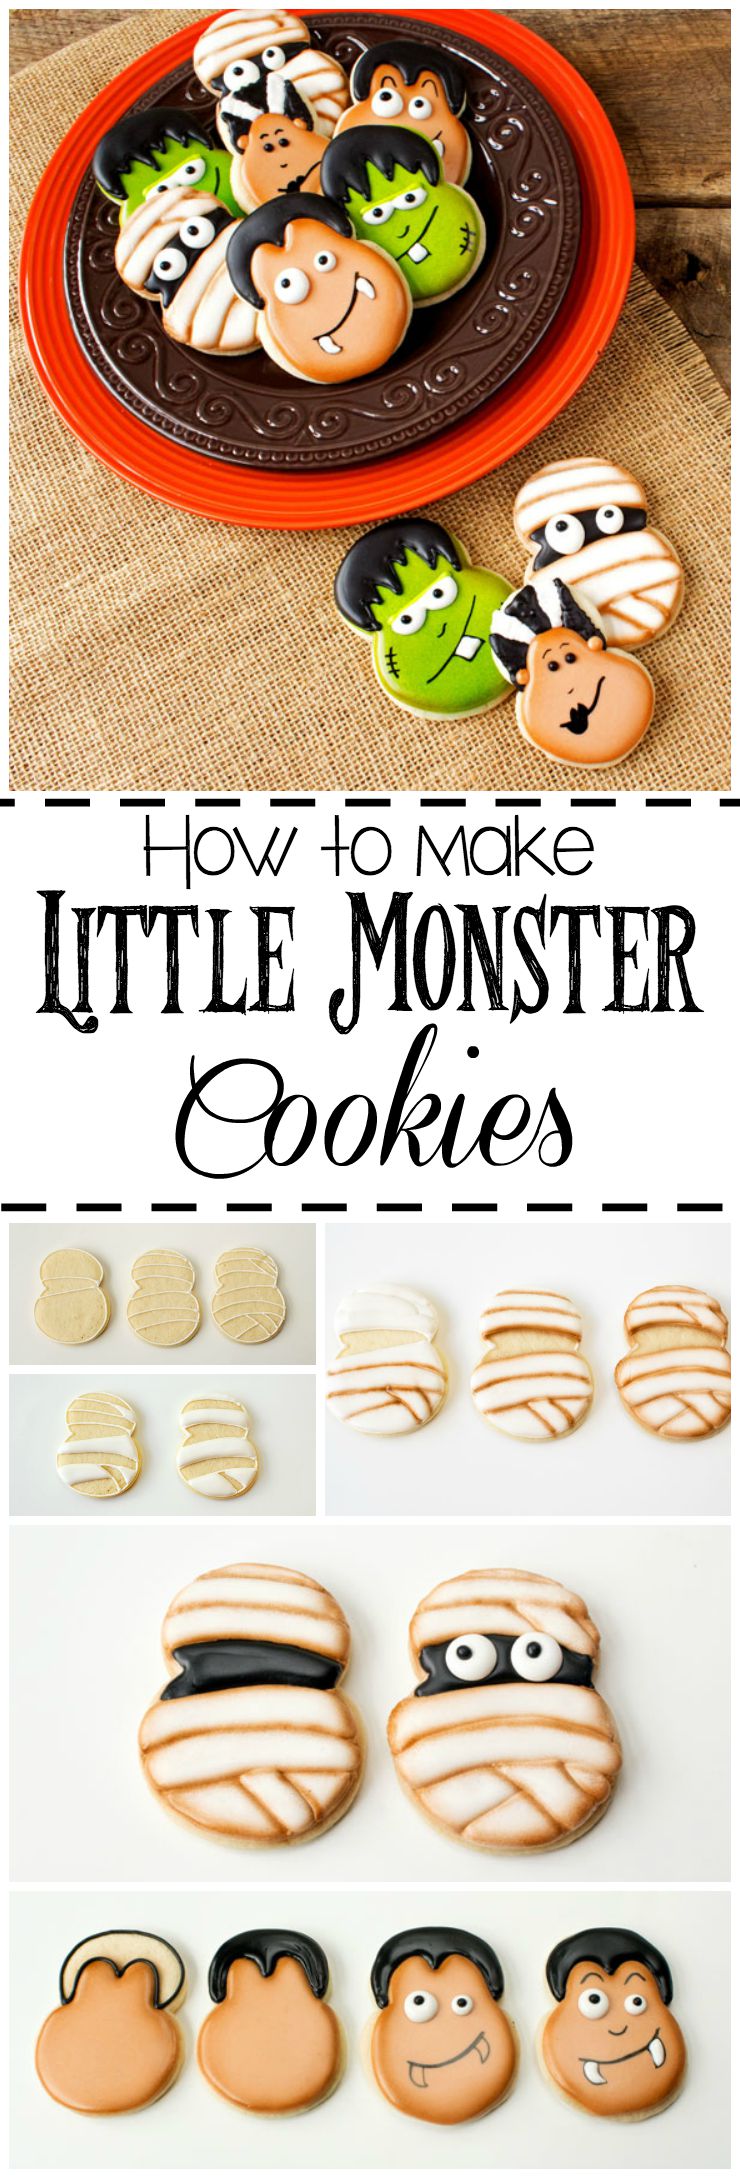
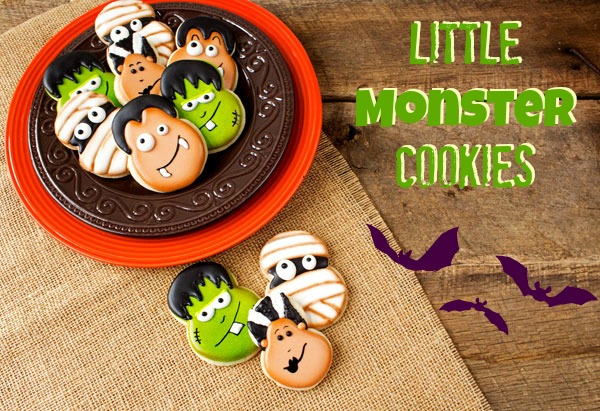
Yesterday I shared how to make little monster cookies by using the eight cookie cutter. I only showed how you make Frankenstein and his bride so today, I wanted to show you how to make Dracula and the Mummy.
I think it’s a little funny when I make cookies thinking I know what my favorite one will be. I really liked the Bride of Frankenstein and had her picked as the cutest one in this set. As I made them, the mummy quickly stole my heart. There is something about his big eyes and no mouth that I couldn’t stop looking at. I think he is a cutie.
Supplies for Mummy Little Monster Cookies:
(may contain affiliate links)
White 15-Second Icing
Black 15-Second Icing
Royal Icing Eye Transfers
Optional Supplies:
Airbrush gun
Brown Airbrush AmeriColor Color or a brown food-safe pen.
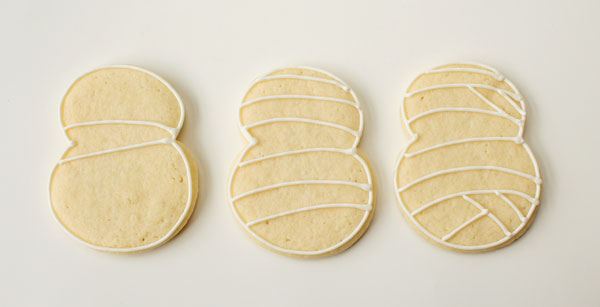
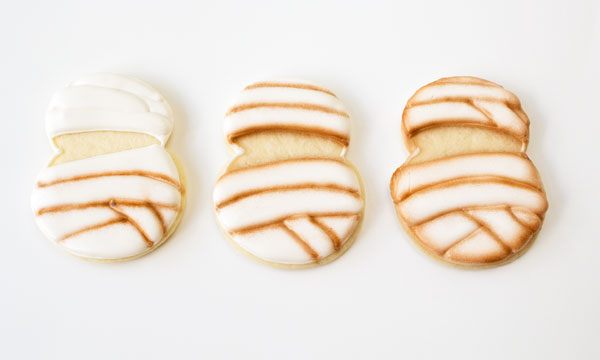
- To make Mr. Mummy, outline the cookie with white icing and a #2 piping tip.
- Then, add the lines to mimic the bandages beginning with the eyes.
- Add another set of lines for the bandages above and below the eyes.
- Add a semi-vertical bandage at the top and the bottom wherever you feel comfortable.
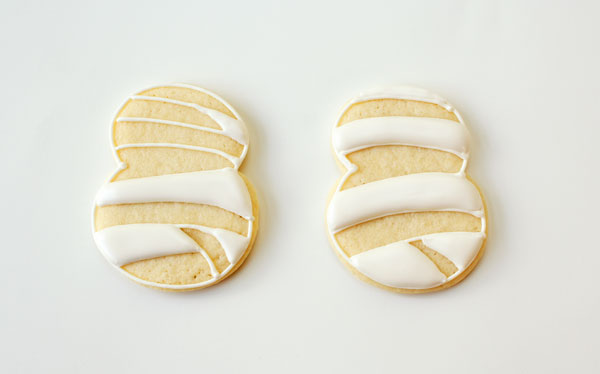
- Once you have your lines made, flood every other section with white and let it dry for a little while. Don’t fill the eye section yet.
- Once the first flooded bandages have dried for a while, flood the rest of them and let them dry completely.
- Begin airbrushing in the creases of the bandages. Hold the airbrush gun close to the cookie and apply light pressure to the trigger.
- Add airbrush color to each line.
- Airbrush the outer edge with the brown.
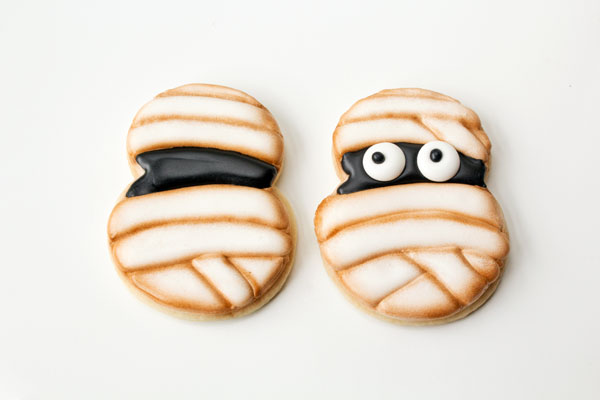
- Next, pipe the eye area with the black icing and a #2 tip.
- While the black icing is still wet, add the royal icing eyes.
- Let it dry overnight.
Supplies for Dracula Little Monster Cookies:
Green 15-Second Icing
Black 15-Second Icing
Royal Icing Eye Transfers
Black AmeriColor Gel Color
Thin Paintbrush
Optional Supplies:
Airbrush gun
Brown Airbrush AmeriColor Color
My photo looks a little weird because the flooded face looks shaded and it isn’t. I don’t know what I did but, will you pretend it is all the same color? Thanks! I knew you would understand.
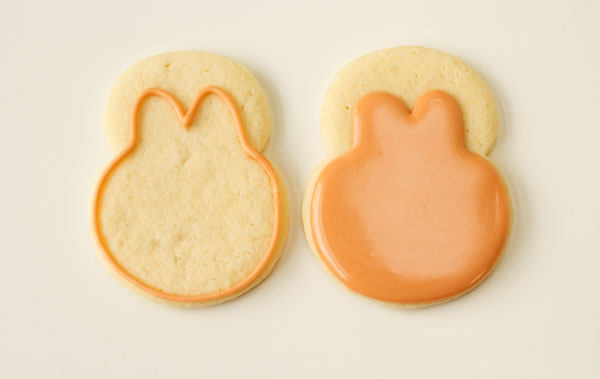
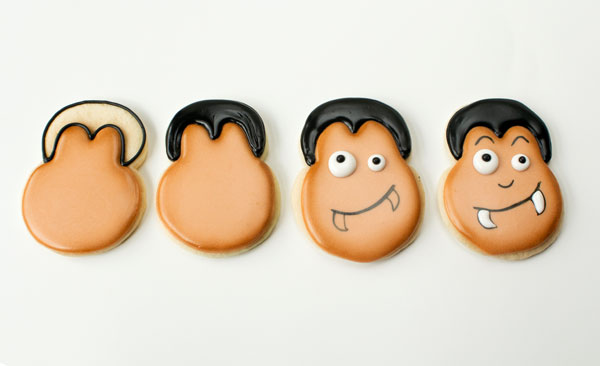
- With the flesh-colored icing and #2 piping tip, outline Dracula’s head. To make his signature hairline, pipe a lowercase “m” and then continue around the rest of the face.
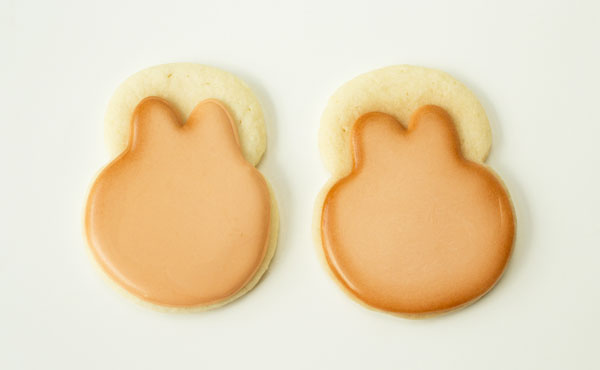
- Flood it and let it dry for about a while before you airbrush it. Some people airbrush wet icing but, I prefer to wait until it dries so the icing doesn’t move while being sprayed.
Airbrush the edge of the face with warm brown AmeriColor by holding the airbrush gun about half an inch away from the cookie and lightly pulling the trigger. Let this dry overnight.
- Outline and flood the hair with the black icing and a #2 piping tip.
- Add the royal icing eye transfers or if you don’t have RI eyes, pipe 2 dots of white and add 2 black beads.
- Paint the mouth, fangs, nose, and eyebrows with the black food gel colors and the script liner paint brush.
- Pipe the fangs with the white icing.
- Let it dry completely.
I told you that the mummy is my favorite and now I want to know which one is your favorite little monster. If you want cookies and Halloween cupcakes for your monster bash, you should make these Frankenstein and His Bride Cupcakes, Dracula Cupcakes, or pumpkin patch and jack-o-lantern cupcakes.
I hope you didn’t miss Part 1 of the Little Monster Cookies because it has a step-by-step tutorial for Frankenstine and his Bride. Don’t worry if you missed it because you can see it here.
Bear hugs,







I think they are all cute! But I’m with you – there’s something about the mummy that makes me smile each time I look at it.
I know Betty Jo! What is it? LOL I think we should dress up like mummies! Are you with me? LOL
These are amazing…I love that they are all the same shape and the perfect size! I can’t believe how perfect your airbrushing is on the mummy…I would have it all over the cookie! And your faces, so cute! I can’t wait to give these at try!
Speaking of airbrushes…I got mine fixed! I just kept playing with it, and finally got it working. I ended up unscrewing the back end of the nozzle and tightening the part inside…it worked…go figure! Thanks so much for the offer to help me out…I will probably need it again in the future!
You can do it Terri!! Airbrushing is easy!
I am so happy your gun is fixed! I was worried that you had purchased two and they both broke. Glad it is better and you can spray everything that doesn’t move! LOL
Love these Lisa,
I don’t have an airbrush gun yet so I was wondering if I could do the shading with a brown edible food marker. Cannot wait to make these.
It will work Asmita. Just remember, your brush only needs to be damp. To much water will mess up your cookie.
I really LOVE the mummy. So cute! : )
Thanks Heather!!
I think I have small 8, imagine a big jar of these in mini form! I’m kind of on a mini kick these days.
Thanks for the tutorial!
That would be super cute NikkiK! A jar full of mini monsters would be the perfect Halloween treat!
I love these posts, my son will never stop thanking you for them if I make him these cookis for Halloween! Thank you for sharing your creativity!!!!
Please make them for your son!! LOL I want him to like me!
I like when kids are happy and have been known to give them cookies to make them smile!
Thank you!!!
Adorable! The airbrushing MAKES these cookies, for sure!
Lisa – All these little gruesome guys are so sweet! It’s hard to say which is my favorite, but I love Ms. Frank’s lips…and the hair, can’t forget those fabulous shocking streaks! (;
you are my airbrushing idol. One day you will find me on your door step (yes with the bears and all) holding my airbrush gun and pleading with you….teach me!!!!!
(no I’m not a stalker….I just really need your help….and I like bears)
Lisa, you really do magic with that airbrush. I love how the whole look changes just with adding a little bit of airbrushing.
I don’t know why it took me so long to get one. I love using it.
How did I miss these? And seriously, you are the queen of airbrushing. Queen Lisa. I bow in your presence.
Can’t believe that I just NOW found these adorable cookies! And your step-by-step tutorial gives me confidence that I, too, will be able to produce cookies that look like I know what I’m doing! 🙂
YOU are my hero! Thank you for sharing ALL of your talents.
I’m off to search the internet for a “number 8” cookie cutter…………